

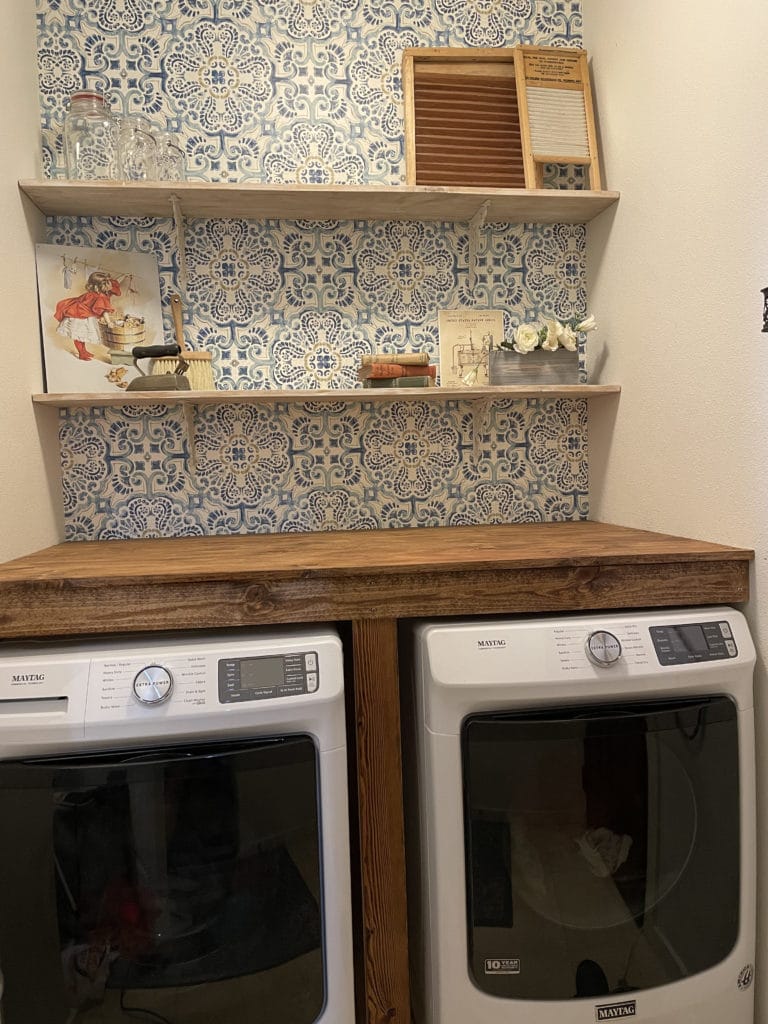
Remember when I did a makeover on my laundry nook? You can find all the details HERE. Well I told you at that time that I planned to build a countertop over the washer and dryer to make a nice folding surface and some place to hold the detergent within reach.
An added bonus is that it keeps things from falling between and behind the machines which was a constant problem.
For a few reasons I never got around to building the counter and then a couple weeks ago my dryer died and my washer was making sympathetic noises so I had to replace them both. Once I got the pretty new machines all comfy in my little laundry nook, I realized I needed to complete this project once and for all.
Here is how I built it.
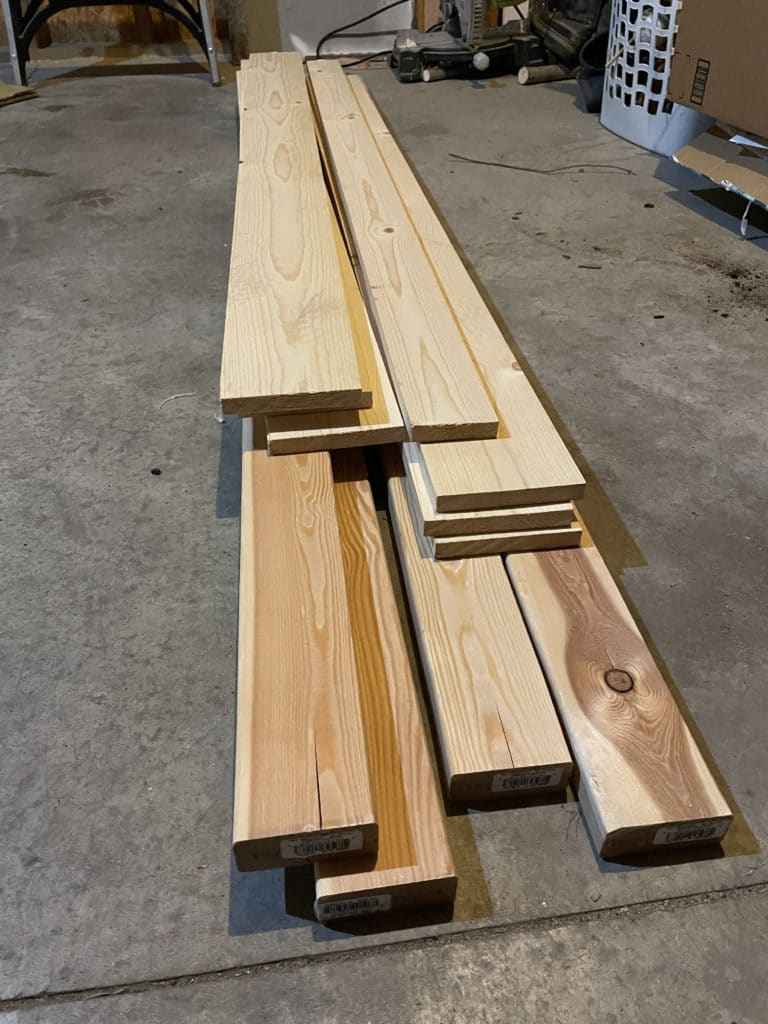
I got 4 – 2x4x8, 1 – 1x4x8 and 6 – 1x6x6 from Home Depot. I will supply all the measurements I used at the bottom of this post.
A couple important things to think about when planning to build your countertop.
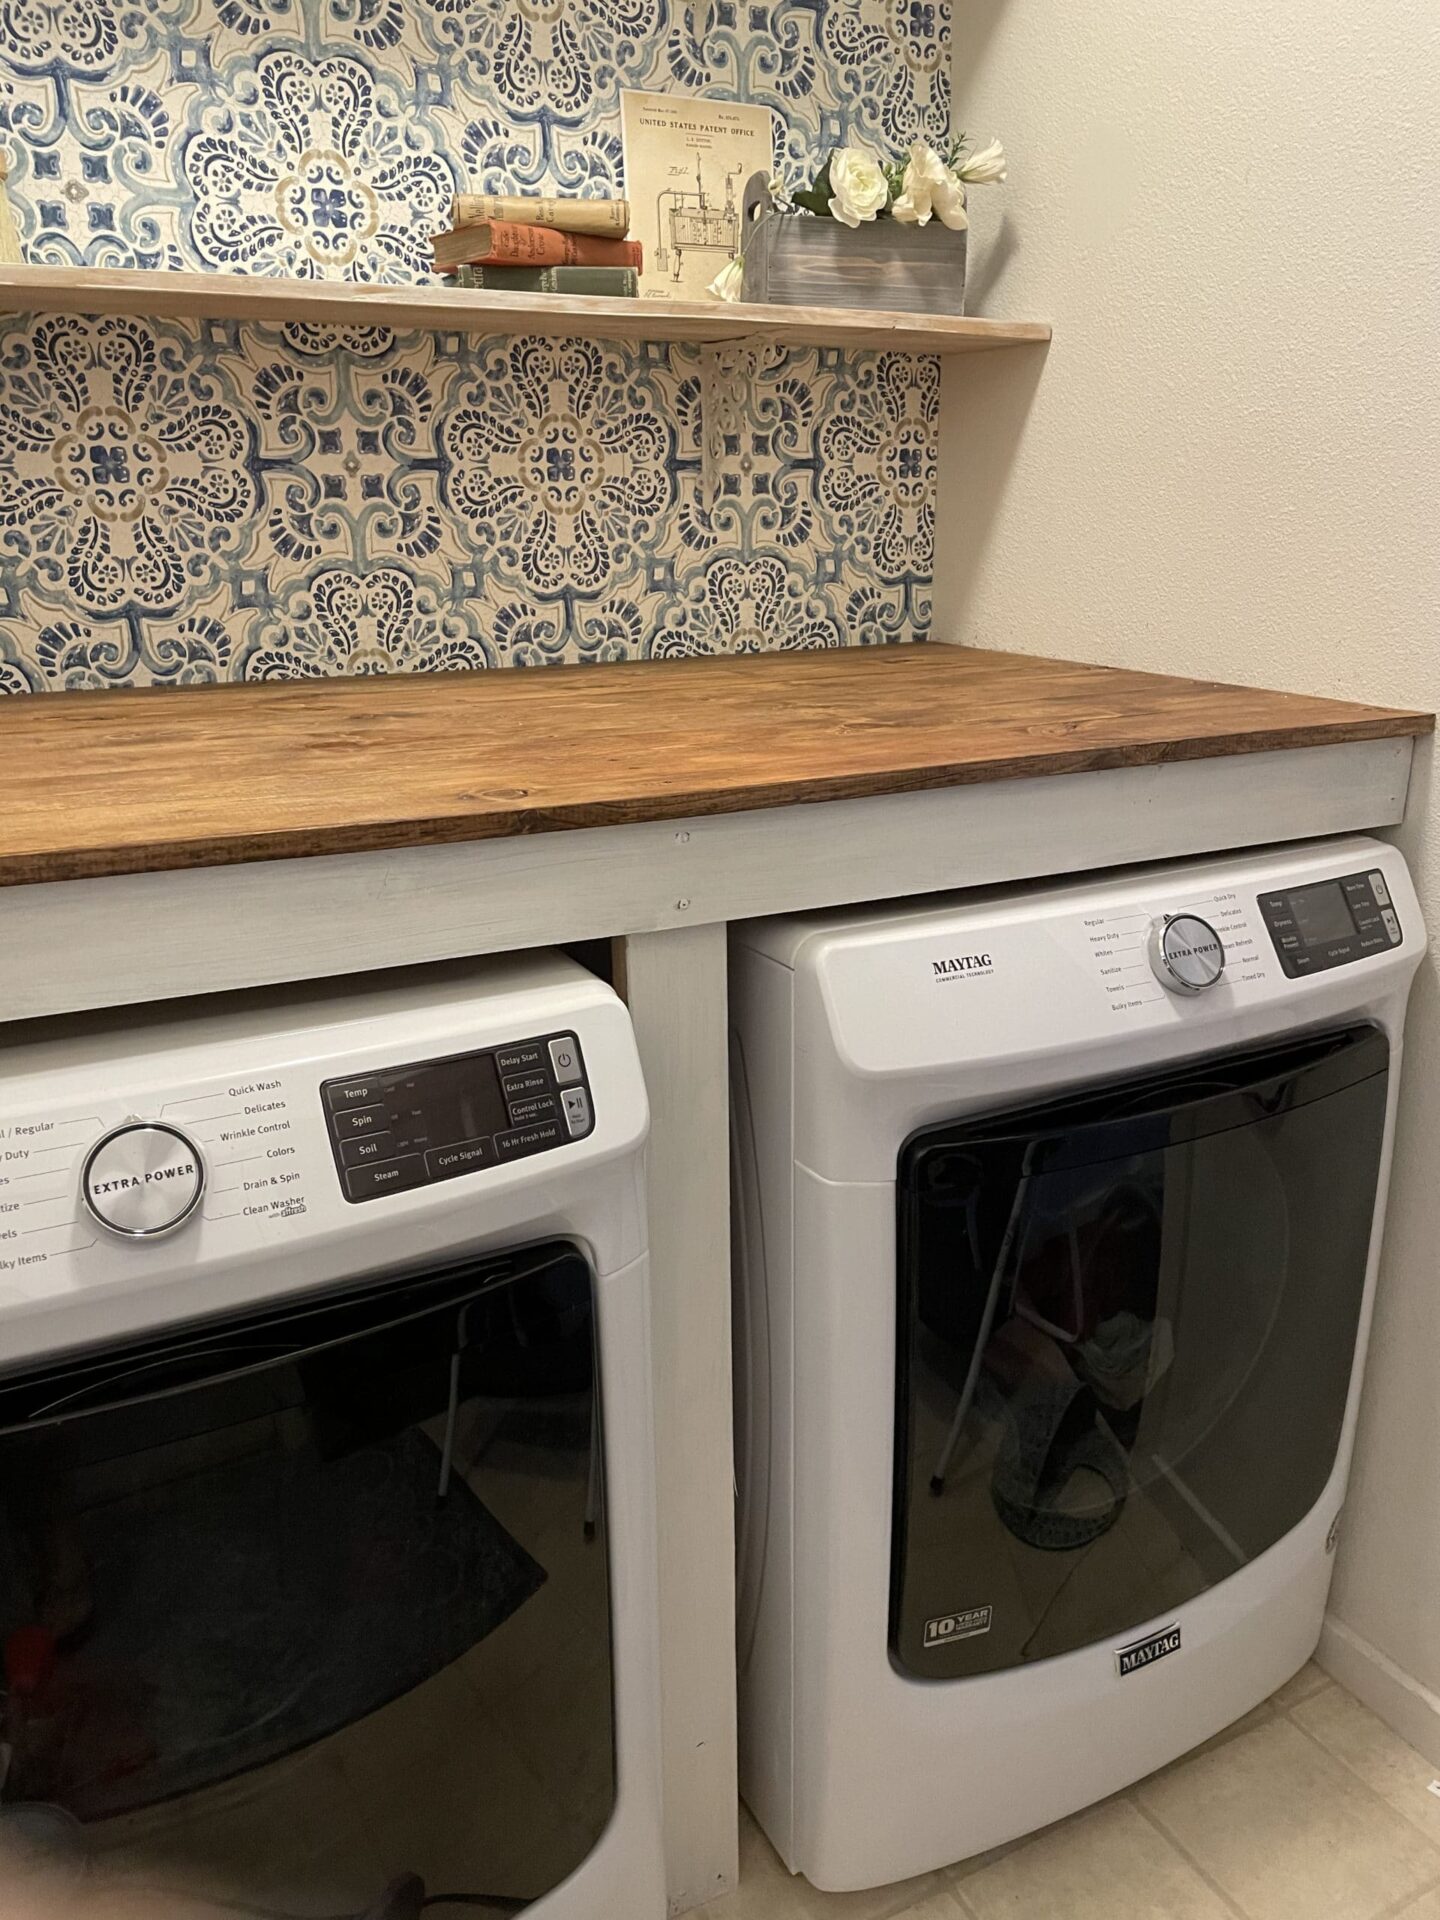
- Make sure to leave a little bit of space between the top of the washer and dryer and the bottom of your supports for your countertop. This will allow you to slide the machines in or out as needed.
- Check to be sure that there are no other things that will determine the height of your countertop. In my case the water line hookups for my washer was at a height that made 43″ from the floor the best height for the top of my support boards. This would clear the water hookup and the space needed on top of the machines.
- Don’t glue your countertop down. By using screws, the countertop can be removed easily if it’s ever required to access the outlets or water lines for the machines.
- Don’t make your countertop deeper than necessary or it will make accessing the machines more difficult and you won’t be able to reach things at the back of the countertop anyways.
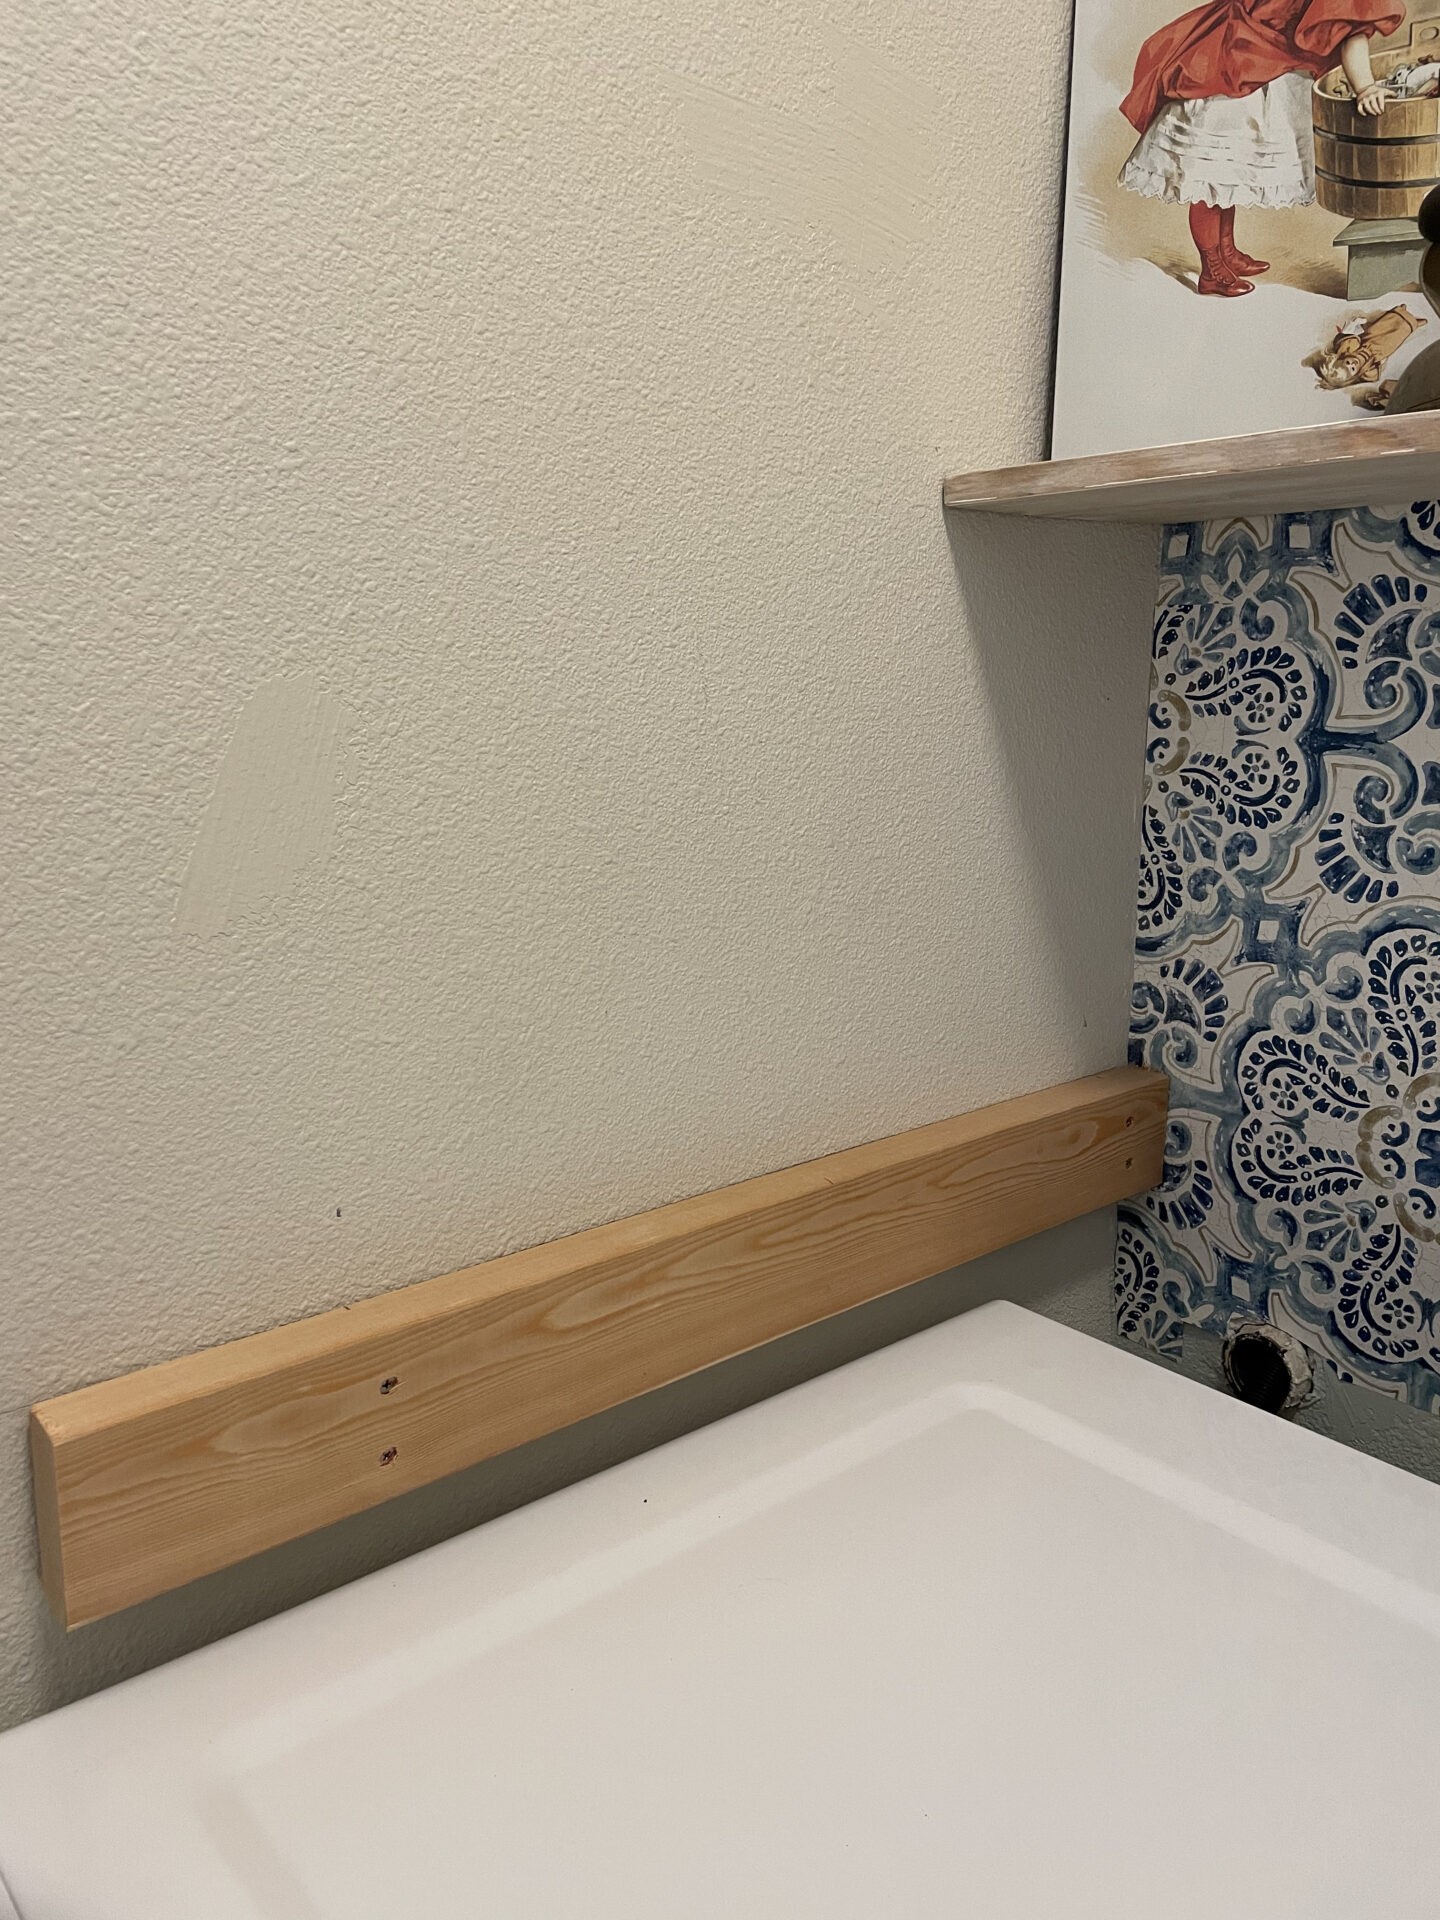
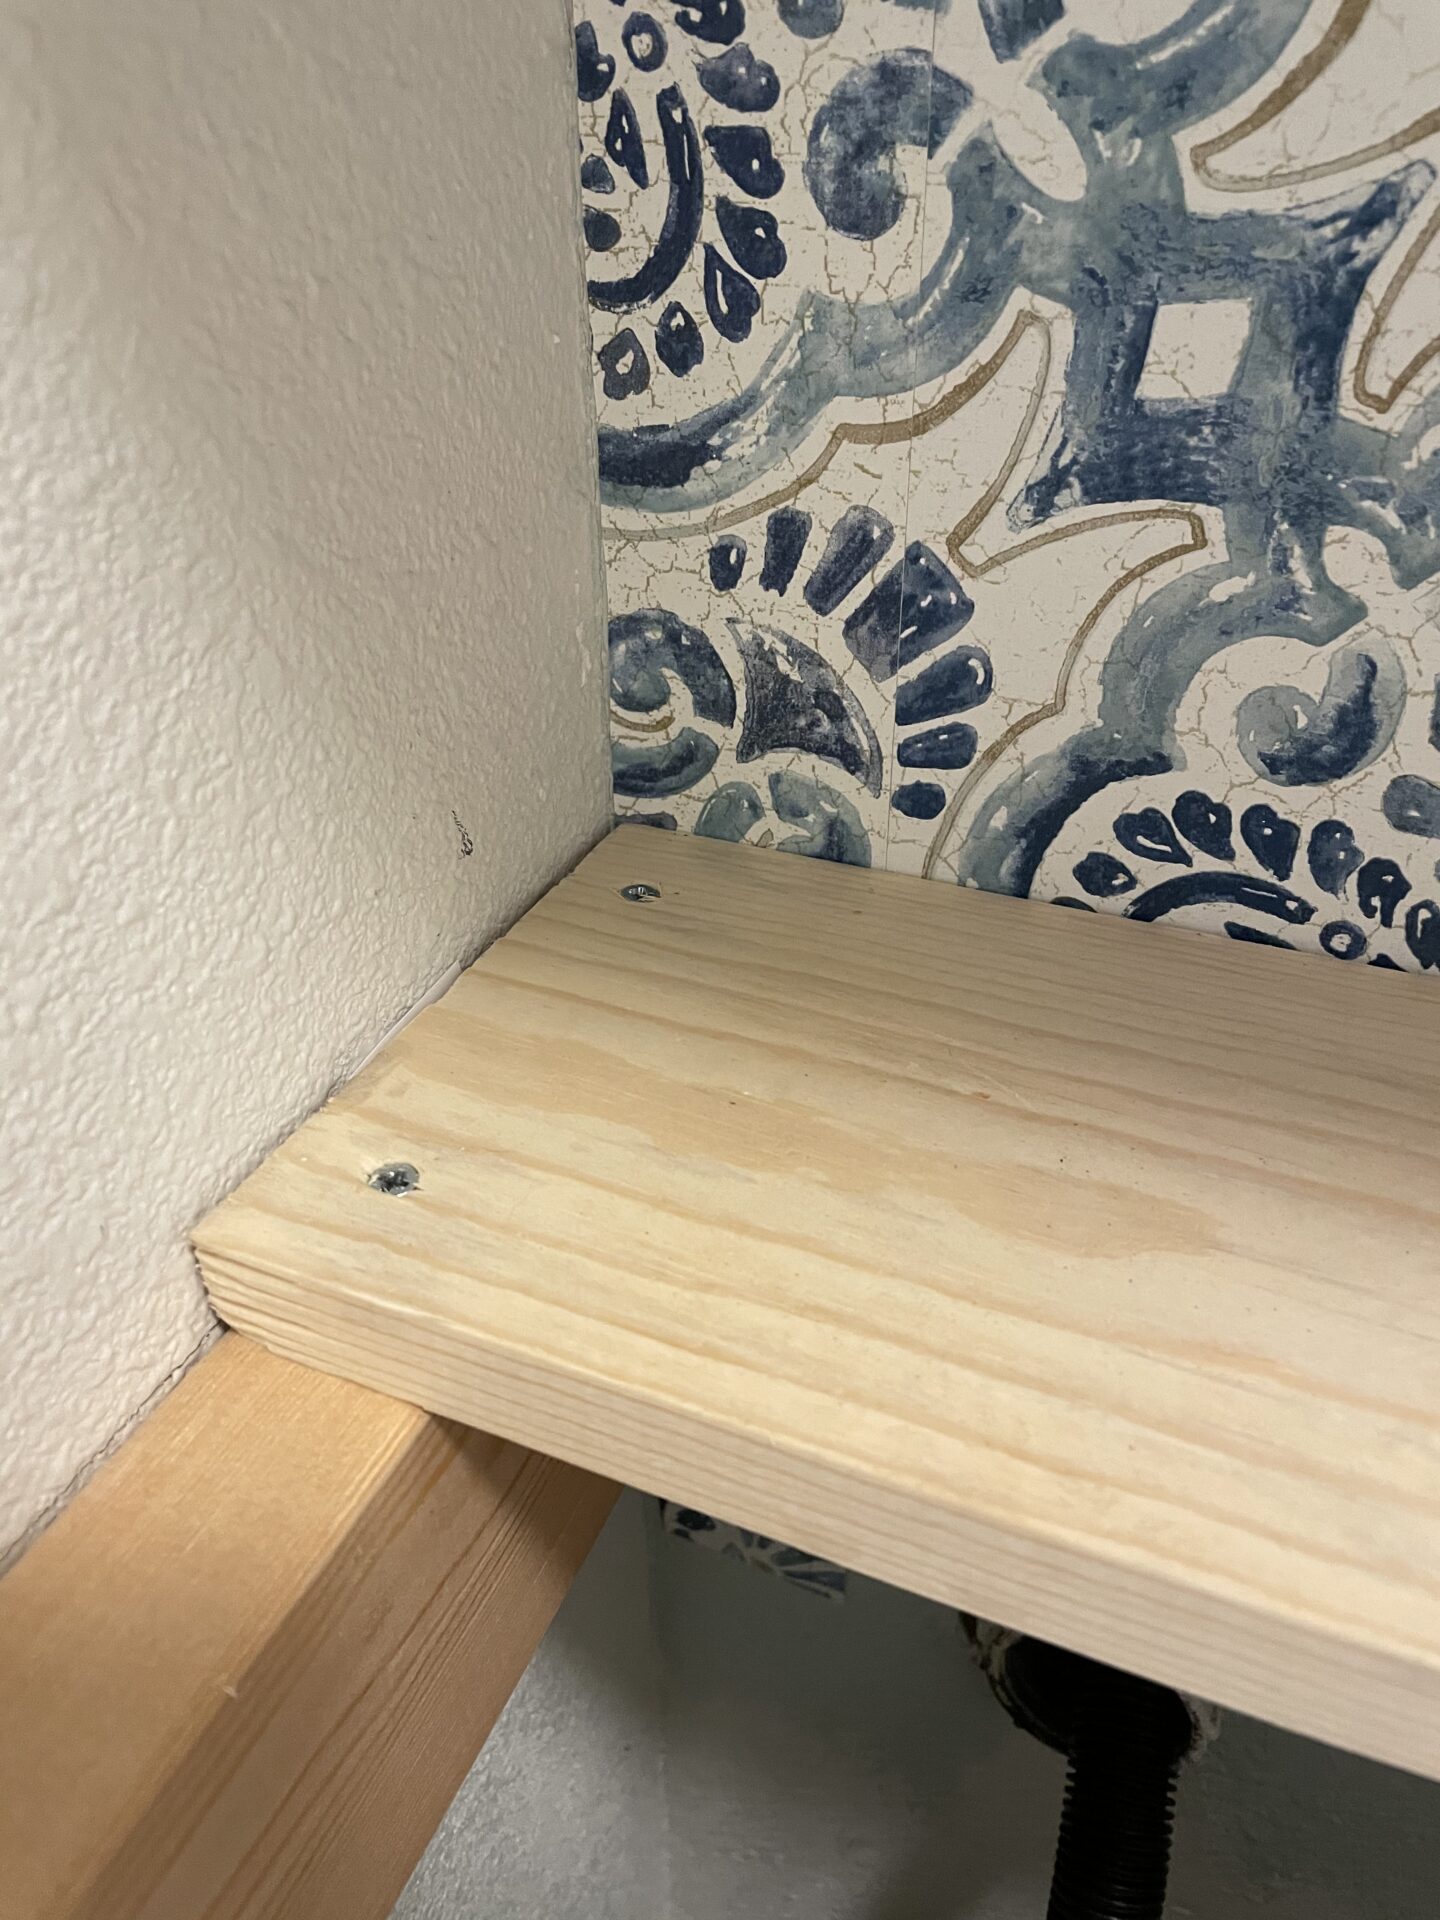
I cut 2 boards for the side supports and secured them into studs where available.
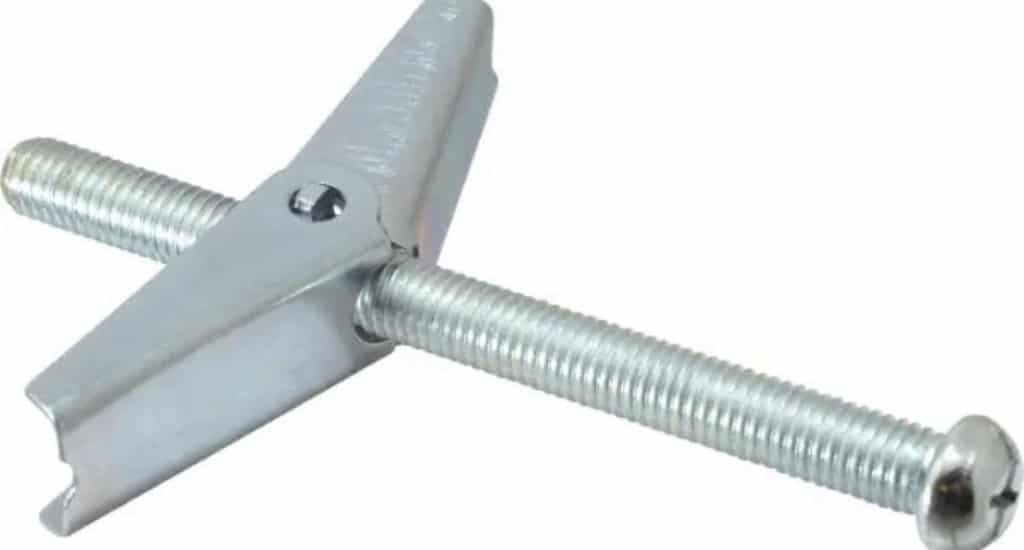
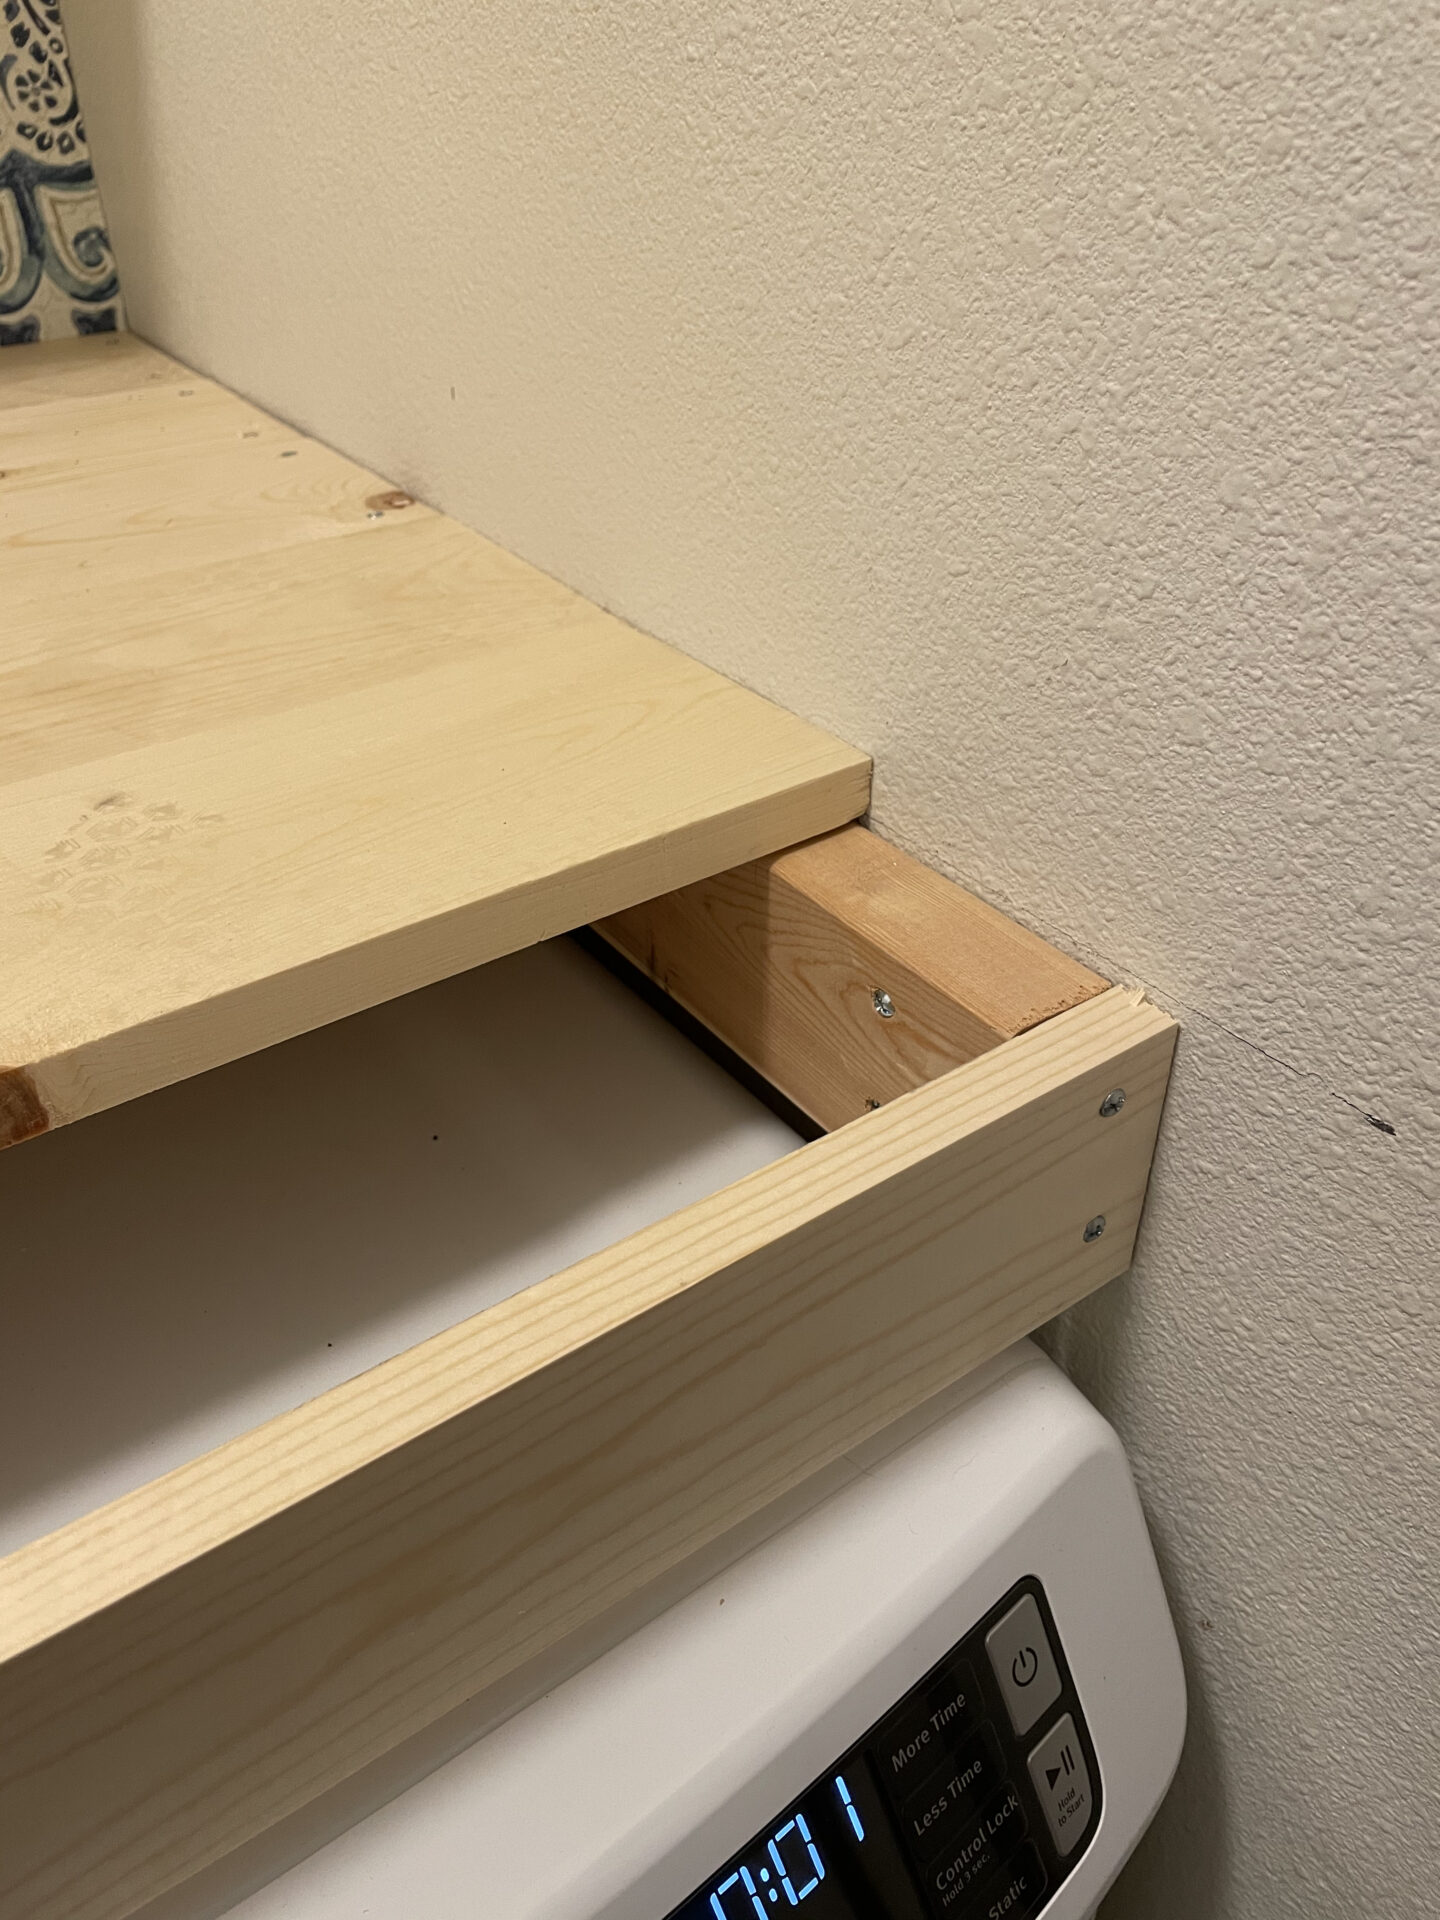
Where there were no studs available I used drywall anchors to make sure the supports were very solid. I chose this butterfly style to make sure they wouldn’t come loose. These ones are rated for 70 lbs and have very long screws included which allowed the boards to secure very well.
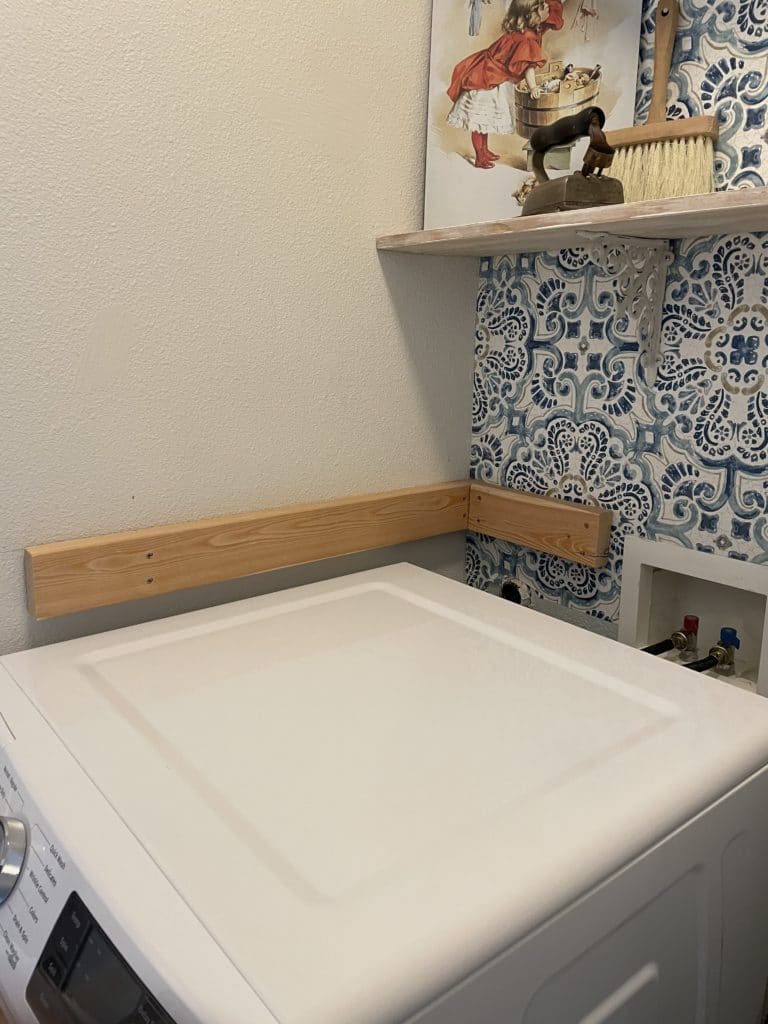
I fit the supports on the back wall on either side of the water line hookup and made sure everything was perfectly level.

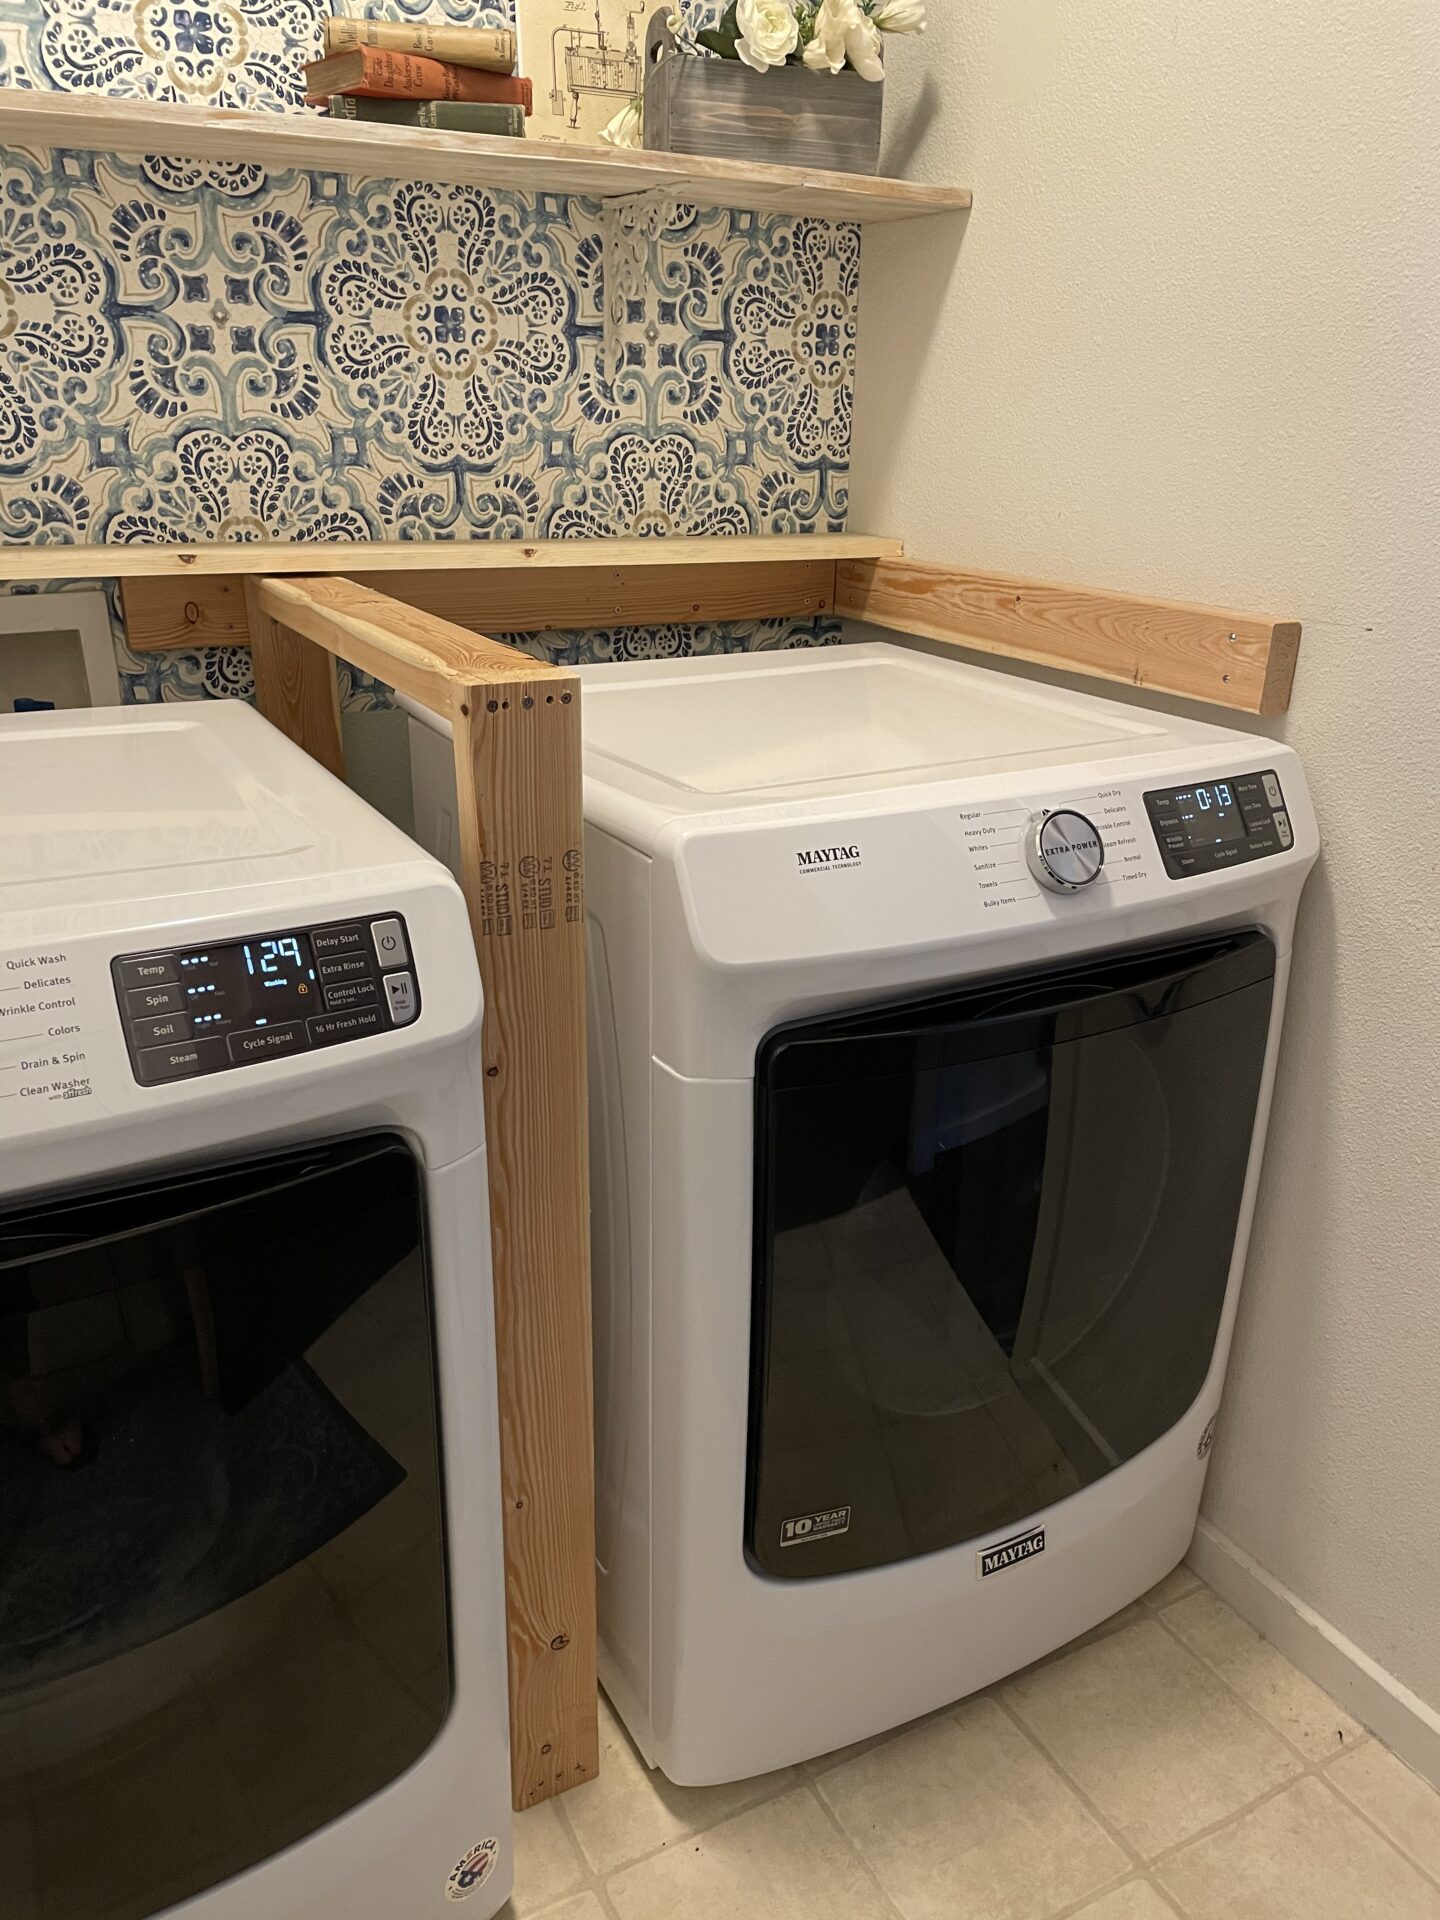
Next I built the middle support by making a rectangle. I had to notch the back vertical piece to fit over my baseboard. I secured the middle support in the exact center by driving 2 screws into the back support board.
I cut my 1×6 boards and secured them on either side and in the middle with 2″ screws.
I attached the 1×6 to the front of the supports to cover the frame.
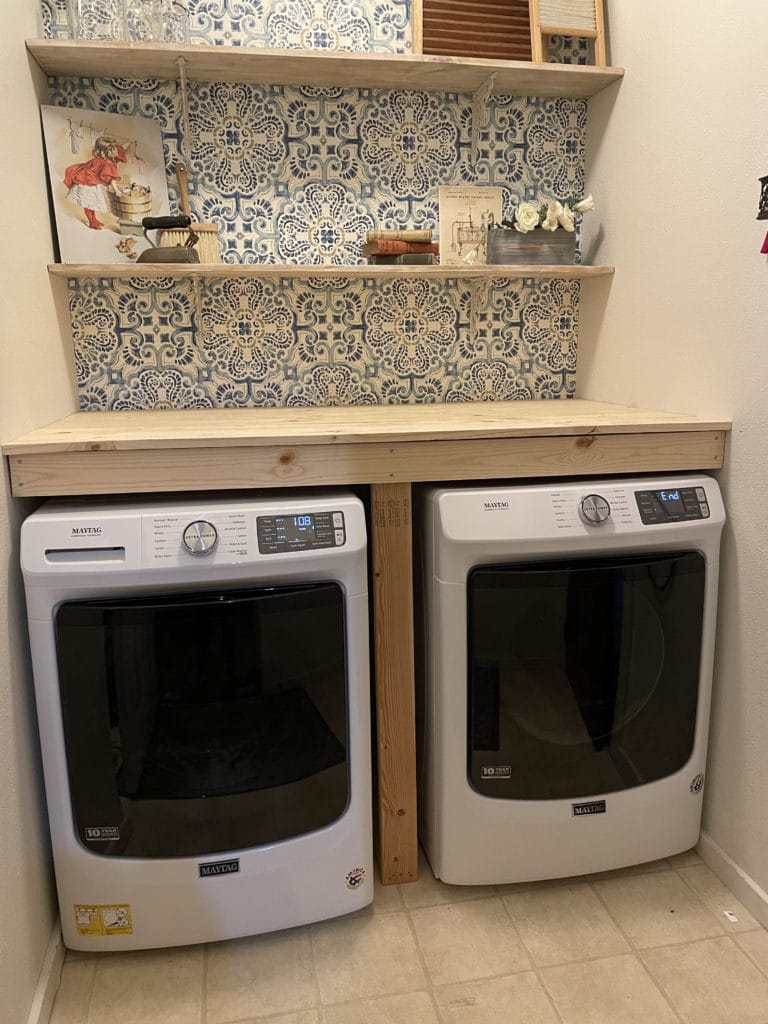
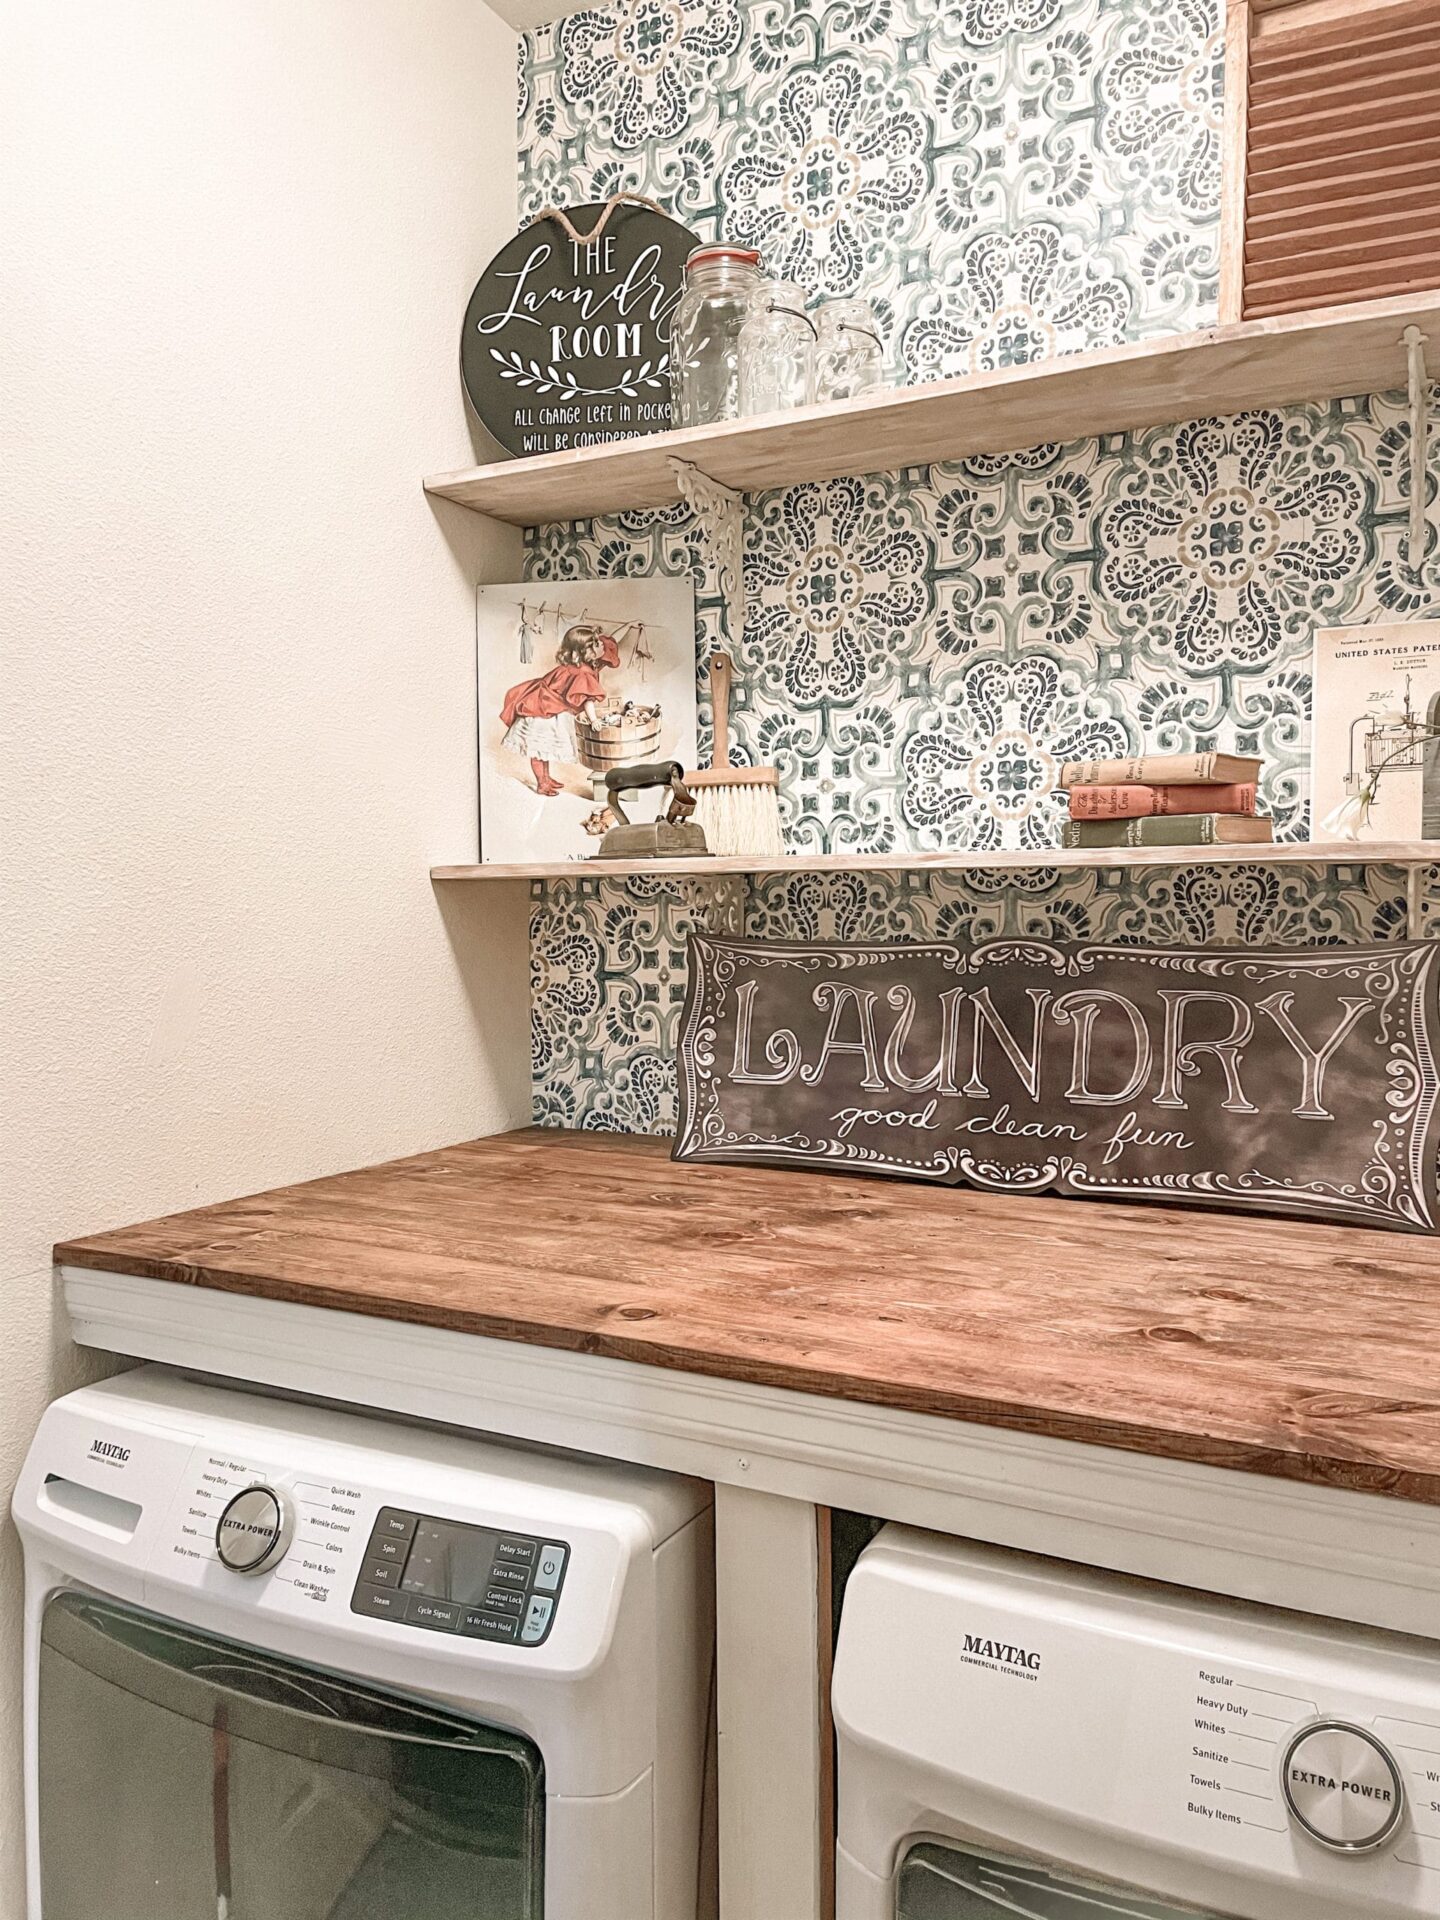
Here is the finished product. I sanded everything really well and then cleaned off all the dust. Now time to make it pretty!
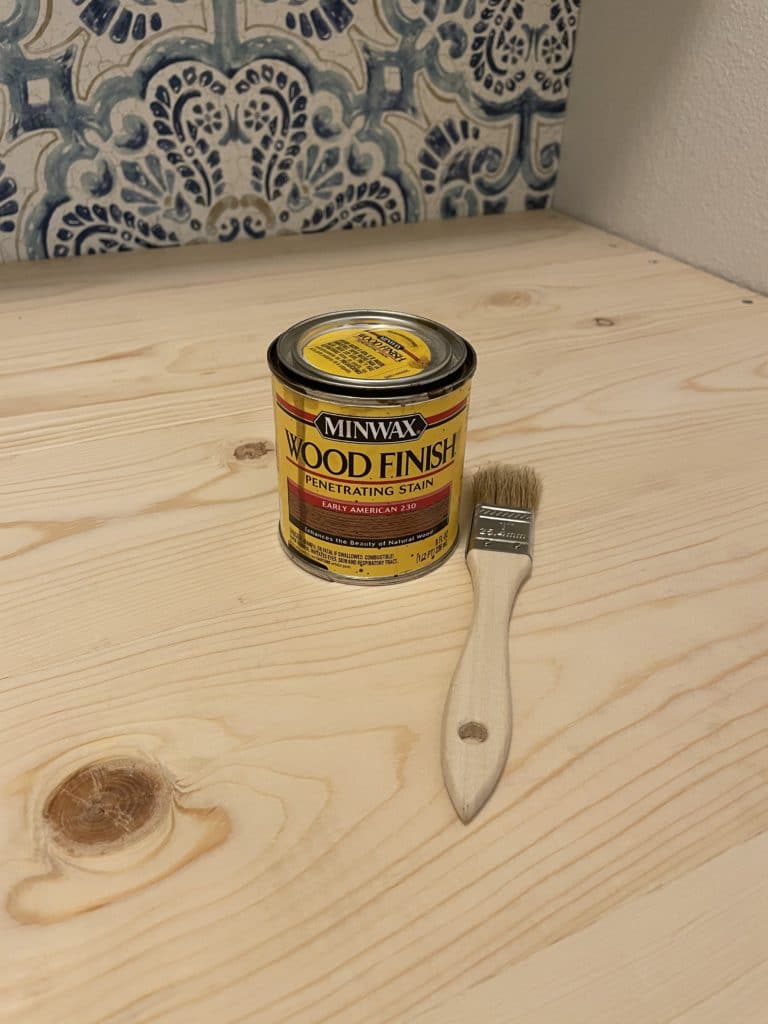
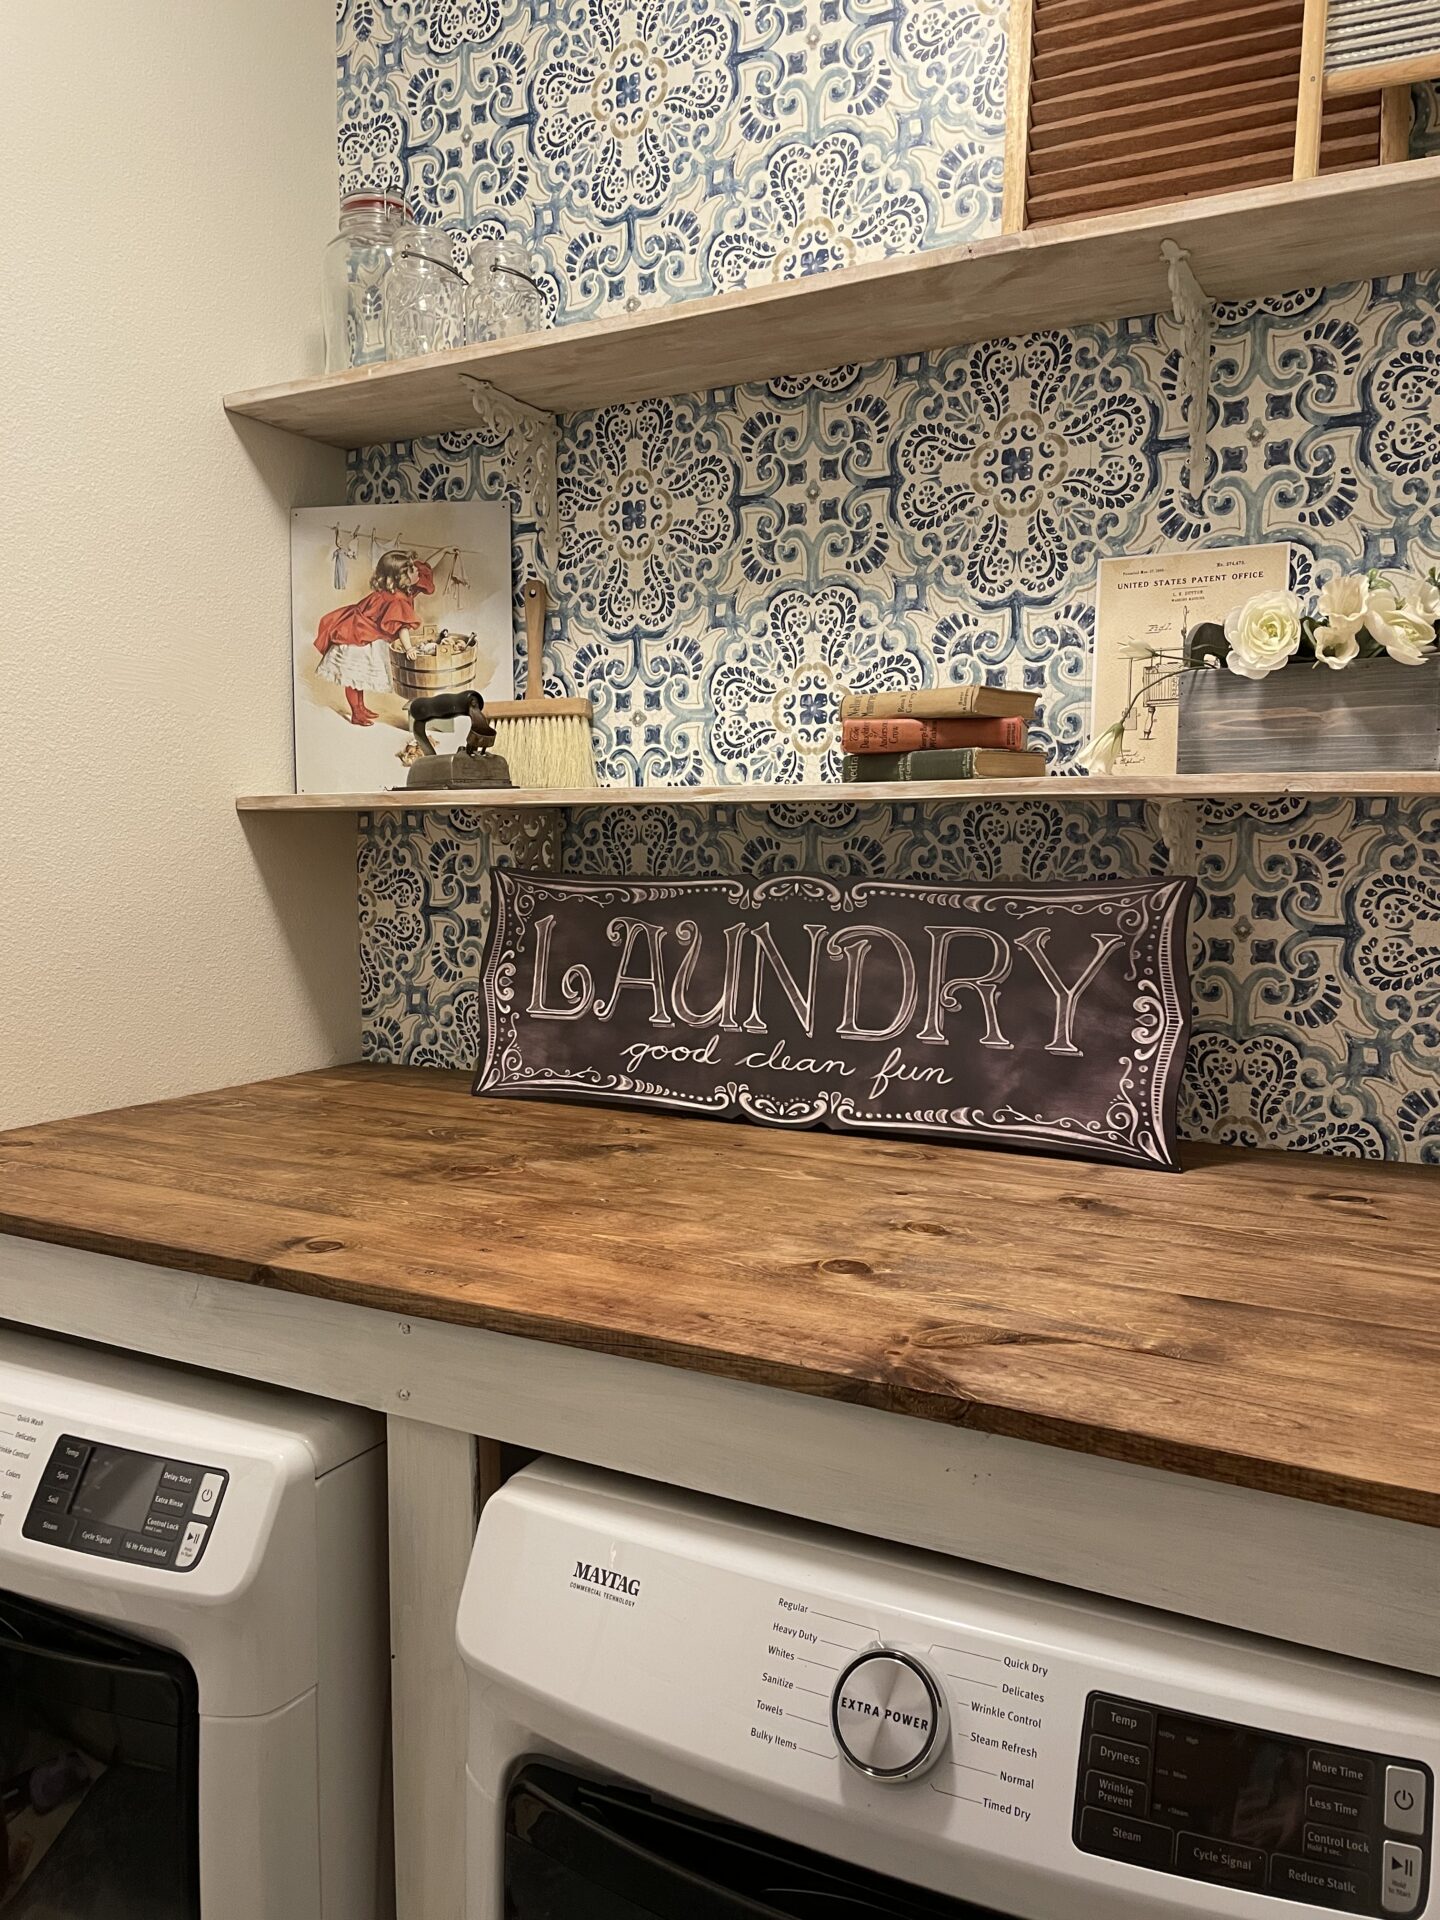
My vision was for dark stain on the countertop to make a nice contrast with the light wallpaper and the light colored open shelves. I used my favorite color of stain – Early American – and applied it thinly with a cheap chippy brush I had laying around.
As is often the case my DIY took a bit of a turn at this point. There is really no way to know what wood grain patterns will come to life when you apply stain and I wasn’t thrilled with how speckled the apron piece turned out and how striped the support leg went so it was time for plan B.
I grabbed my favorite color of white homemade chalk paint (Benjamin Moore White Dove) and painted the apron and support.
Several coats of satin Poly over the stained wood and the painted wood (because I used chalk paint) and it was done!
Or was it?
Overall I was very happy with it but you know me and the details….it was asking for a few pretty touches and I just had to comply.
A quick trip to Home Depot and I was all set.
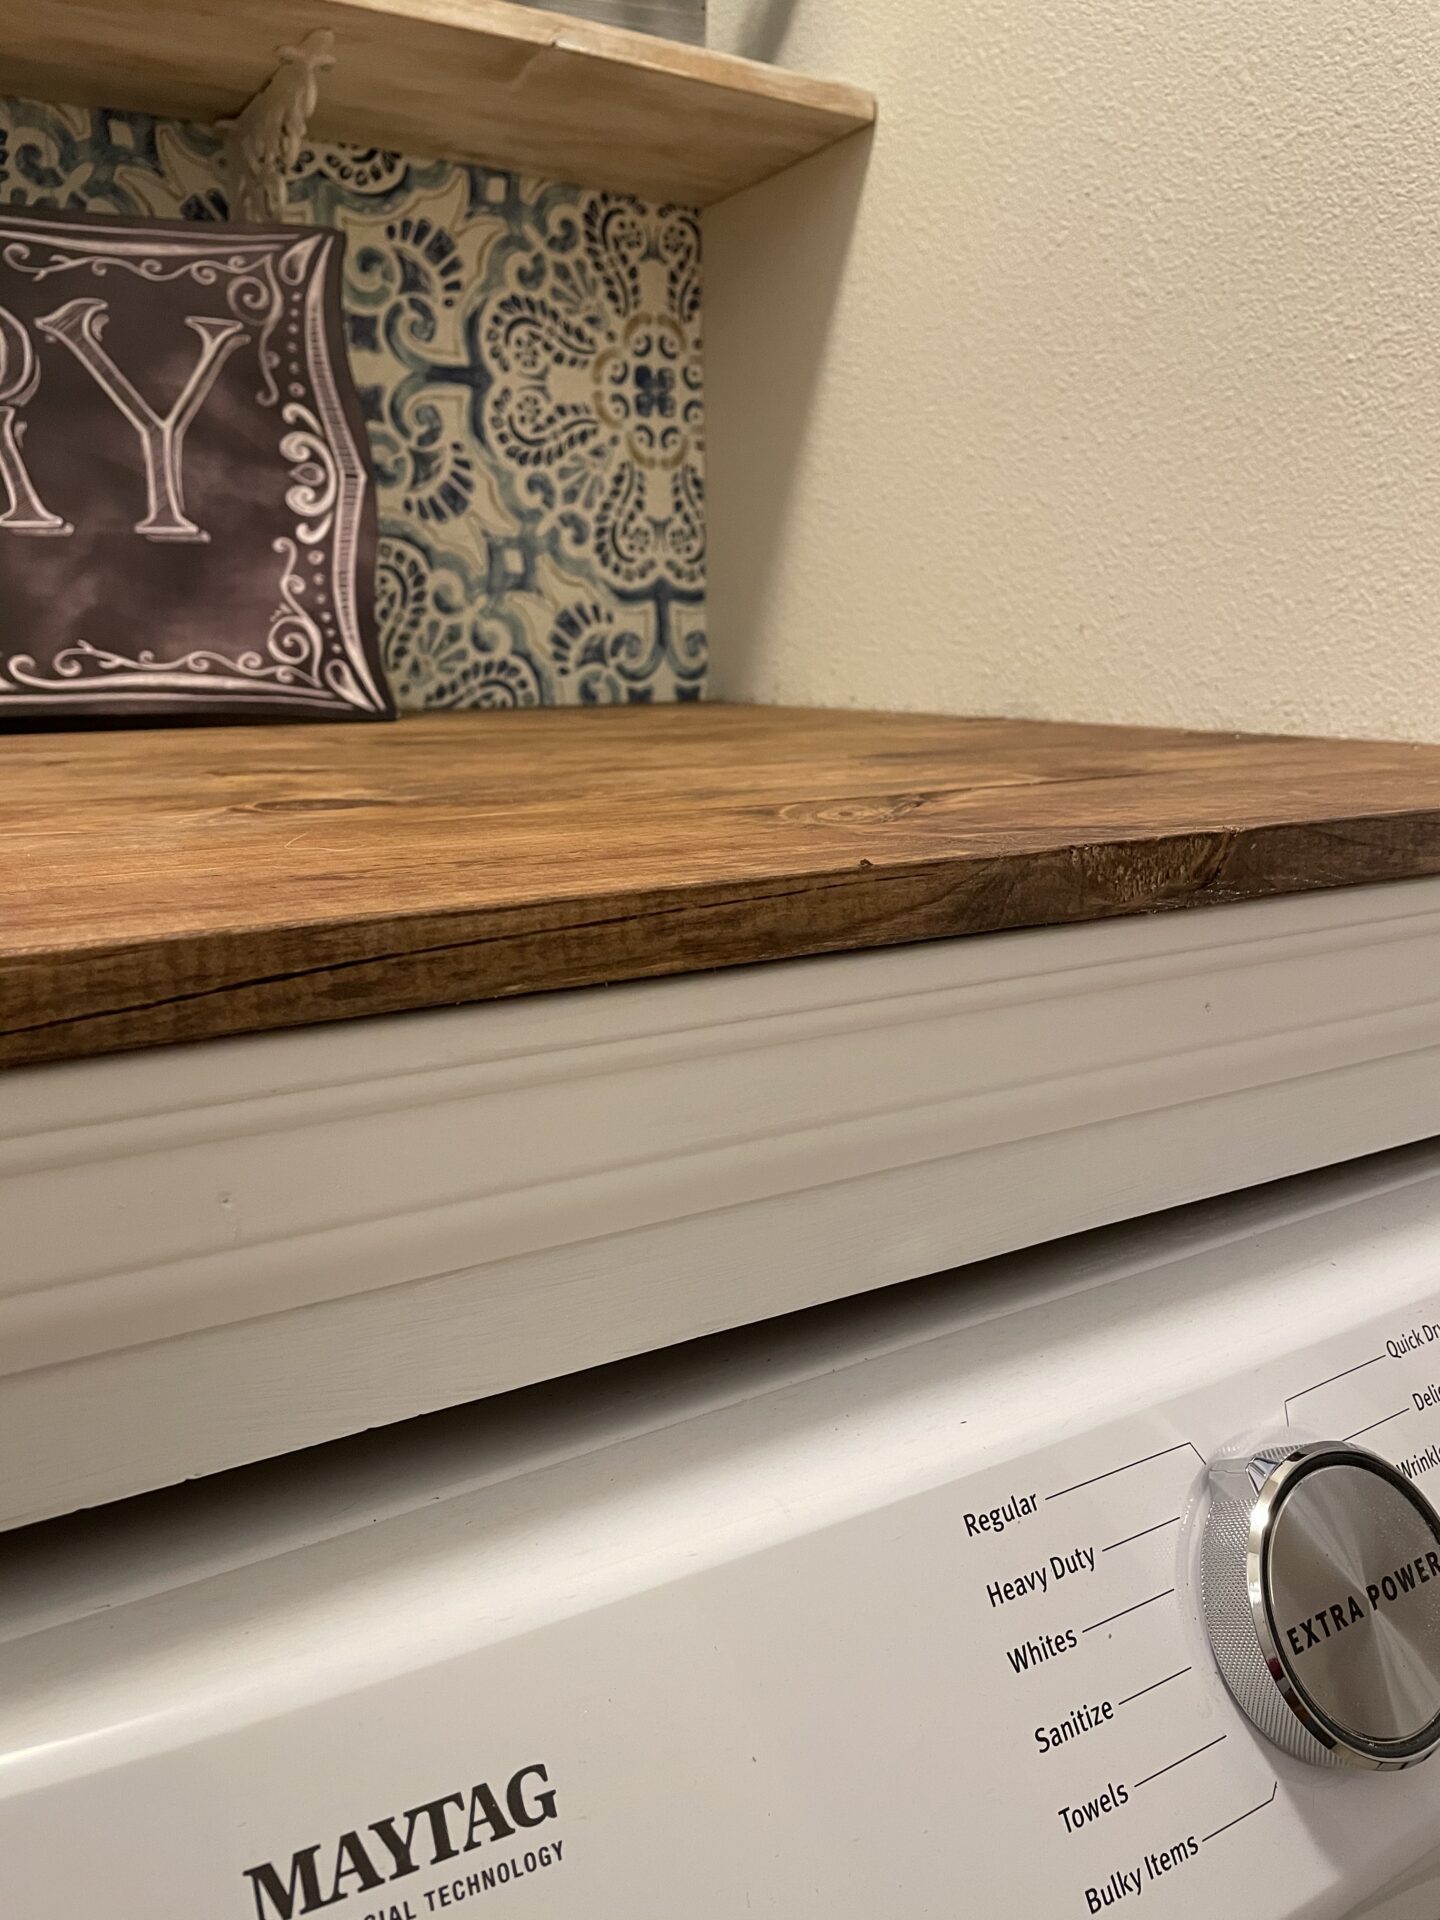
I bought a piece of trim, cut it to size and nailed it in place with some finish nails. Another coat of paint over the trim and it was much better!

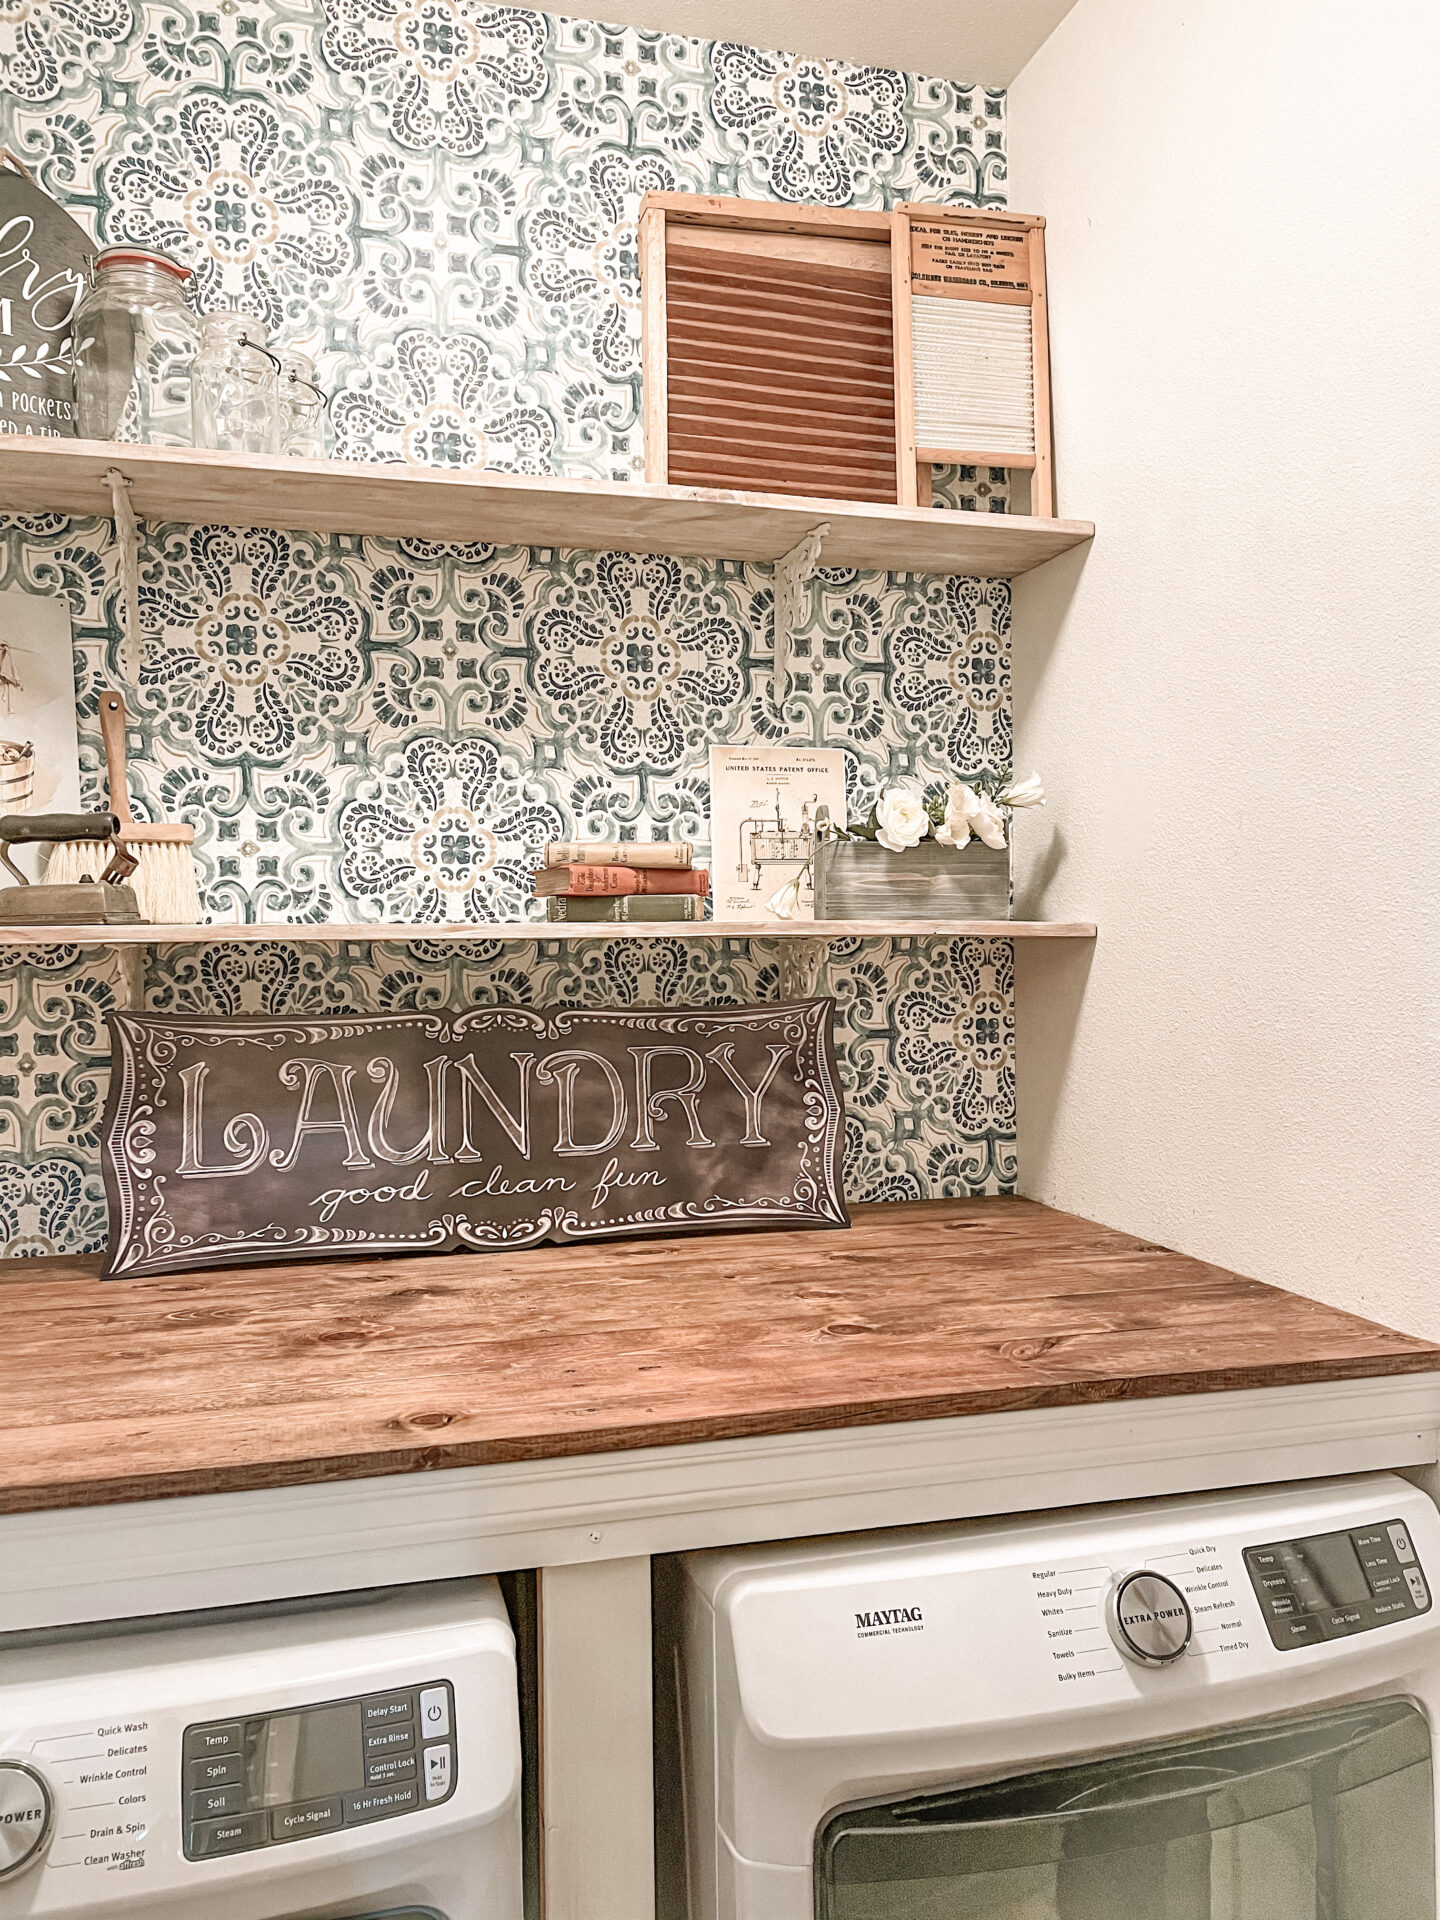
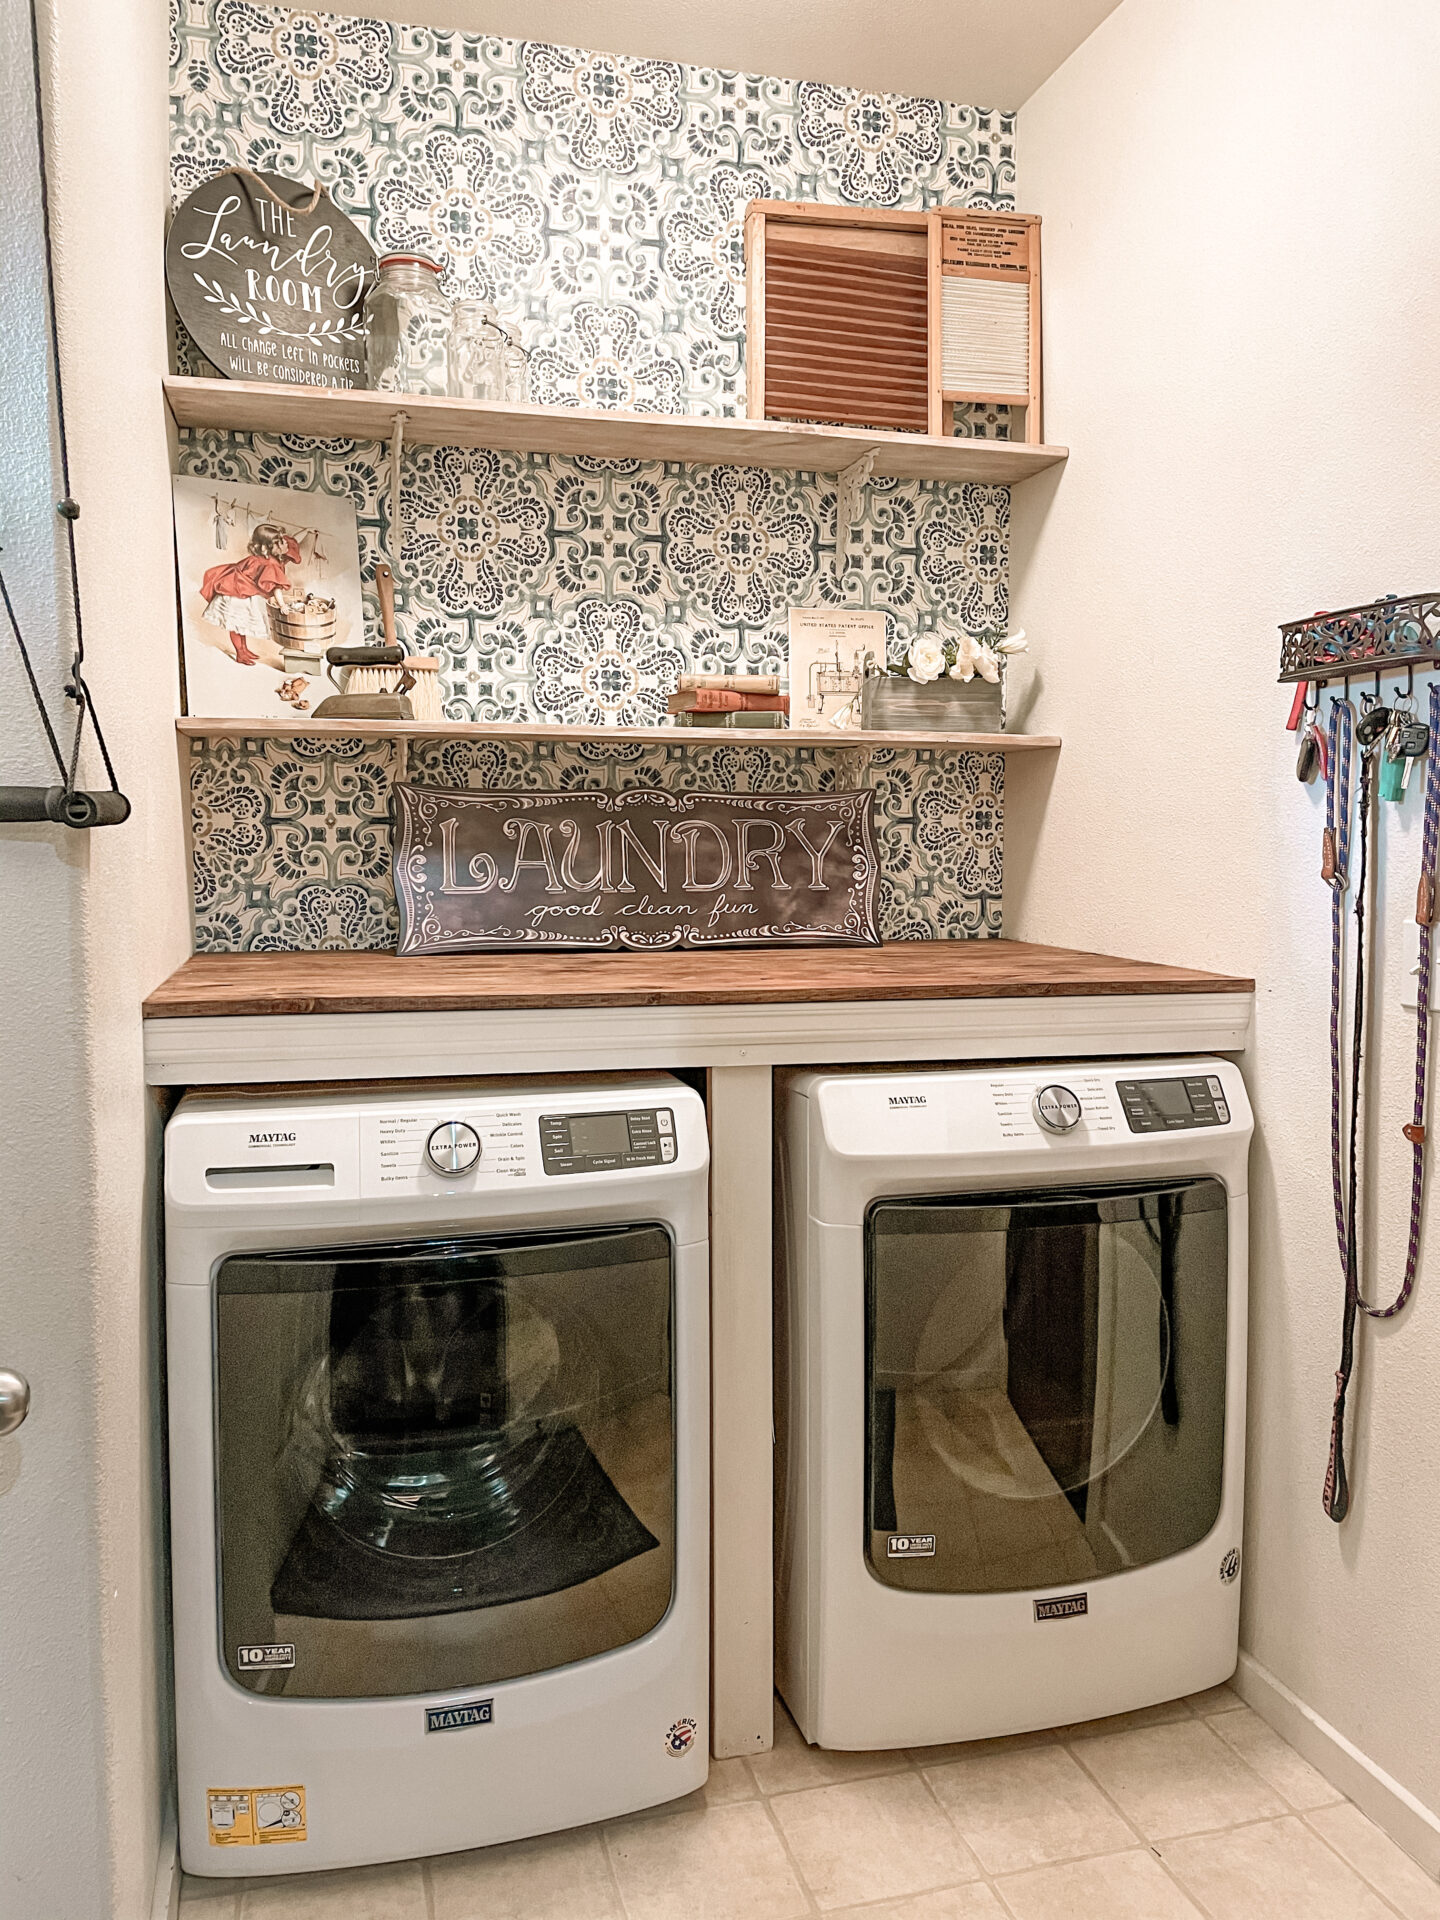
Here is the finished look. Now nothing falls between or behind the machines anymore, I have a large and sturdy counter surface to set laundry baskets, launder detergent, or pretty much anything else I want to set on it. I can use it for folding clothes and it’s so sturdy I can stand on it to dust my open shelves or replace the decor.
Supplies and Measurements
- 2 – 2×4 cut at 31.5″
- 1 – 2×4 cut at 11″ (for left of my water faucets. This will vary depending on location)
- 1 – 2×4 cut at 37″ (for right of my water faucets. This will vary depending on location)
- 2 – 2×4 cut at 43″ for middle support
- 2 – 2×4 cut at 27″ for middle support
- 1 – 1×4 cut at 62″
- 6 – 1×6 cut at 62″
- Piece of trim cut at 62″
- #8 2.5″ screws for securing frame to walls
- Drywall anchors if unable to attach to wall studs
- #8 2″ screws for attaching countertop boards
- Finish nails for attaching trim
- Wood Stain
- Interior Paint or Chalk Paint
- Polyurethane, Satin finish
Pin for later…

Emily’s Inspiration
To see what Emily is building this week simply click on the photo below.


It looks so good. I love it.
Thank you so much! It’s already saved me so much time not having to go fishing for things that fall behind the machines! lol
[…] this case one of the items turned out to be just the ticket for my fancy laundry area now that its been given a well deserved […]
[…] wallpaper on the back wall, added some shelves and displayed some pretty vintage things. Then I built a counter to go over the top of my machines to stop everything from falling between and behind the machines and to give […]