

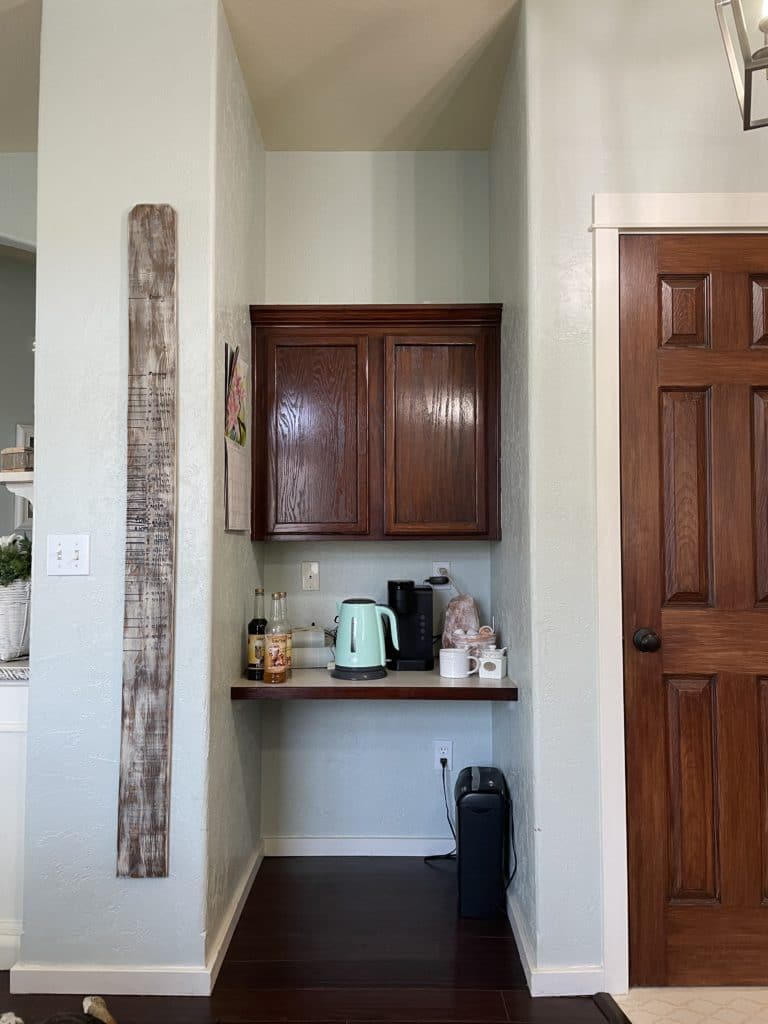
Remember this little spot?
No?
In fact, have you ever seen it before?
I admit I don’t show it much. You might have seen a sliver of it in photographs of my kitchen before but I rarely, if ever, show it in full. Need you ask why?
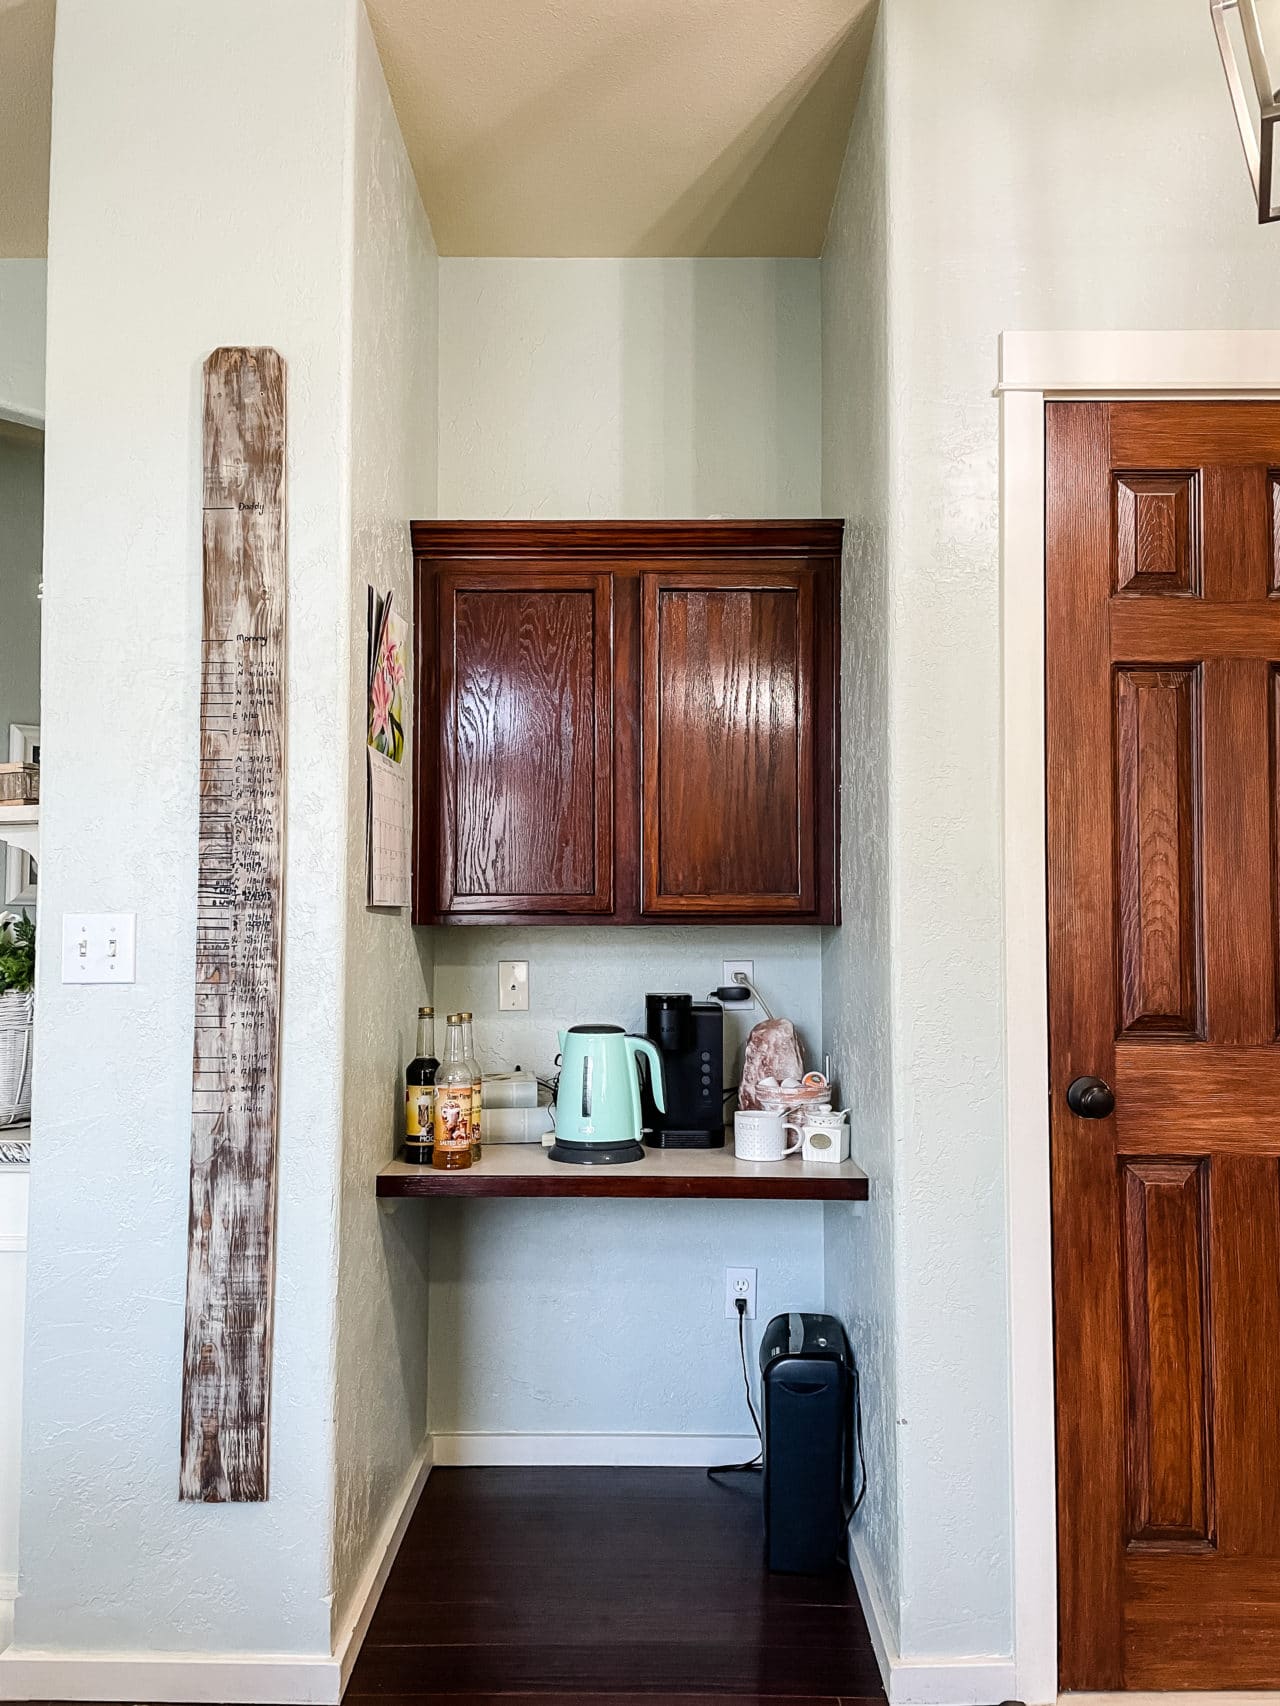
Most of the time it’s been an overly messy desk area that I never use as a desk. It has housed dog crates (underneath) and even sort of disguised a large toy box at one point.
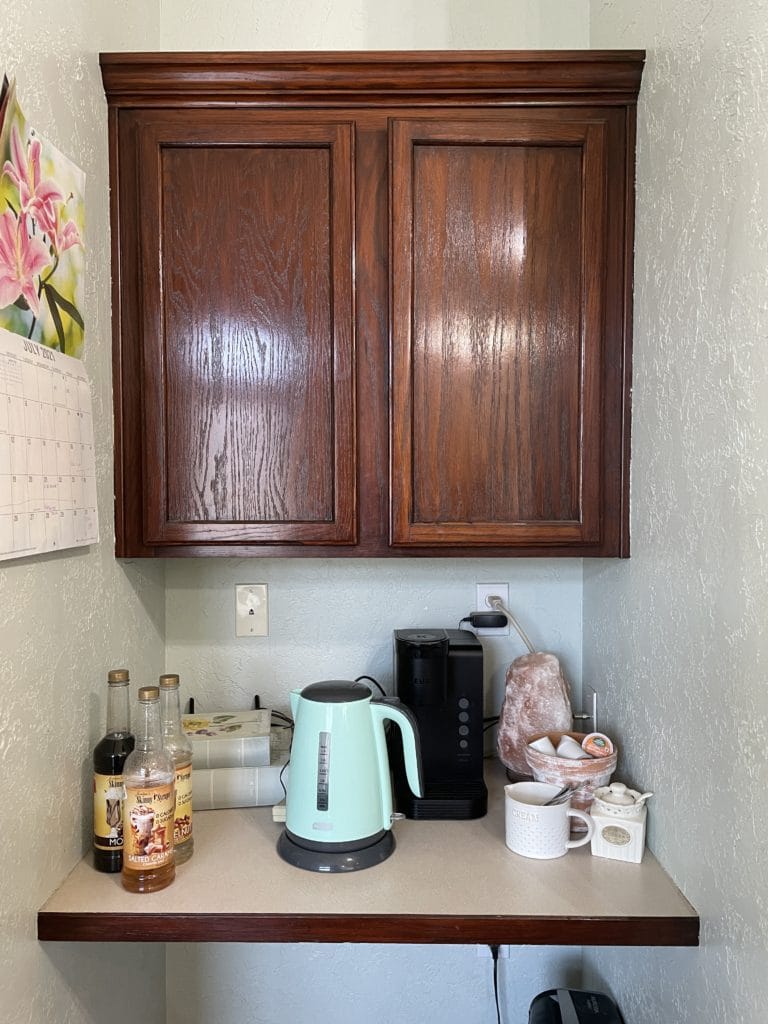
Most recently I put some of my coffee and tea things there. I sort of always fancied making it into a coffee bar but I always planned to have a lovely little piece of furniture in here and then open shelving above. The trouble is, I have been looking for the perfect size piece of furniture for this nook for several years now and still can’t find the look I want with the measurements I need.
Yes you read that correctly. Years.
Well I’m here today to inform you that I’ve given up looking. I have shifted to Plan B. I supposed that means that perfectly sized little cabinets are about to start popping up all over the place now.
Well let’s get started on this project, shall we?
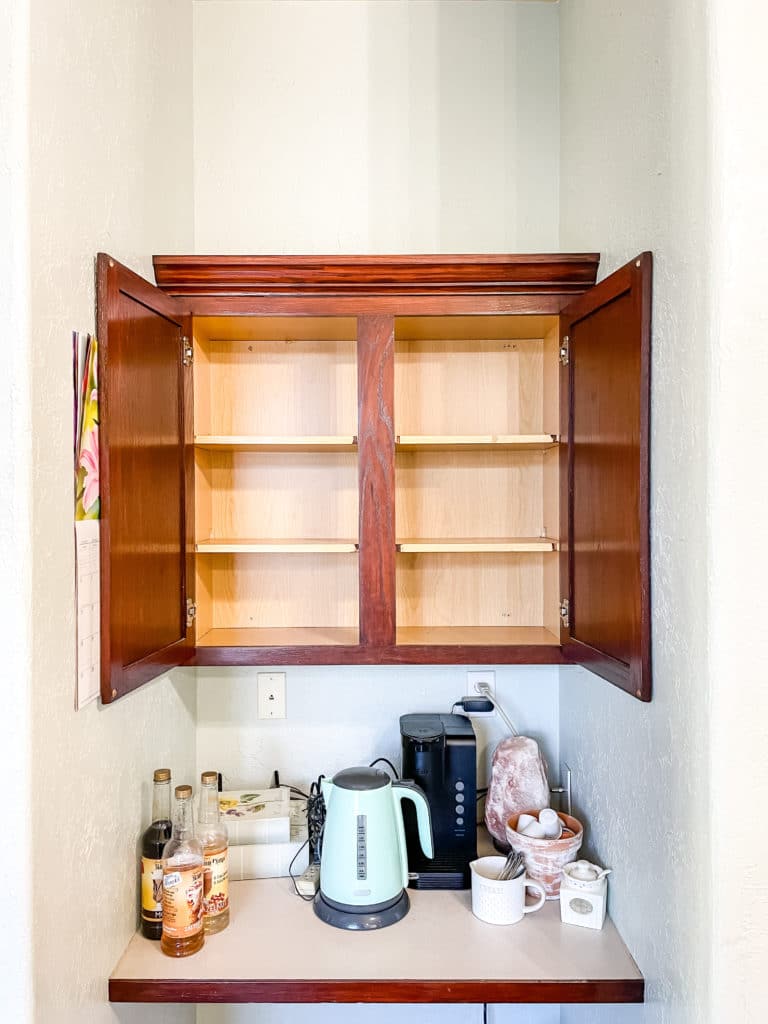
First I cleaned everything out of the wall cabinet so I could remove it.
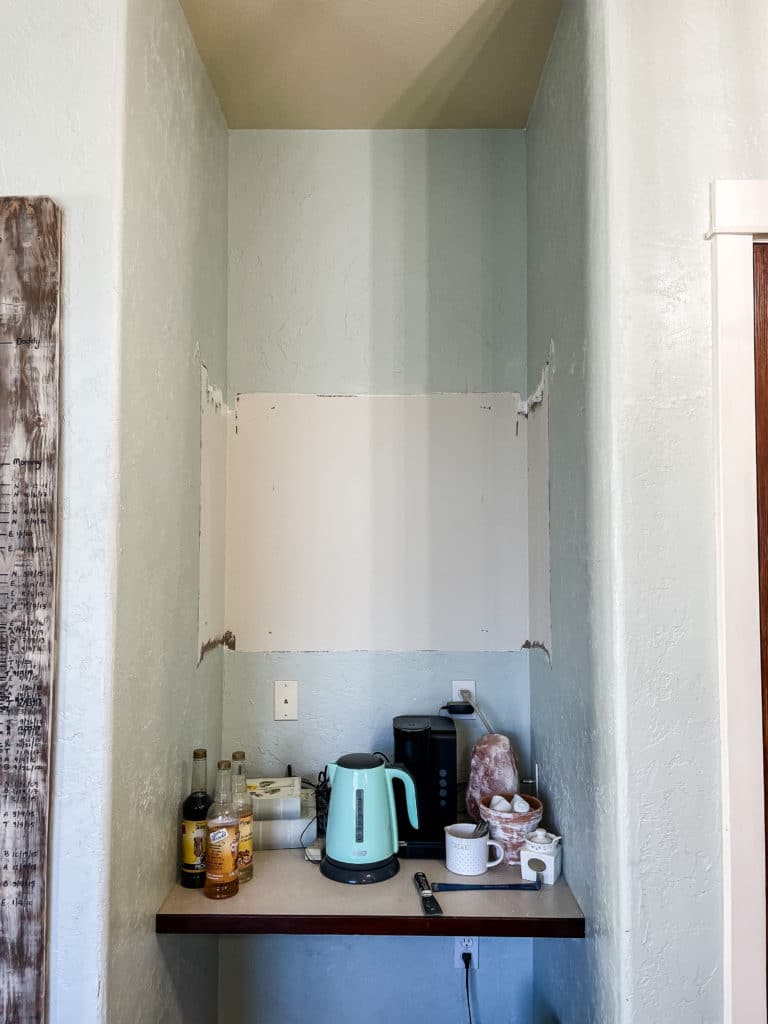
I had to wait a couple days for The MR to be home to help me get the cabinet off the wall. I almost tried to get it off myself but I was afraid I’d break it if I did. Patience isn’t my strong suit. At least not when it comes to DIY projects.
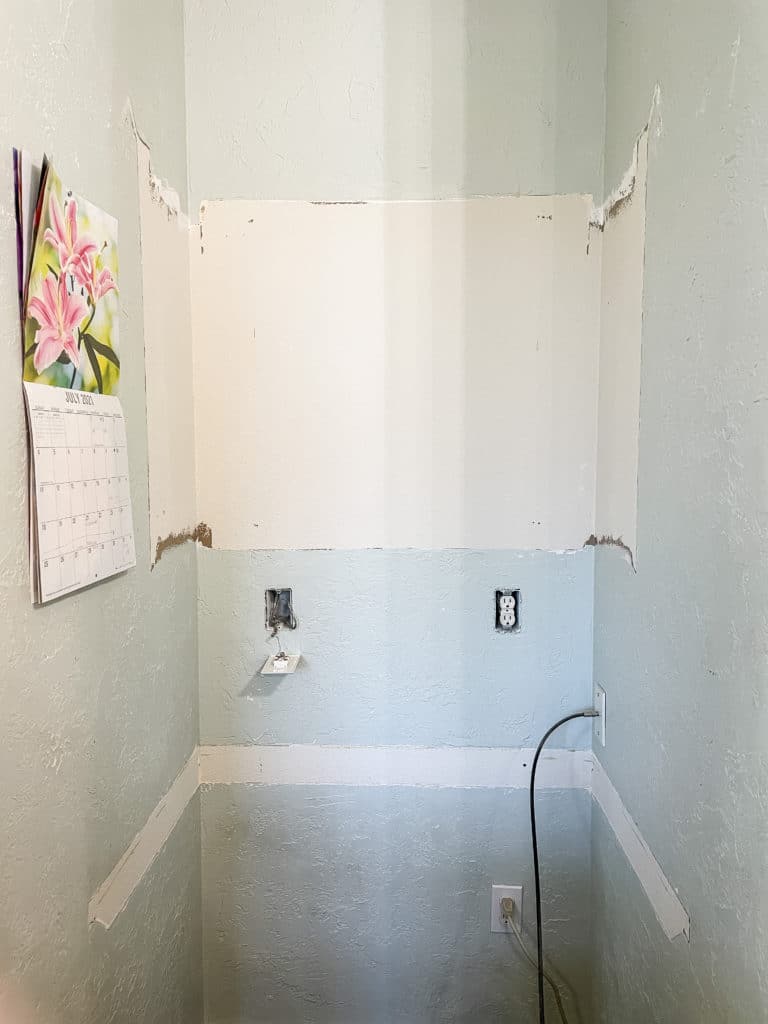
After staring at this nook for a day or two and going back and forth about what I was going to do in here, I finally decided to get the last bit of demo done and remove the countertop. I’ve dreamed of seeing this last bit of ugly countertop disappear ever since I put in the granite in my kitchen!
Now as for the walls, the issue is this – I’d ideally like to make the entire nook a focal point with some sort of different color or technique. This house however has many annoying “qualities” and one of those is that every single corner is one of those rounded ones.
Around every window.
At the edge of every wall.
Around every archway and open doorway.
It’s infuriating.
Have you ever tried to change paint colors or stop a wall treatment on a rounded corner? No matter what you do it never looks very great.
Let’s not even talk about how fun it is to trim out those rounded corners with say crown molding or board and batten or baseboard.
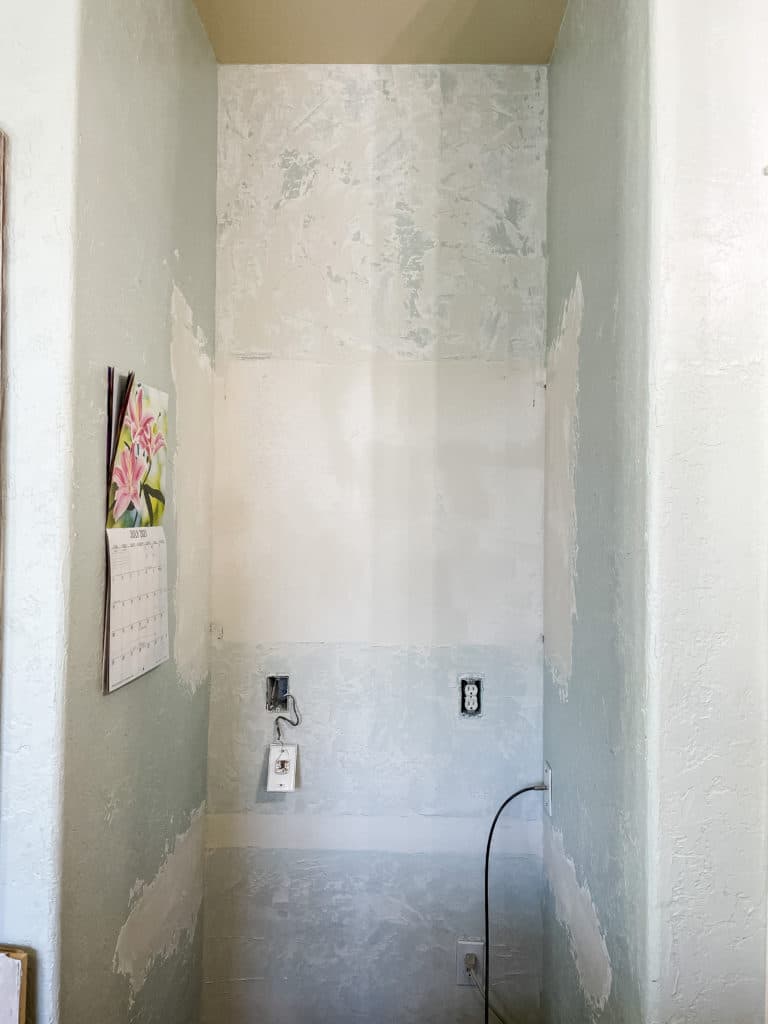
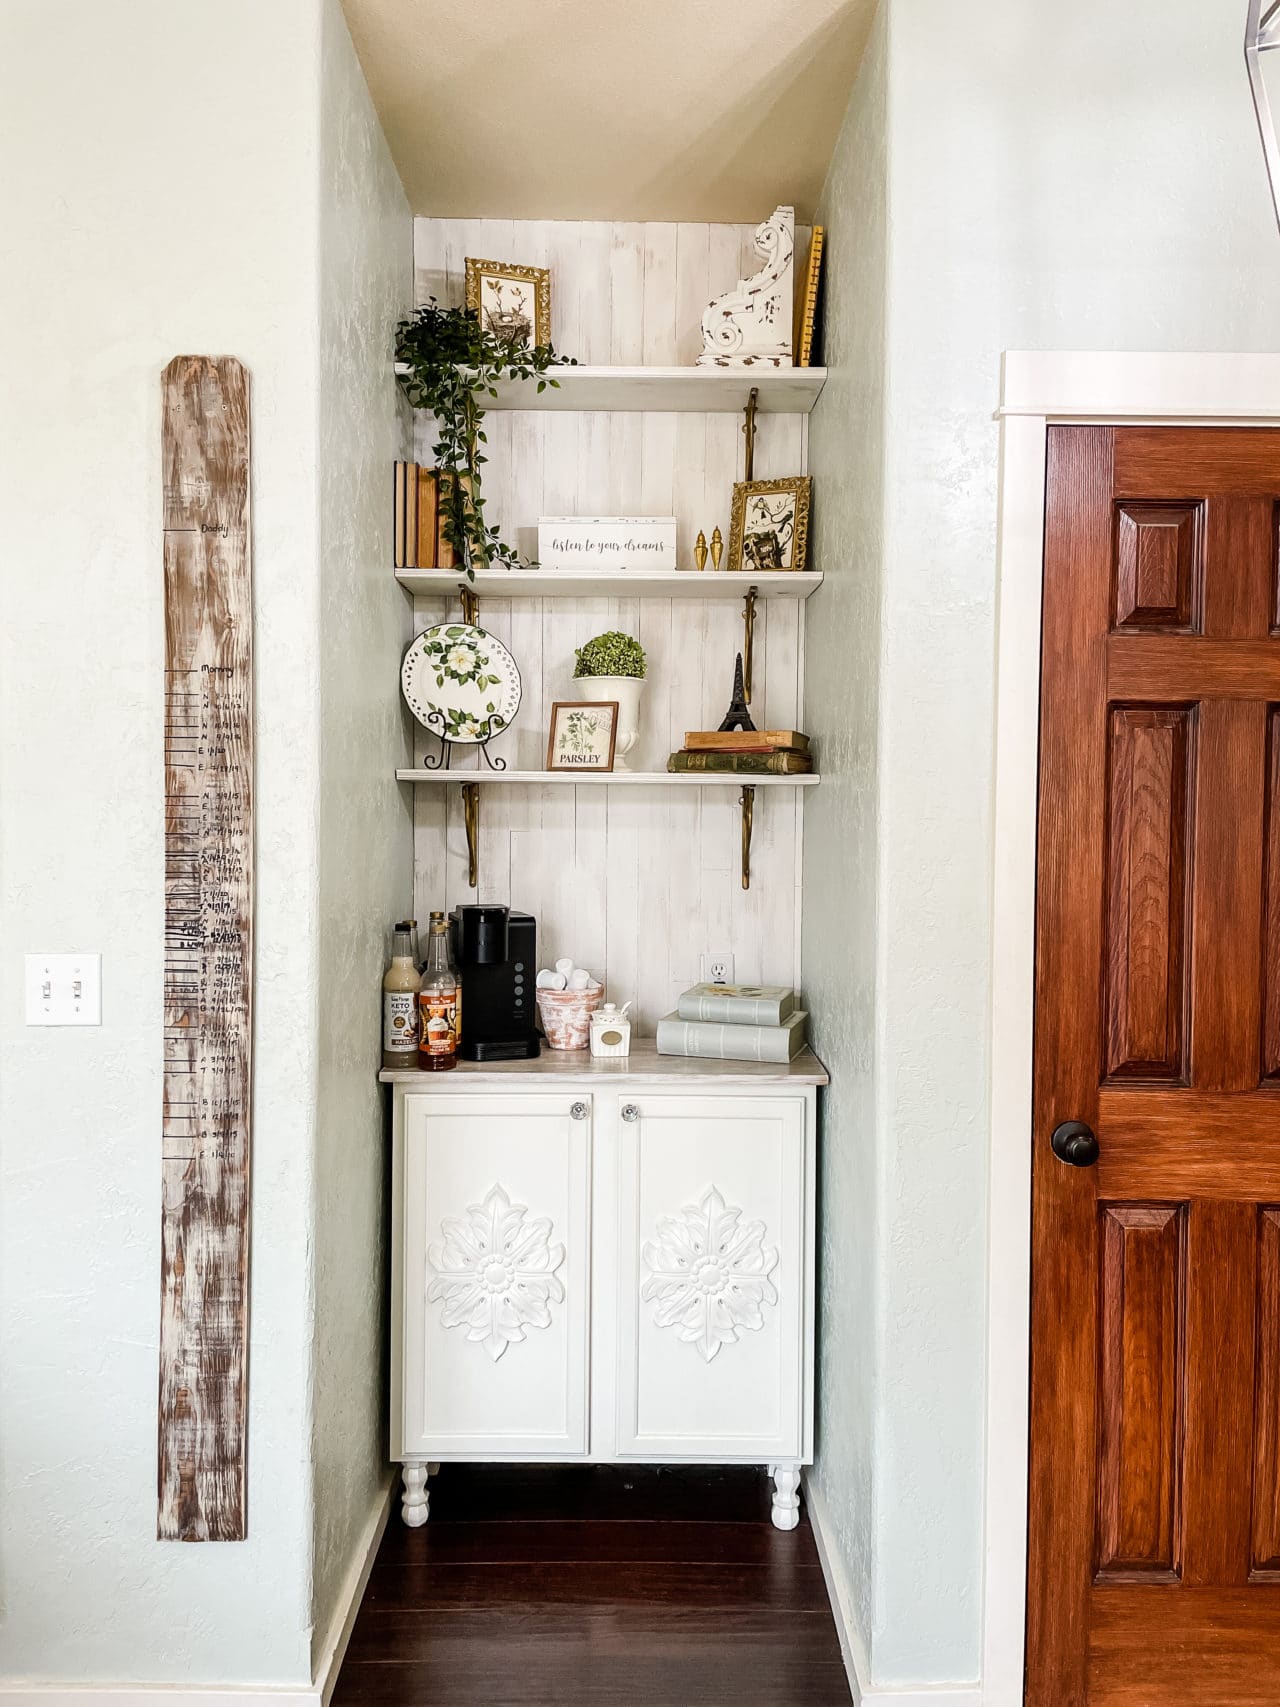
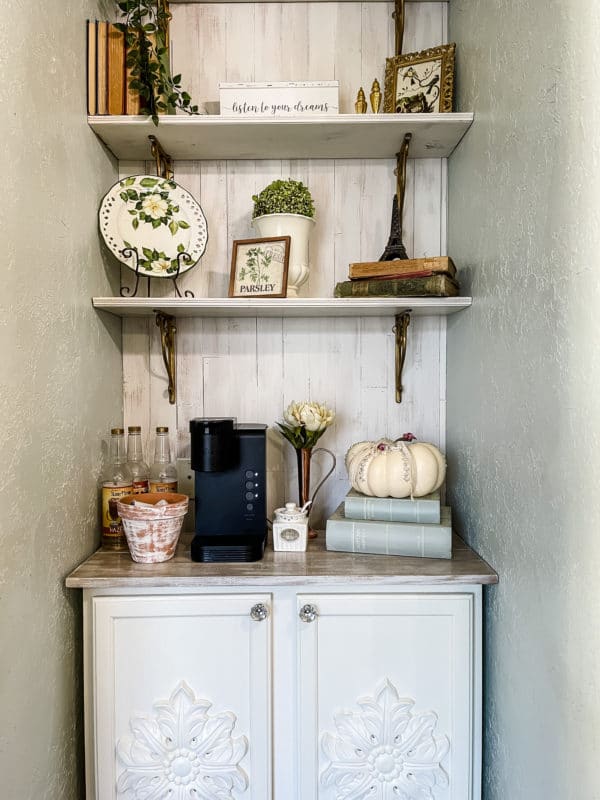
So after mulling it over for another few hours I decided to plaster the side walls to blend in with how I’ve done the main floor but I would plaster the back wall of the nook smooth so I could do some sort of feature on it.
Wanna know what?
Oh good!
I’ve been dying to show you.
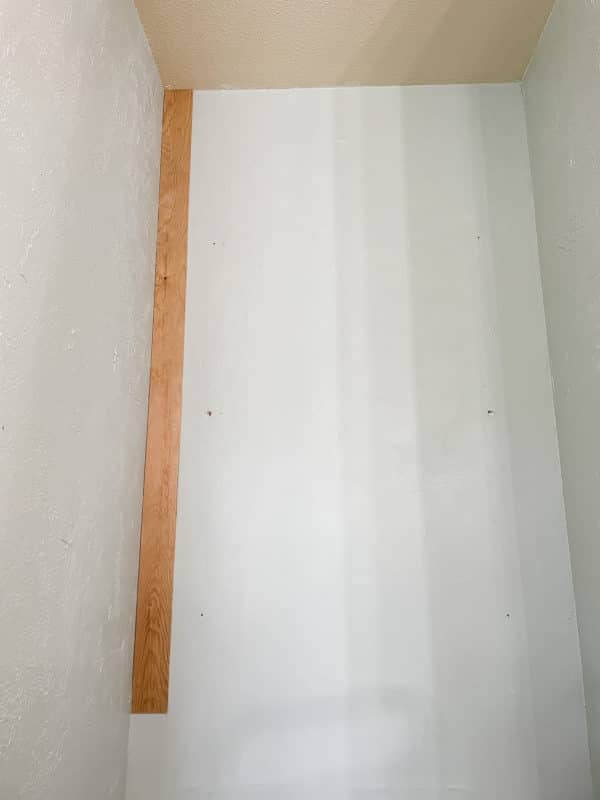
I had some leftover wood from a different project sitting in my garage. I decided to try something different, not sure how it would look when I finished. I ran the strips of wood through my tablesaw and cut them into 3″ strips, then I used my chop saw to cut them into varying lengths. The length shown in the above picture is the longest piece I cut.
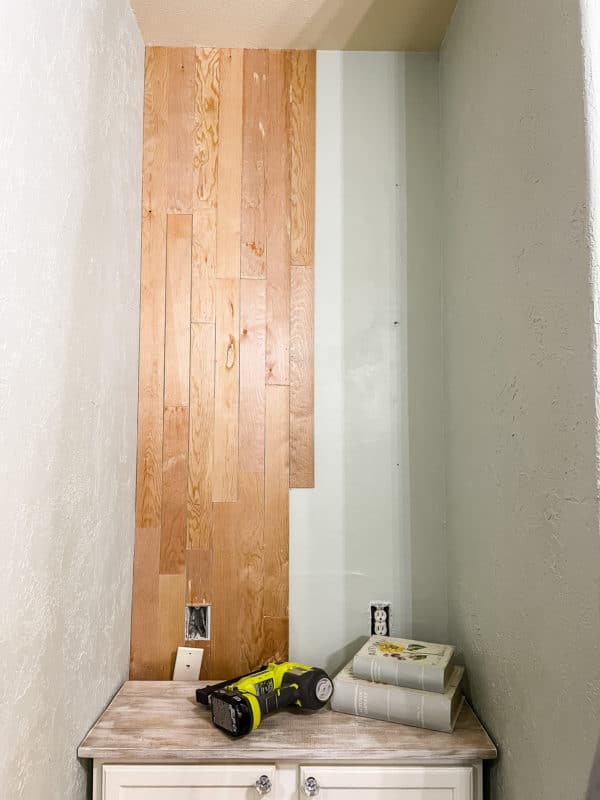
I put them on the back wall of the nook vertically and secured them with my finish nailgun. I made sure to stagger the joints just like you would with a wood floor.
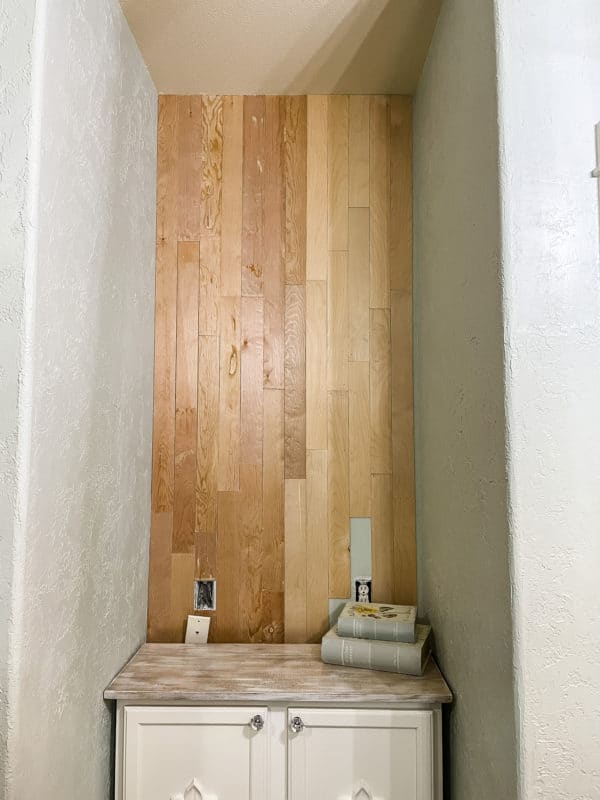
I didn’t worry about staggering the color of the pieces of wood I used because I was planning to paint it, not leave it natural.
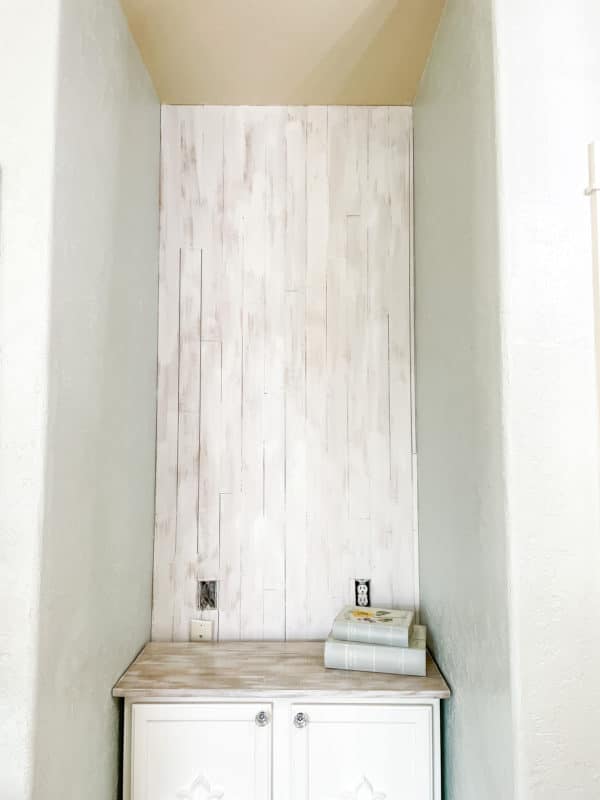
I used my homemade chalk paint and just painted it on with a paintbrush not caring to have every little bit covered evenly. I purposely left some bits thicker and some bits with a bit of the underneath wood peeking through so that the end result would look worn and almost chippy. This was only 1 coat of chalk paint.
At this point you could choose to seal it with some polyurethane if you wanted and I totally would have if this was an area that I felt I would want to wash regularly like say a backsplash or something. I think I would use a matte finish though so that it still looked old and chippy, not shiny at all. This time I decided to skip the poly but I can always put some on later if I think it would be better. I don’t really care if this gets a bit worn and banged up because that will just add to the look.
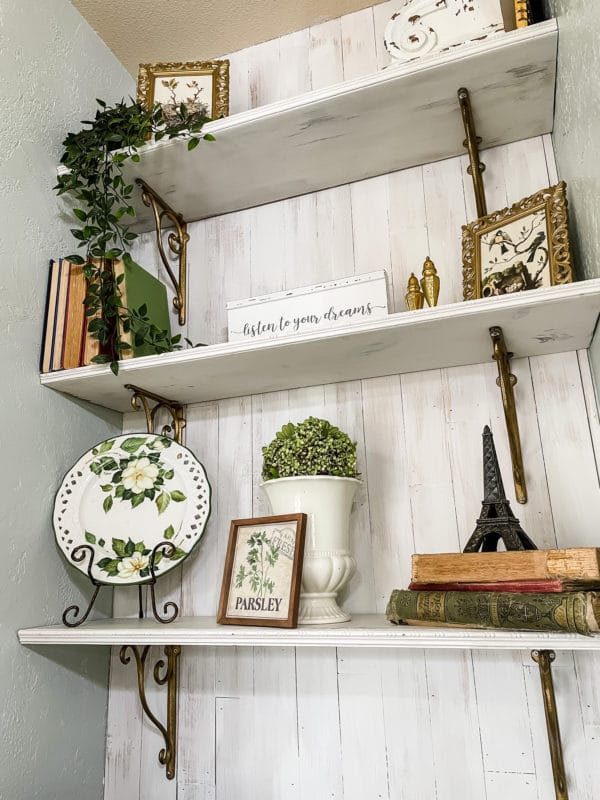
Now it was time to hang some open shelves where the wall cabinet used to be. To see the details on that process you can check out this blog post.
The final step to this entire makeover and perhaps the most important one, was when I turned the wall cabinet into a piece of furniture. As I said, I couldn’t find a cabinet that would fit the width I had to work with so the solution was to make one.
If you missed that process, I showed everything about it in this blog post. It really wasn’t a difficult project and well worth it in the end.
So there you have it!

Before 
After
In 3, sort of easy, steps it went from a boring and typical builder grade kitchen desk nook, to a beautiful custom coffee nook!
Voila!
Until next time…

Pin for later

This looks amazing! It doesn’t even look like the same spot. You are so talented and always create such beauty!! I seriously love it!!!!
You are seriously the best friend a girl could ever ask for. You’ve made my entire day!
Hugs
[…] can bet it’s where I will be brewing up my pumpkin spice lattes maybe as early as later […]