

Who wants to see the final step of my fireplace makeover? I think my dog is raising her paws…
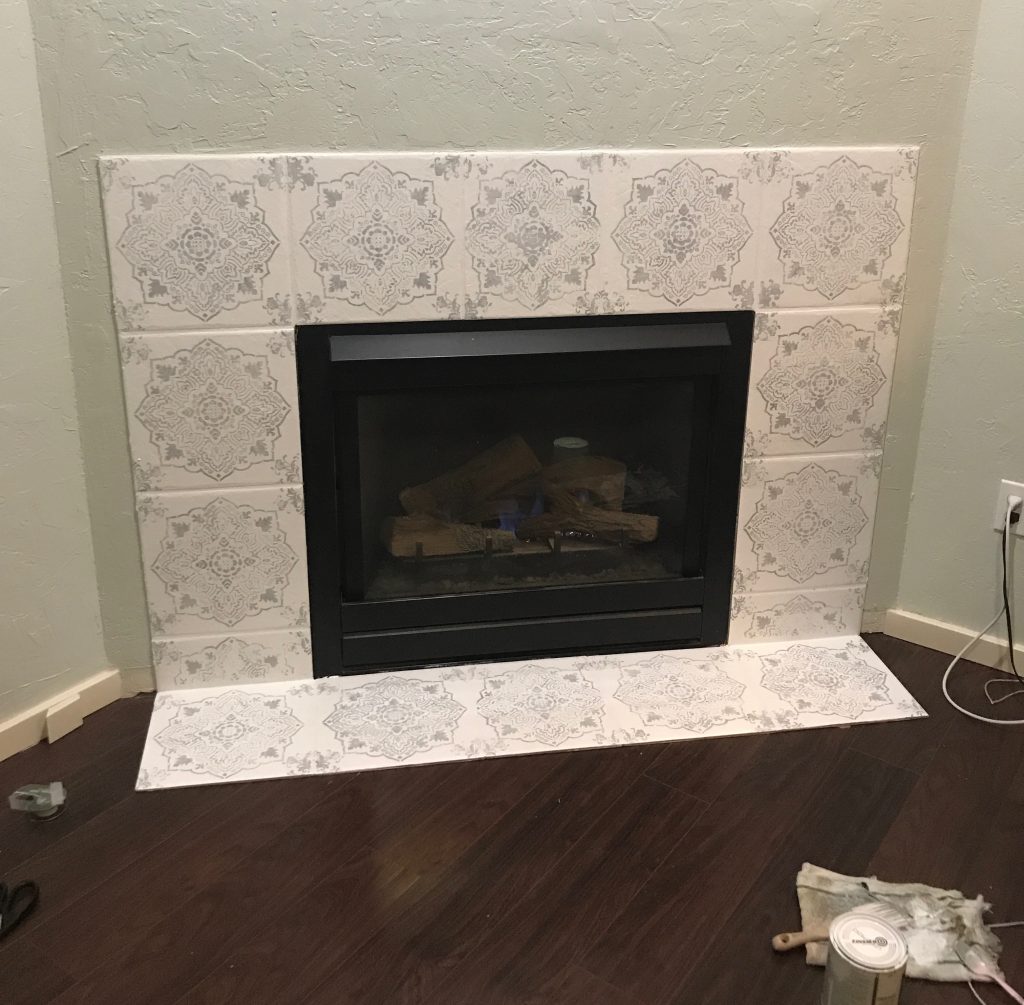
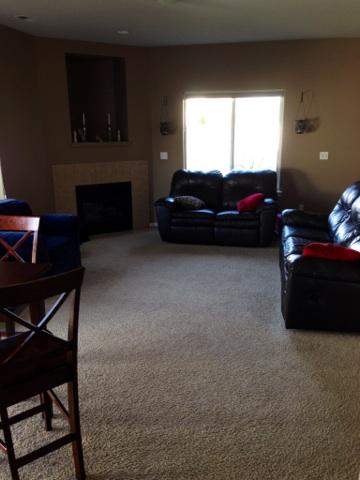
In case you haven’t followed this journey from the start, here is what it looked like for the past several years!

I know!
I always planned to do a stacked stone on this entire wall with a floating mantle of a wonderful piece of reclaimed beam from some old barn or something with a magnificent story. Then I woke up.
And I did what I do best which is to make do with what I have and come up with Plan B! If you want to see how I painted the tile around the fireplace, CLICK HERE.
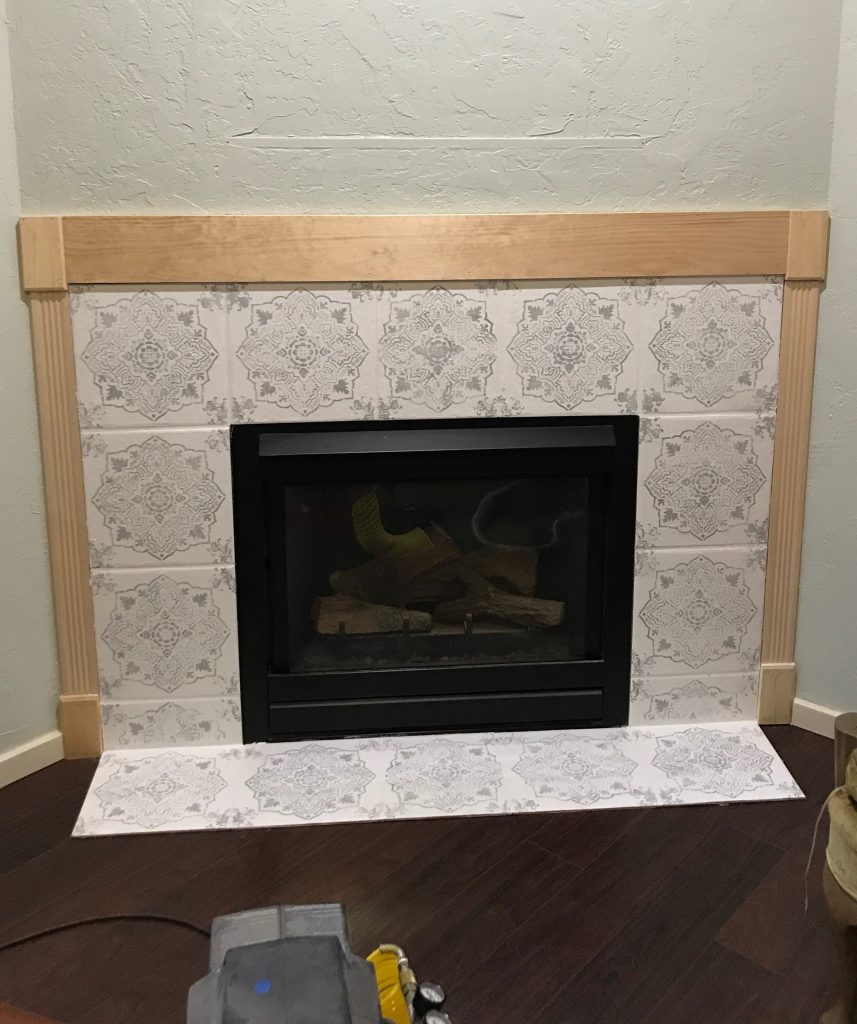
My next step was to trim out around the tile. You can see that project HERE.
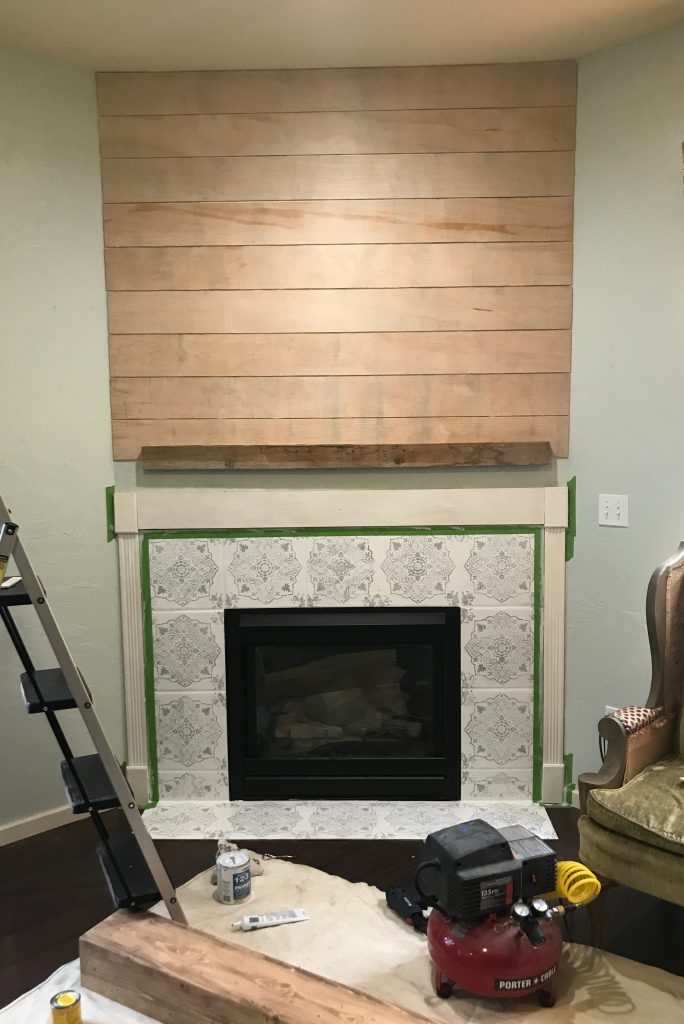
Then I secured a 2×4 where I wanted the mantle to be and installed shiplap to the upper part of the wall. You can see those details HERE.
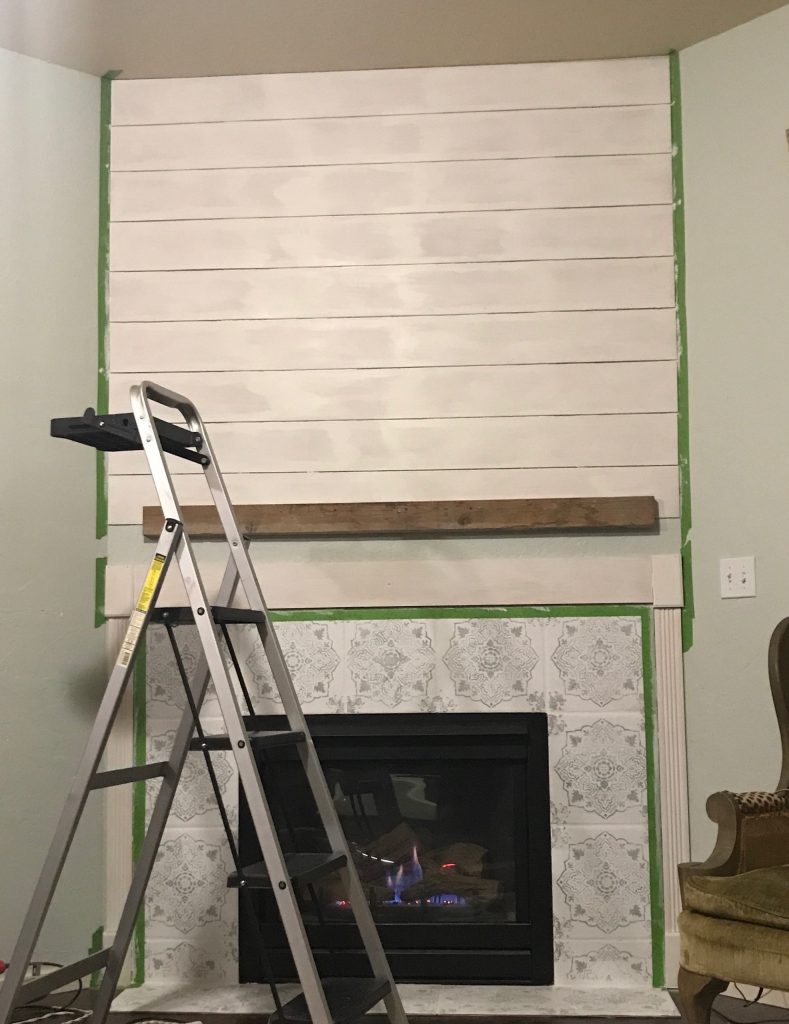
Finally I primed and painted all the trim and shiplap. I used Sherwin Williams Alabaster for a lovely aged white.
That brings us to the final step which is one of the most important steps. What does every fireplace need? A mantle!
I really wanted a big distressed beam but I looked and looked and could never find anything local or online that wasn’t going to break the bank. So what do I do next? I make something!
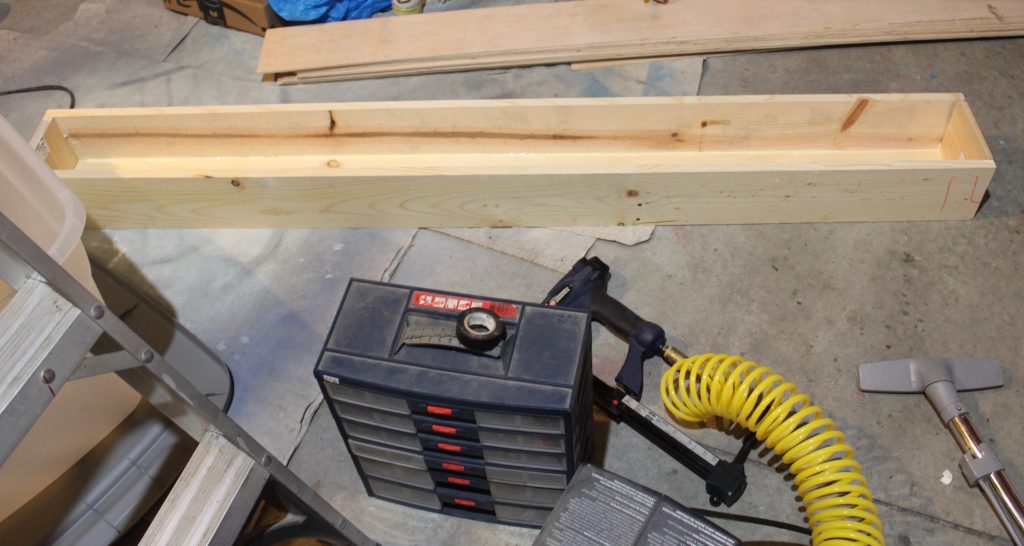
I built a 3 sided trough (for all intents and purposes) using 1×6 lumber. I made it the full width of my fireplace wall. After gluing and nailing the 3 pieces together, I measured and cut the little end pieces to fit and glued and nailed them in as well.
Next I sanded the whole thing down, removing any of the stamps etc from the lumber yard and breaking the edges so they weren’t looking to put splinters into my fingers anymore.
Believe or not I took my hammer and a pair of pliers next and using the hammer claw and the hammer head along with the edge of the pliers, I distressed the top and front of the “beam”. Then I lightly sanded it again just to remove any sharp edges from where I had distressed it.
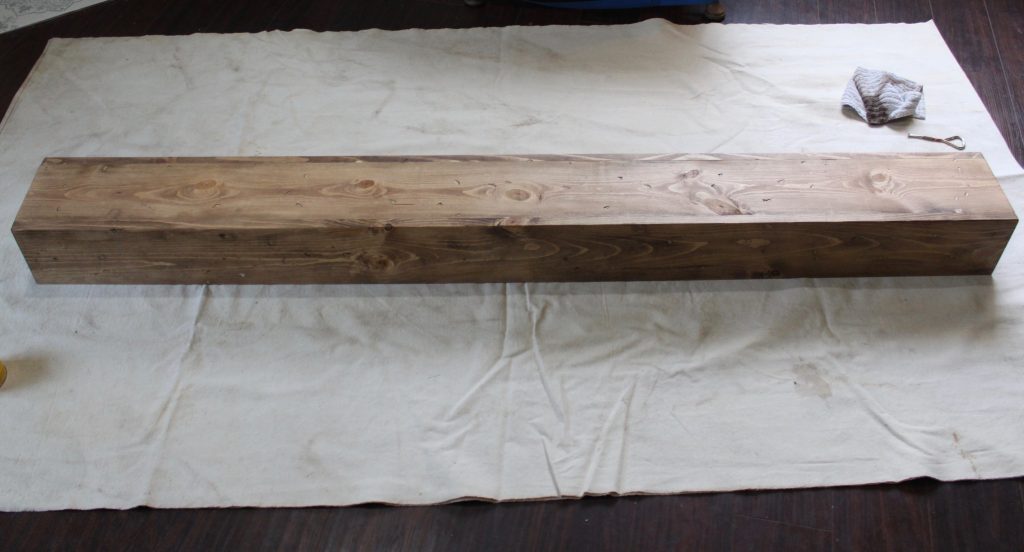
Then because it was too cold to continue working on this out in the garage, I carried it into my living room and stained it in there! I used Minwax Special Walnut and I applied it very lightly with a rag, rubbing it into the wood and especially into the imperfections to highlight them. This is what gives it a more realistic reclaimed look.
Since my gas fireplace puts out a lot of heat I did not want to finish this with wax which normally would be my first choice on something like this. I clearly did not want a sheen to it either. I’ve lightly protected it with a matte finish polyurethane but just a thin coat. I honestly don’t care if it gets a bit more distressed and weathered over time.
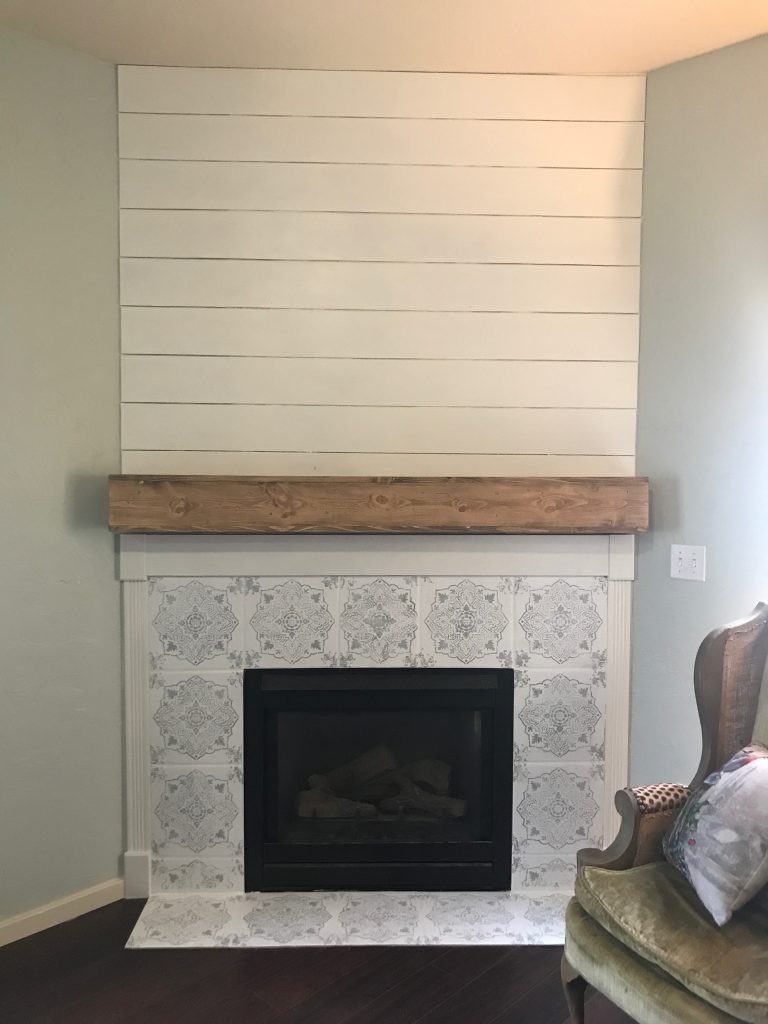
The final step was simply to install my floating mantle using that 2×4 I had secured earlier and had leveled very carefully. I simply set this mantle onto the 2×4 and secured it with screws. These are at the very back of the top surface so will never be seen due to the height of this mantle. However if you wished you could set the screws and fill the holes with wood filler. I did put some very thin shims under the bottom edge of the mantle so that the mantle itself has the slightest tilt down towards the back. This is simply to discourage things from rolling off of the mantle but is not tilted enough to be noticeable from any angle.
All that’s left now is to style it! My favorite part and the reason for this entire project! I’m just wondering why I didn’t give up on Plan A a lot sooner and go with Plan B ages ago….
Thanks for following me on this journey. It’s been so satisfying and really changes the entire look of the living room. I have been having so much fun styling it for winter and can’t wait to reveal that to you soon. Until then….
Enjoy!


[…] space, I’ve worked hard to bring extra cozy touches to my living room. Although originally the fireplace was one of my least favorite features, it is now my favorite, thanks to a major facelift a couple […]
[…] filling in the huge television hole above the fireplace and giving the fireplace itself a HUGE makeover, this is now what it looks like at this end of my living room. The mantel later got a second […]