Remember how my fireplace looked a really long time ago?
Yes I’d rather forget too but in order to fully appreciate what I”m doing at the moment, sometimes we need to take a little stroll down memory lane.
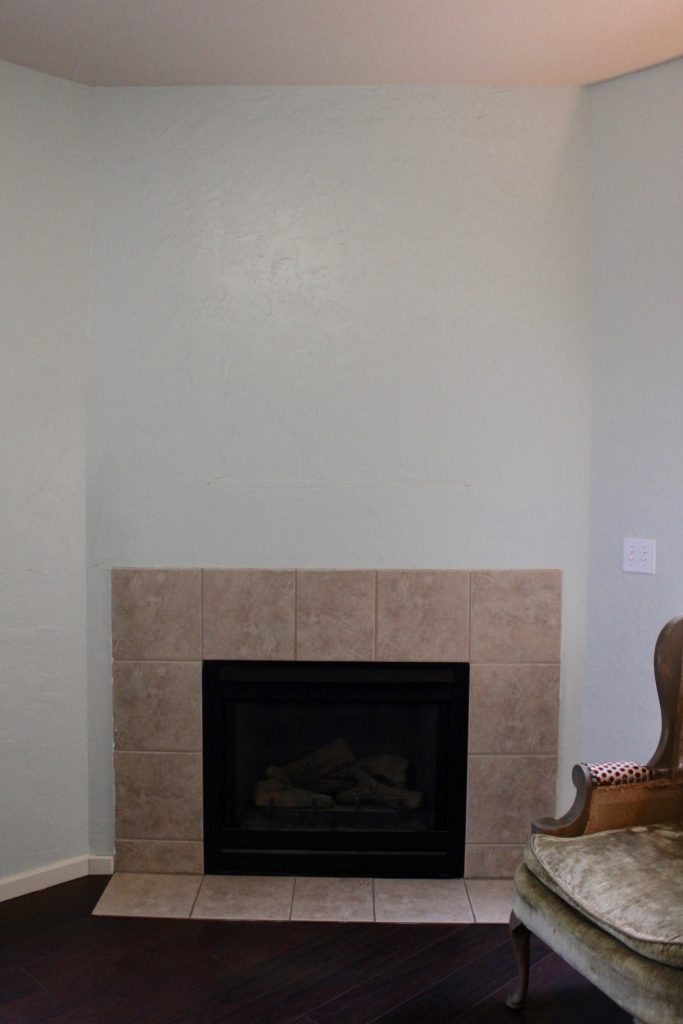
I mean, how jealous are you, on a scale from 1-10?
Okay so clearly that was a really long time ago and I KNEW I had to do something about it. Originally I planned to do a lovely stacked stone around it but that was going to take too long to save up for so I thought I’d come up with a Plan B.
An “in the meantime” plan.
I have a lot of those.
This was Plan B. I chalk painted the tile and stenciled it.
Not bad but since nothing else was done in this room (other than having replaced the nasty old carpet by this point) I wasn’t positive if I was sold on it or not. This is important because since I didn’t know if I liked it or not I didn’t bother to seal it.
First, I wasn’t sure if I liked the look completely.
Second I wasn’t sure if the paint would hold up properly since this was the first time I had painted ceramic tile with chalk paint at this point in time.
Third, I wasn’t sure if the heat that this gas fireplace puts out would affect the finish.
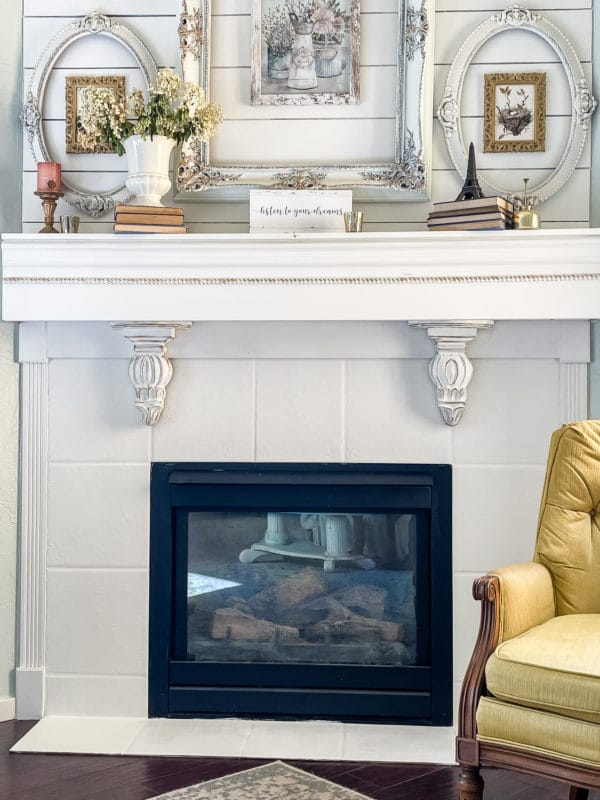
That said I continued to work on this wall and framed out the fireplace some more, added shiplap and a mantel and then changed the mantel and still I didn’t bother sealing the tile.
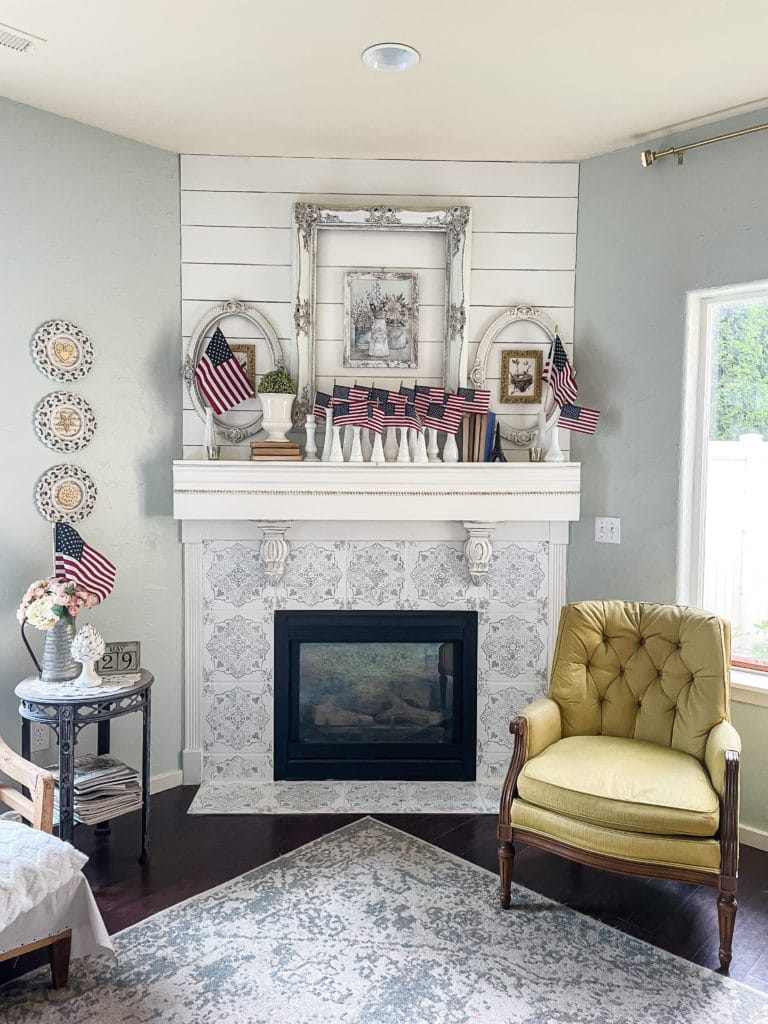
Fast forward a number of years and guess what? It’s still the same. I actually decided that I really liked the look of the stenciled tile with the mantel and the rest of the space and that I wouldn’t bother putting in stacked stone.
Ever.
But…..
Do you see that?
That.
Right there.
You see, my dogs love this fireplace in the fall, winter and spring and especially my tiniest little guy spends half his life baking on the tiles in front of the fireplace.
I’m serious. I don’t know how he can take the heat but he loves it.
So……you know all that fast forwarding we did?
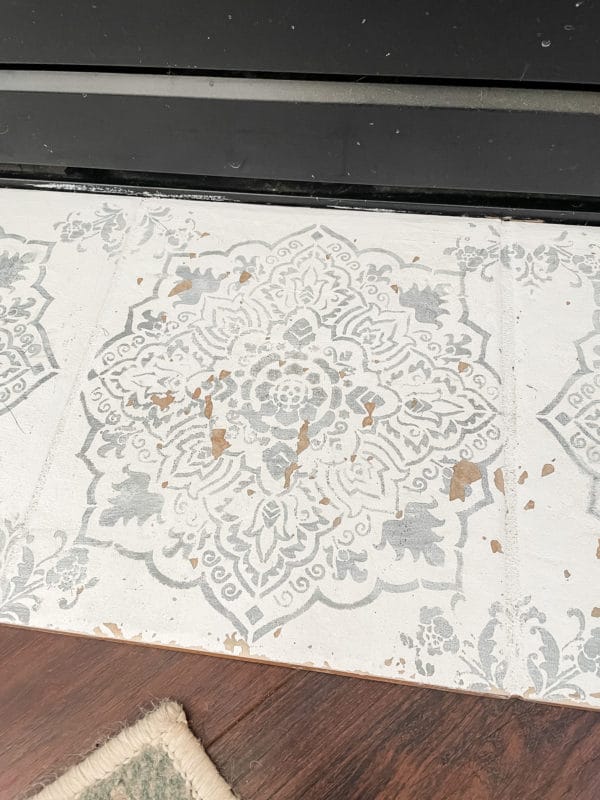
Yup! Over time the tiles on the floor have gotten chipped and peeled a bit from how often I’ve had to clean them thanks to all the muddy little paws that constantly pitter patter over them.
Honestly they’ve held up really well considering how many times I’ve scrubbed them but its still starting to really bother me and it’s more than time to fix this mess.
Especially since there is always a lot of focus on the fireplace in the upcoming seasons.
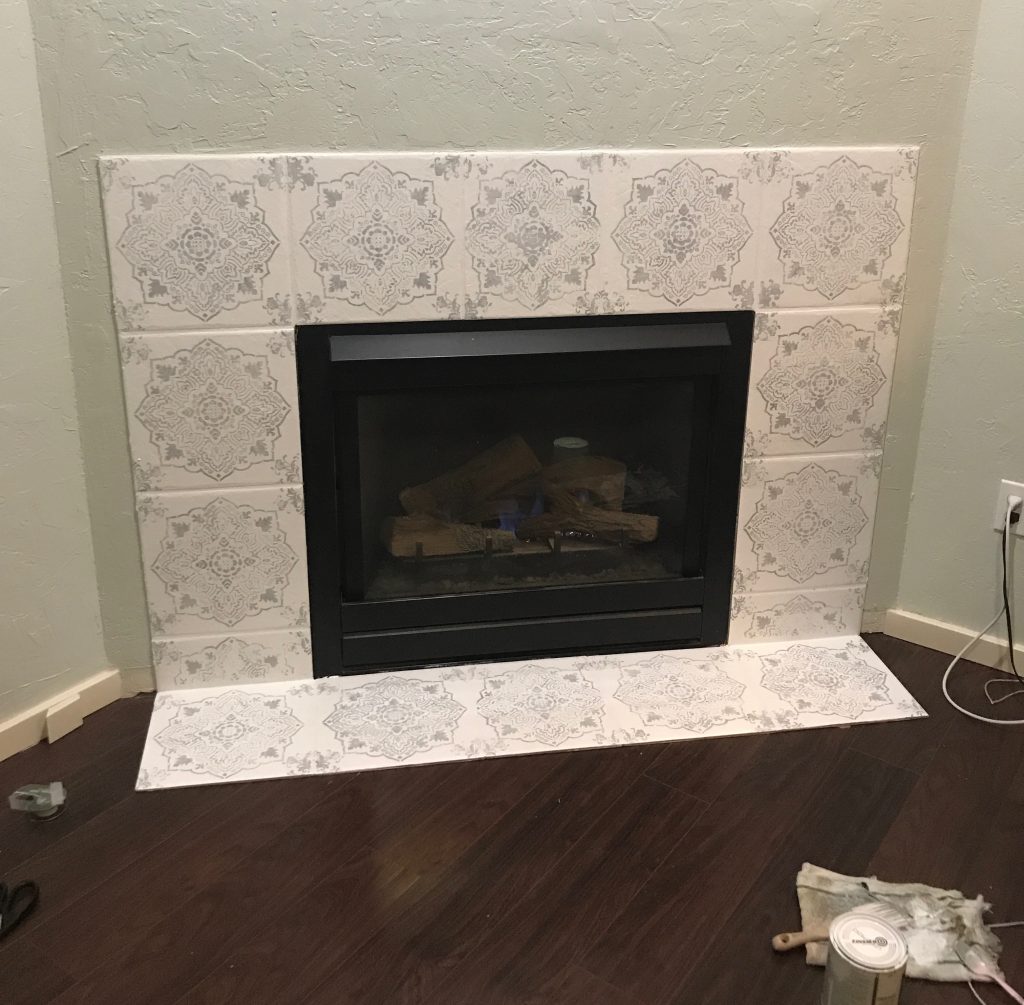
So I finally broke down and scrubbed all the tile really well to make sure it wasn’t dusty or dirty. I removed any loose paint and then I painted it with my Homemade Chalk Paint.
You could certainly use bought chalk paint but I happen to prefer the consistency of the homemade chalk paint and I love that I can make any color I want. This is White Dove. I did about 3 coats to make sure the pattern from my previous stencil did not show through at all and that none of the places that had chipped or peeled showed at all.
Now most people would probably use the same stencil as before since because we know that looked really good. I’m not most people though and I really don’t like doing something exactly the same as I’ve done it before. I like to change at least a little something about it.
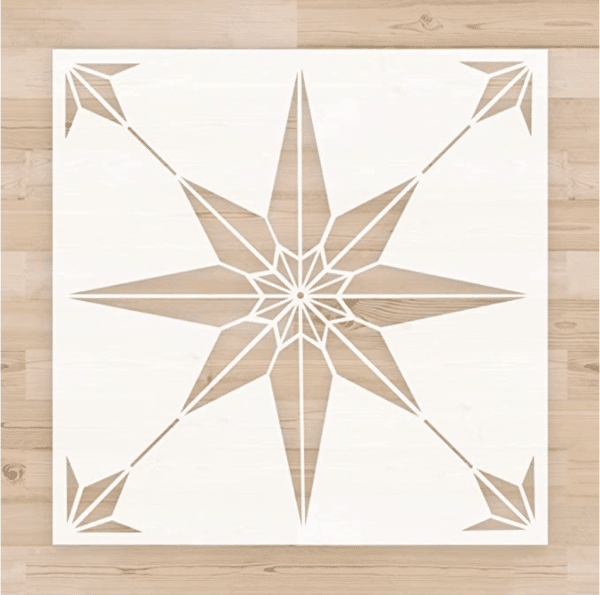
Voila! This is the new stencil I ordered from Amazon specifically for this project. I’ll link everything at the bottom of this post.
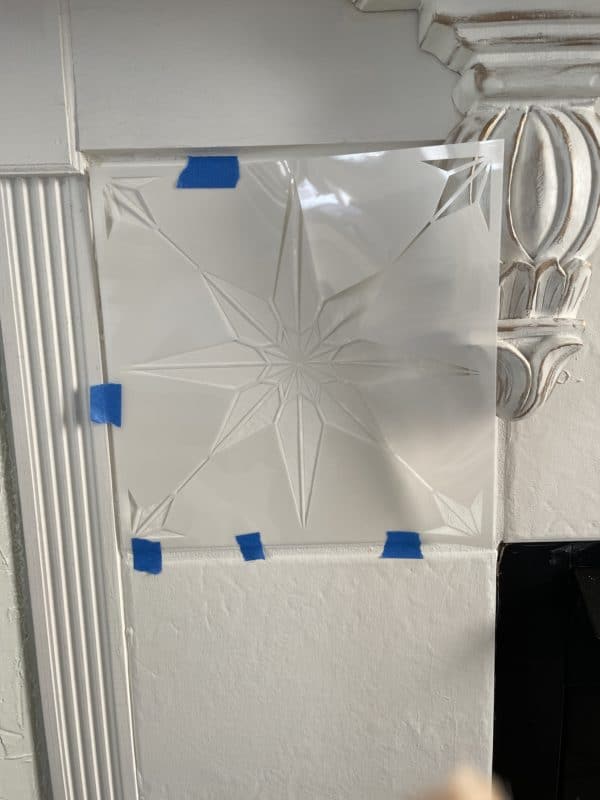
A bit of Painter’s Tape and I was all set and ready to go.
For the pattern this time I chose to use some leftover wall paint I had from one of the bedrooms. It’s called Mindful Gray, very similar to what I had used before but it is regular wall paint in a satin finish, not chalk paint.
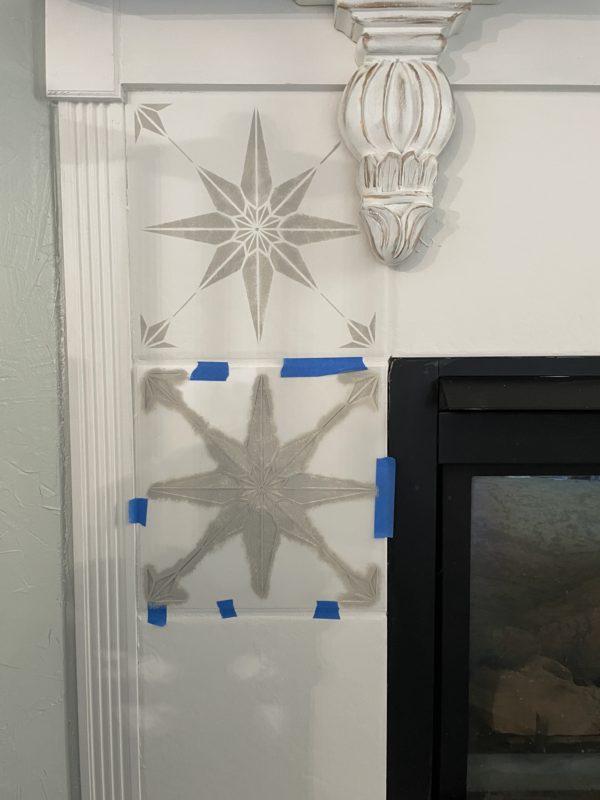
For a project like this I always use a stencil brush, put some paint on the brush and then wipe it off on a paper towel so it’s quite dry. Then tap the paint on in a straight up and down motion, no rubbing. You can go back over it until you get the depth of color that you want but remember, having some lighter parts and some darker parts makes the overall design more interesting in the end. Don’t be afraid to leave variations in the color.
I do random tiles here and there rather than the ones right beside each other so that I don’t risk smudging the fresh paint while working on the next one.
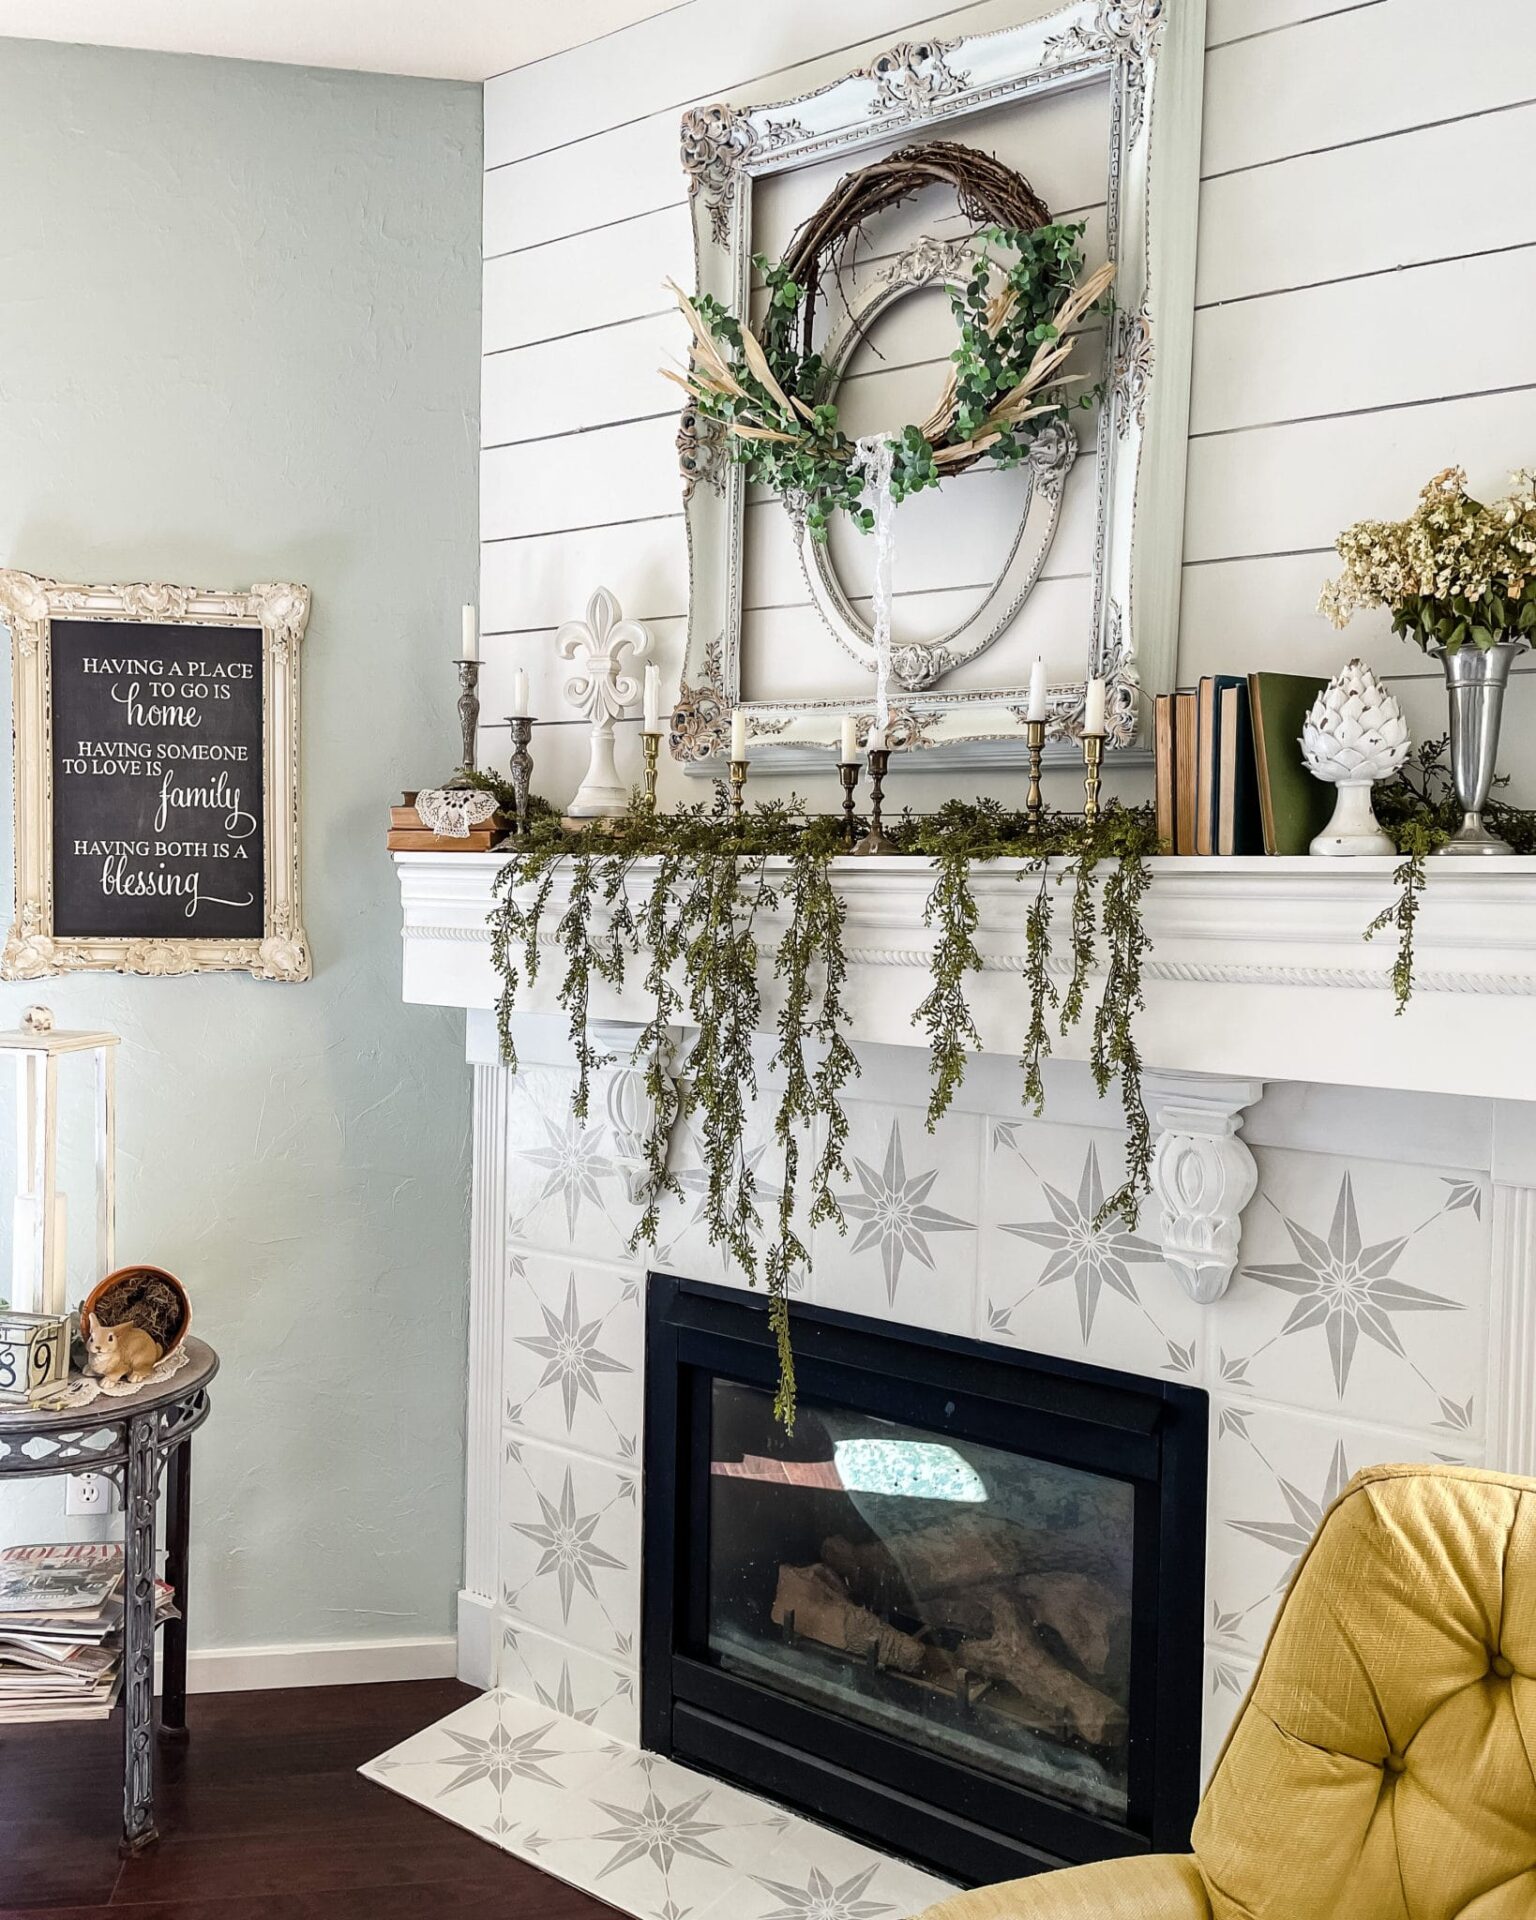
You might notice that the center tiles above the fireplace and on the floor below are smaller than the other tiles. This is because these are floor tiles rather than the typical tile one would use around a fireplace so they had to cut a tile to make them fit around the size of the gas insert. Because of this I altered the pattern just slightly on the smaller tiles and didn’t include the corner designs. If I squeezed the corner designs in it would have looked crowded and messy. Removing those corner designs and just doing the center star makes the pattern have room to breathe and you barely even notice it.
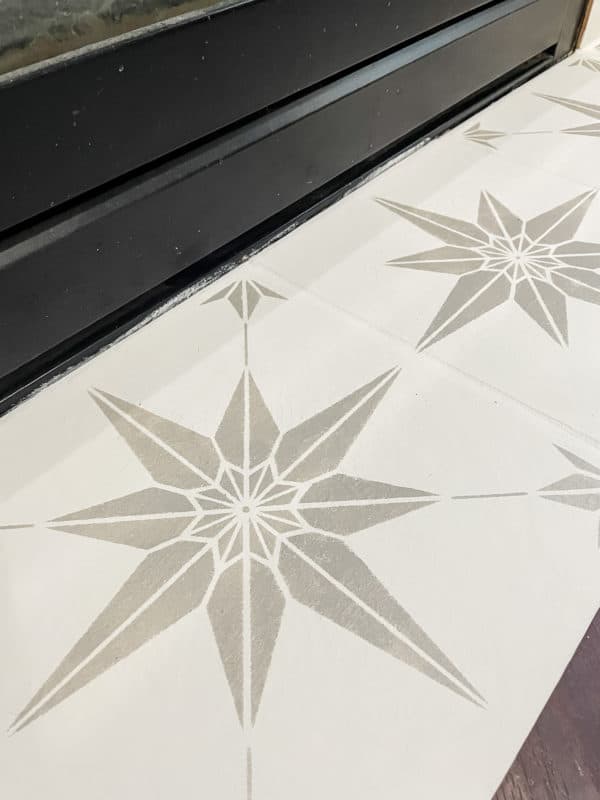
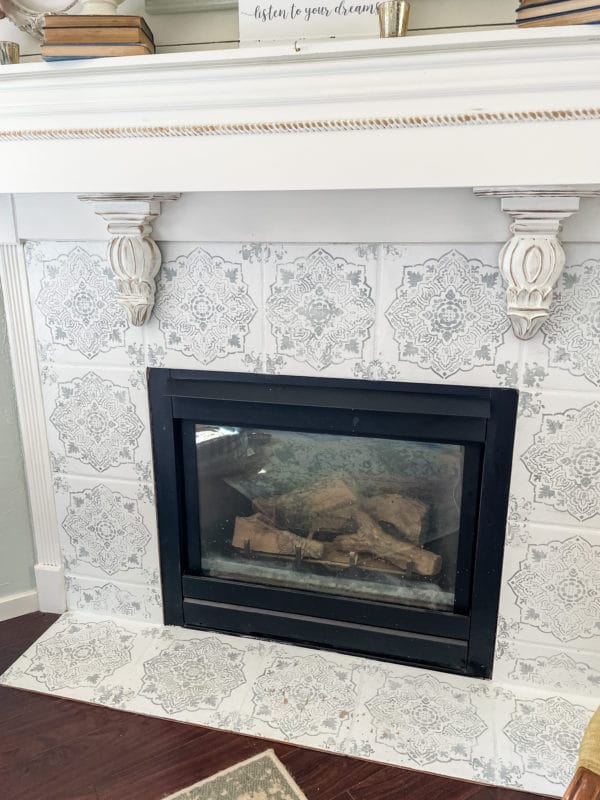
So this is what the design looks like up close now. It would be fine to leave it like this but I’d rather soften it just a little so it isn’t quite so crisp and new looking and fits in better with my vintage style.
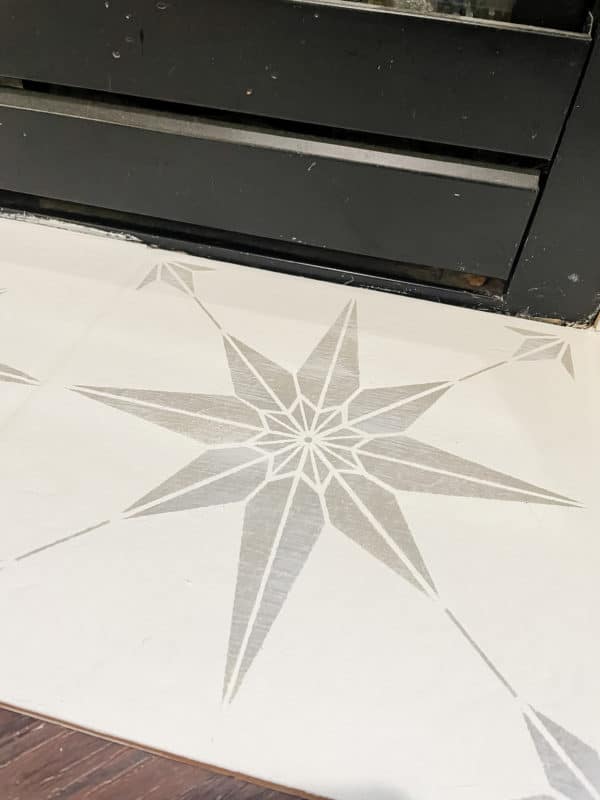
To do this I simply took my paintbrush, dipped it in my base color chalk paint and wiped it off with a paper towel. I barely tickled the surface in left to right motions to apply the faintest bit of white over the top of the design.
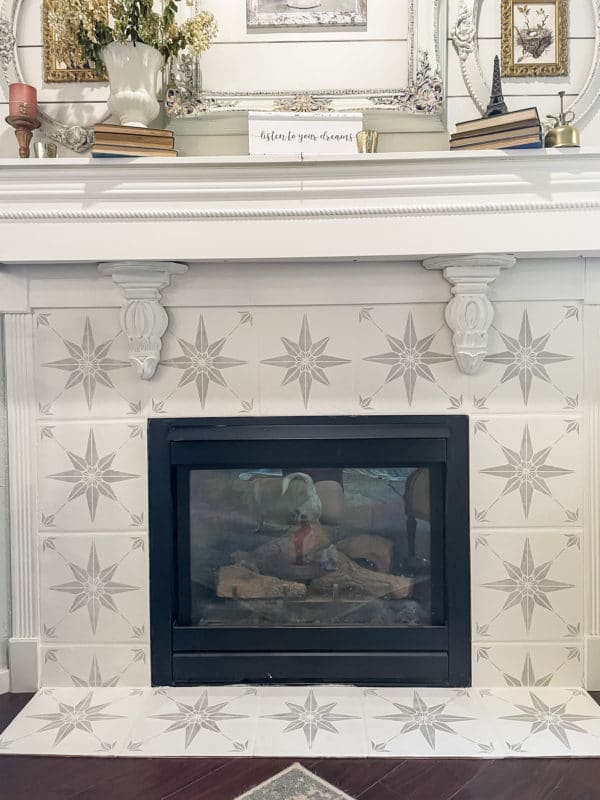
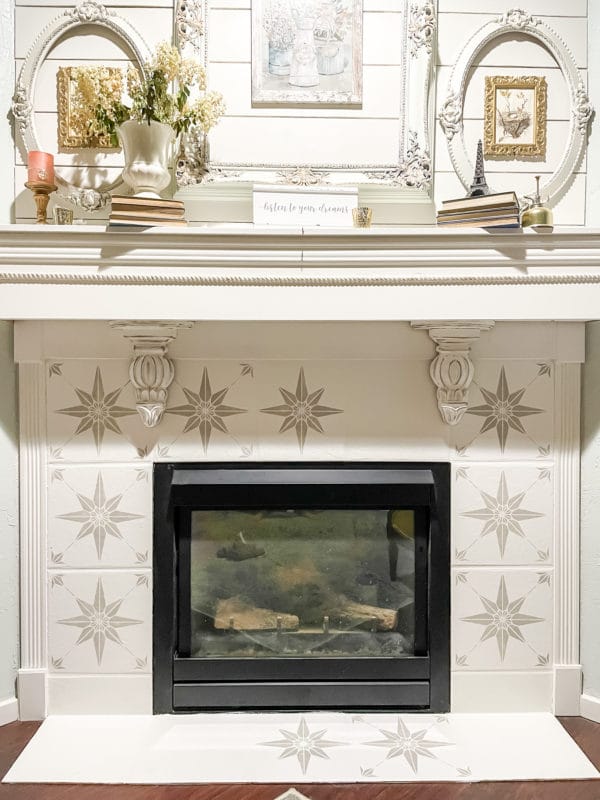
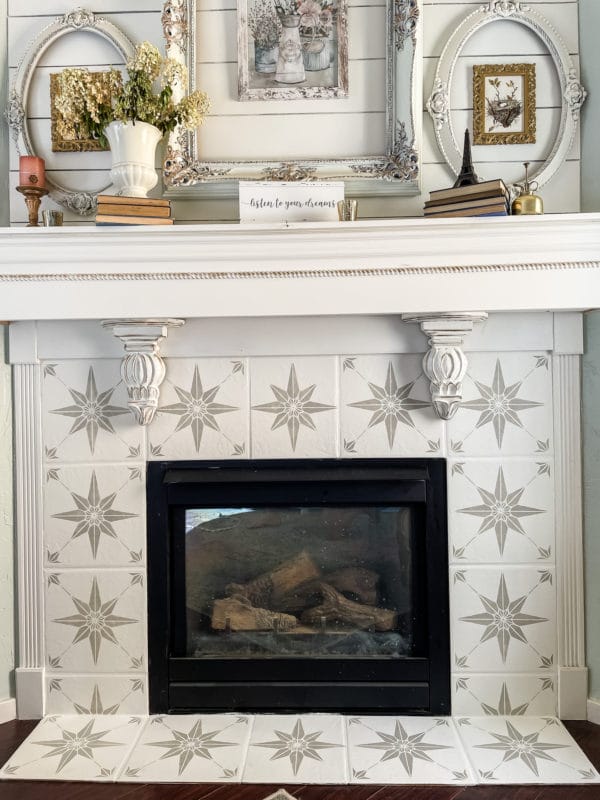
And here, my friends, is the finished product. Now THIS time, I decided to seal it really well! I started by applying a really good coat of polyurethane in a satin finish to all the tiles with a brush. The kind I used is specially made for floors so it’s very durable. I only did 2 coats on the wall tile but 4 coats on the floor ones so I don’t have to worry about chips from scrubbing the tiles anymore.
I would have used a matte finish polyurethane but the large container I had on hand was satin and I hate going out and spending money on materials when I don’t have to. I’d rather use up what I already paid for. You could certainly use matte or satin – whichever you prefer.


I have shared some affiliate links in this blog post for your convenience. If you make a purchase from clicking one of my links I will receive a small compensation but it will not affect your price in any way.