
Just the other day I had the best time joining some Instagram friends (who also happen to be bloggers) for a week of DIY’s. Basically each of us would take a different day and create some sort of Christmas DIY project which we would share.
I got so many great ideas from this again. I love working with other creative minds. I will link their projects at the end of this post but for now let’s take a look at what I made for my day.
My Project
I’ve been wanting some large wooden lanterns for a long time now but they’re always so expensive that I always put them down again and think “I could make some of these”!.
Well at long last – I did!
I will put all the measurements at the bottom of the post.
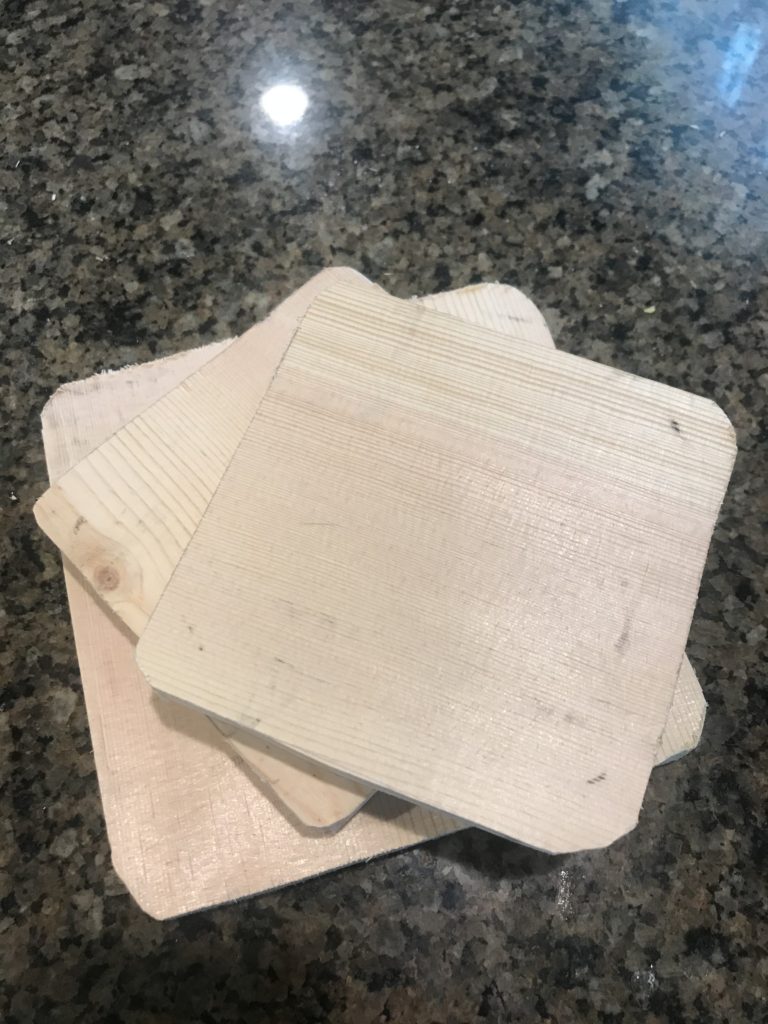
I started but cutting 3 squares out of a pine board I had. I cut one larger than the other 2 because my plan was to make 3 different sizes.
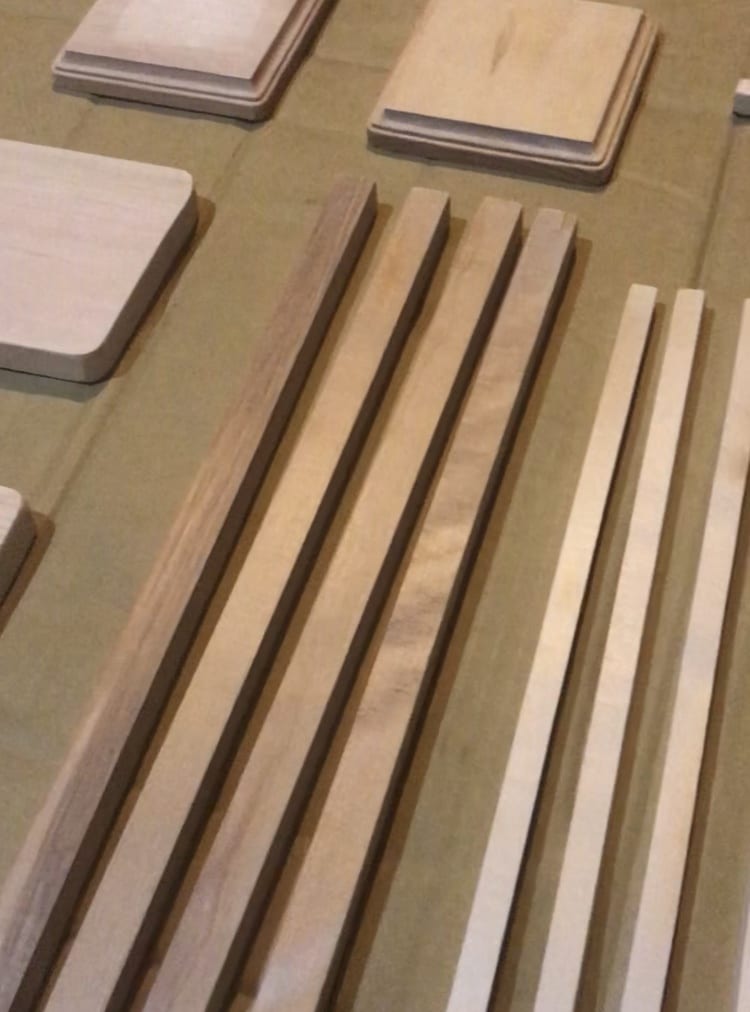
The sizes of the base pieces I cut directly mirrors the size of the unfinished balsa wood squares that I purchased at Hobby Lobby for this project. I also bought my side pieces there and cut them to the lengths I chose.
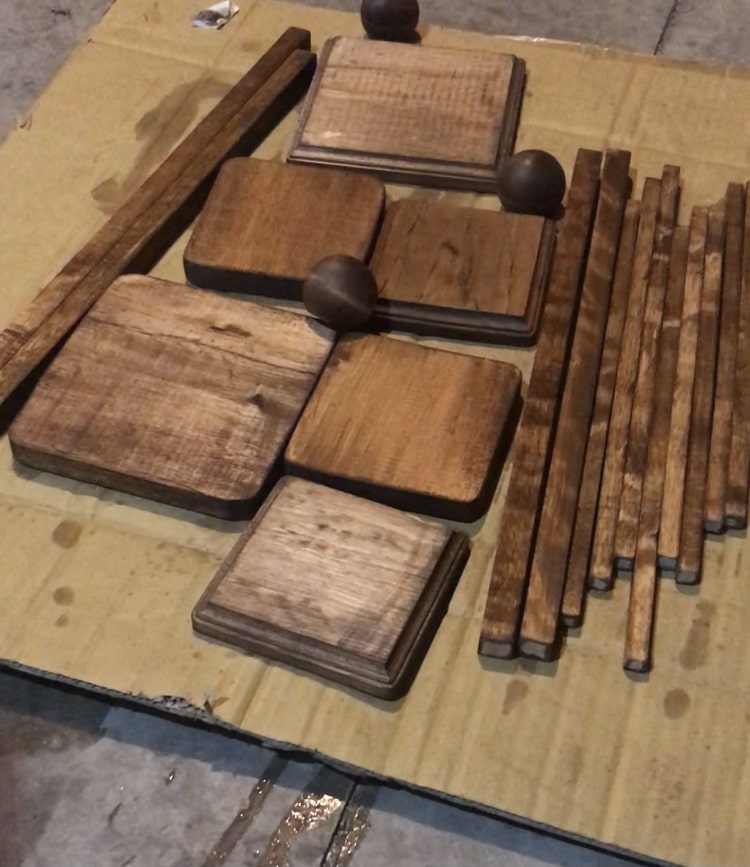
After a quick sand to take off any rough spots, I stained them with Minwax Early American.
Now because I fully intended to paint these and was just staining them so that the underneath color that will end up getting revealed later was a nice tone, I don’t care that the stain came out sort of blotchy. Had I wished to leave them stained, I would have been much more thorough with my sanding, avoided using different types of wood which take stain differently and possibly applied a wood conditioner prior to staining.

Once the stain was dry I used wood glue and finish nails to put the lanterns together. The last thing was to glue the balls knobs to the tops of the lanterns using wood glue.
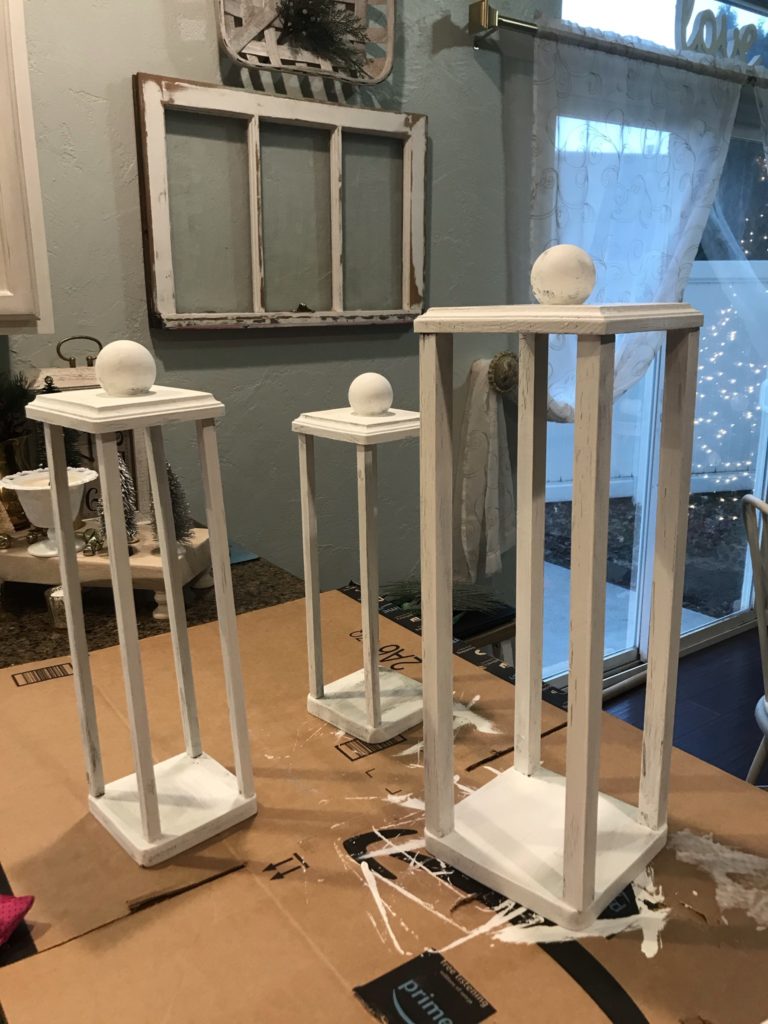
First, I applied a coat of Elmer’s School glue and let that dry for about 10 minutes and then painted them with one coat of homemade chalk paint. Once the glue fully dries it shrinks, creating cracks in the paint layer.
In addition to the crackle, I lightly sanded the edges and any place they would receive the most wear with repeated use.
A final step was to coat them with a spray varnish in a matte finish.

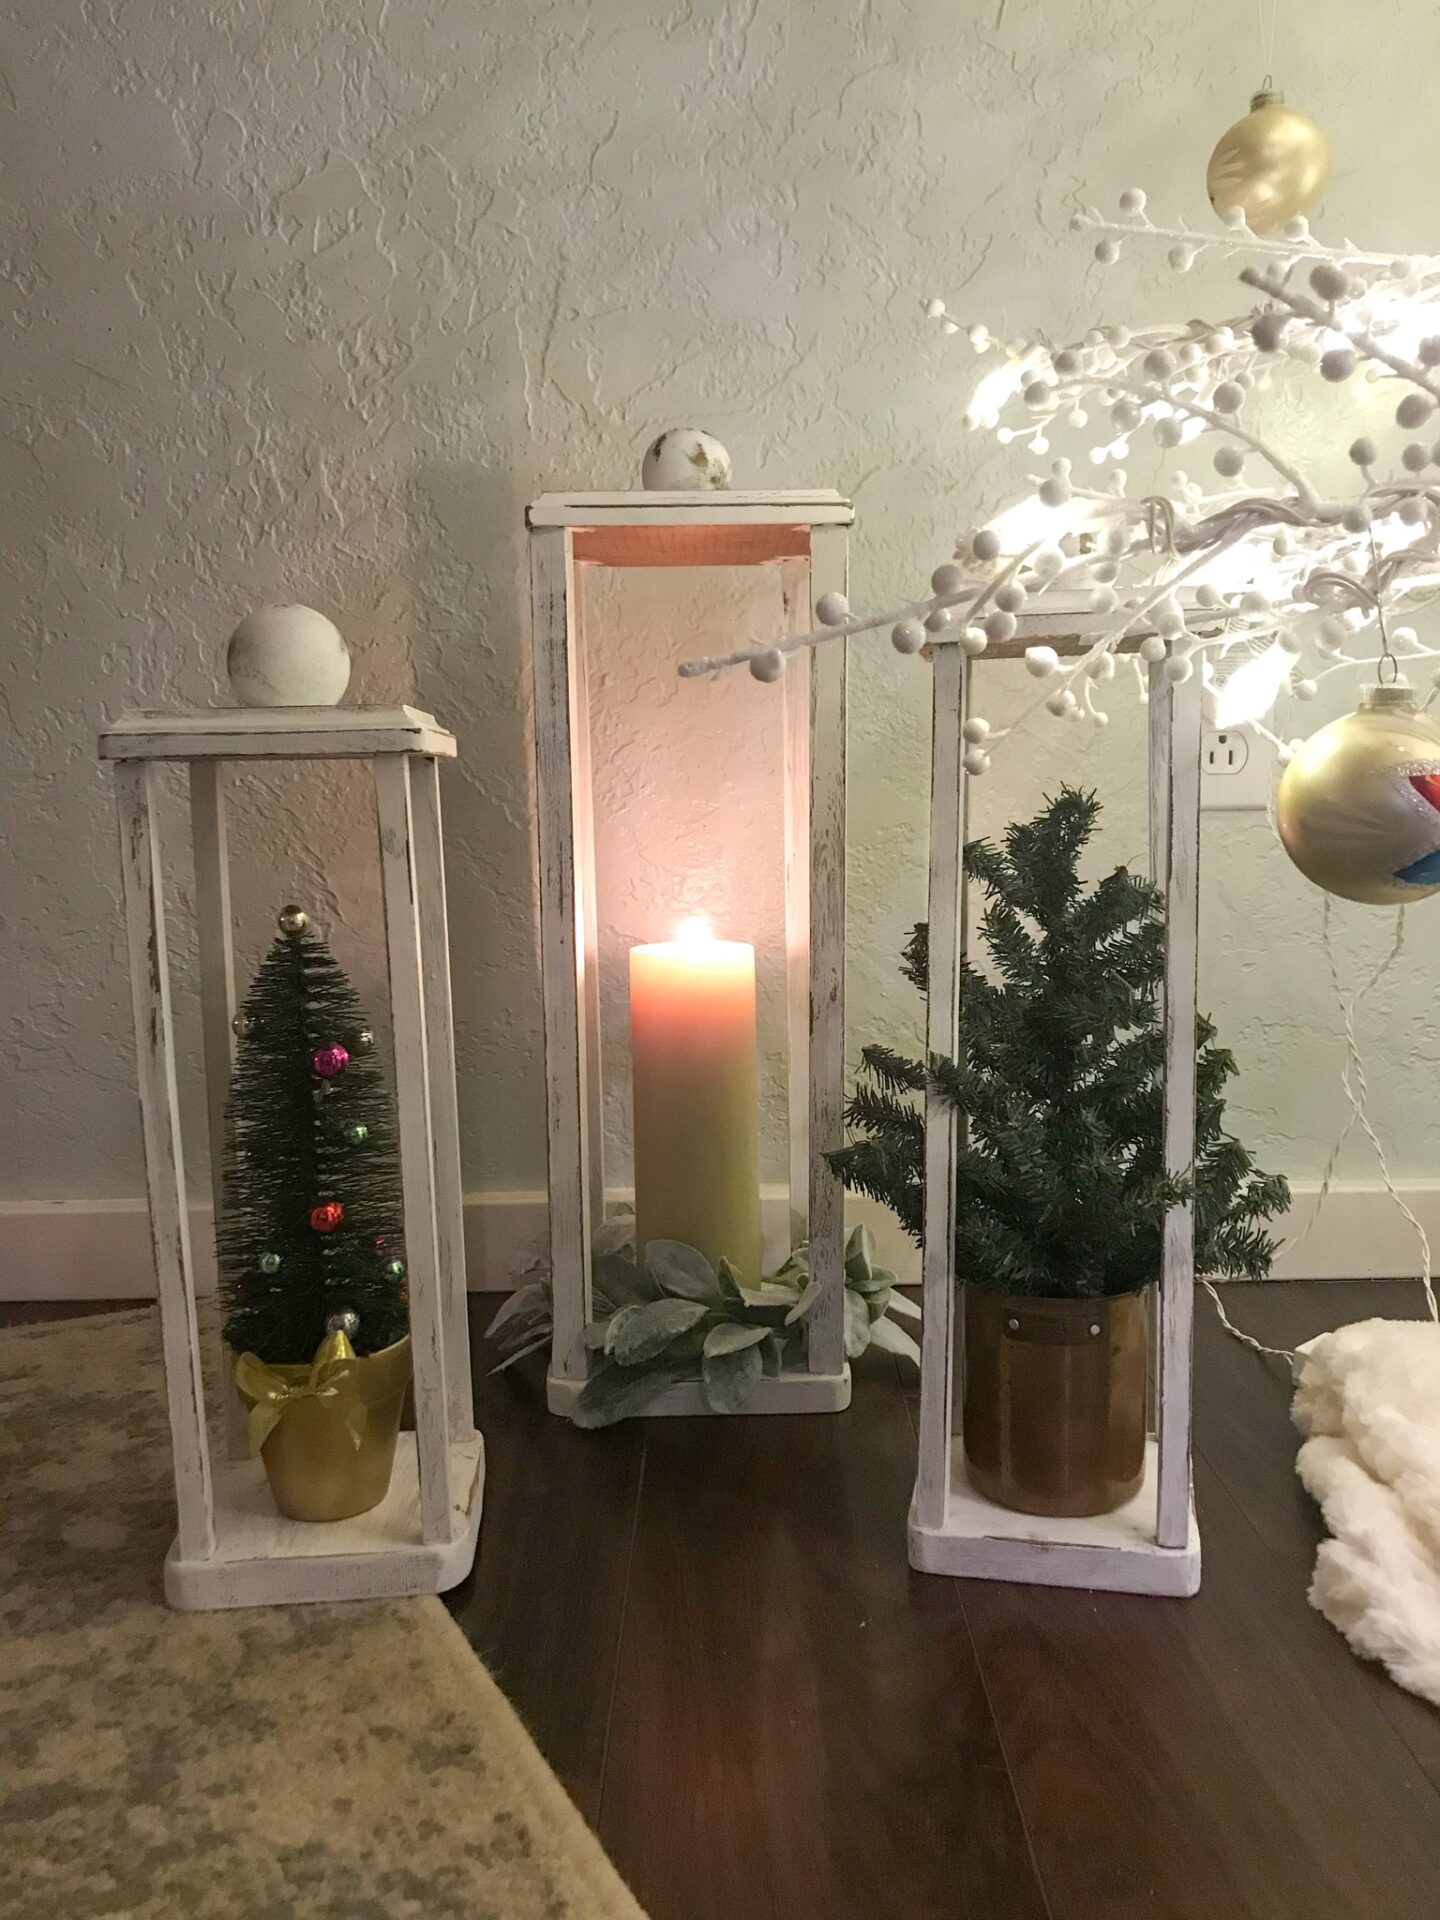
And here are the finished lanterns! I quickly styled them for this photo but I can think of so many different places to use them and ways to style them. I also want to make some super sized ones soon for my front patio!
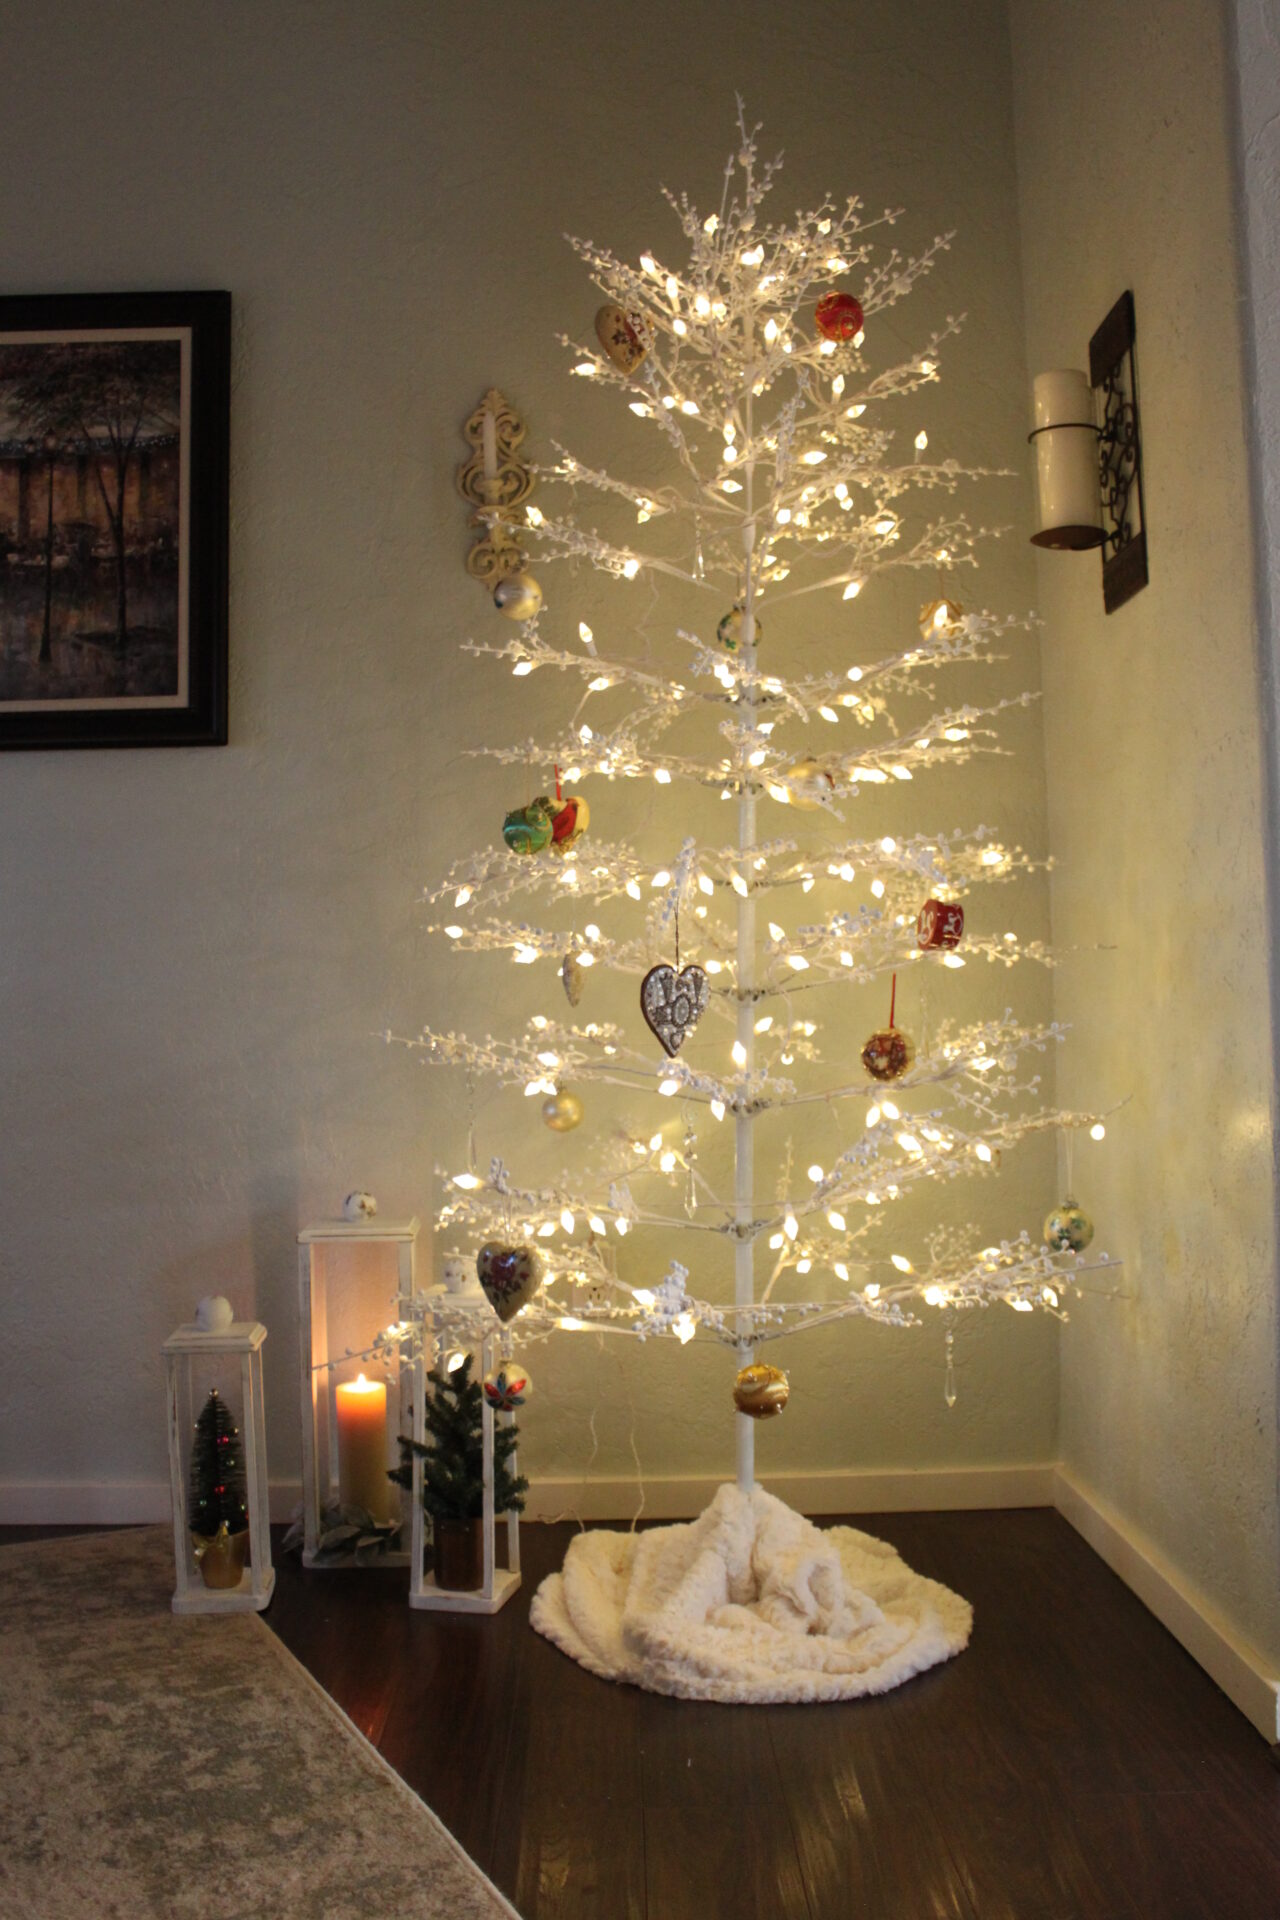
I think they’re the perfect accent for my tree of vintage ornaments in the dining room.
Measurements:
- Two 5″ squares
- One 7″ square
- Four pieces of 3/4″ balsa strips cut into 18″ lengths
- Four pieces of 1/2″ balsa strips cut into 15″ lengths
- Four pieces of 1/2″ balsa strips cut into 13″ lengths
- Two 5″ squares with routed edge (Hobby Lobby, unfinished)
- One 7″ square with routed edge (Hobby Lobby, unfinished)
- Three 2″ ball knobs (flat bottom, Hobby Lobby)
Other DIY Ideas
Here are the DIY’s that my friends shared this week. Just click on any of their photos to see the project on their Instagram account. You can view the stories of how they made them by clicking their Instagram Highlights.

Until next time, sweet friends…

Totally enjoyed this post—I copied your measurements and handed them to hubby—they will be excellent gifts for our kids. Very cute and should be pretty easy with his fully equipped shop…and thanks so much. Loving your blog!
Oh I’m so happy that you found inspiration in that post! If you have any questions at all please don’t hesitate to send me a message. Based on you stating that your husband has a fully equipped shop, however, I’m thinking he won’t need any help from me! lol. Clearly these could be made in any sort of dimensions desired and I plan to make some much larger ones for outside. Thanks for taking the time to stop by and leave me a comment. Happy Thanksgiving!
Regards,
Tara