

This site contains affiliate links to products. I may receive compensation for purchases made through these links.

I am so excited to be joining 4 other sweet blogging friends in a Thrift Challenge Blog Hop!
Meet my sweet friends and their blogs. Each of us worked our magic on a thrift store, yard sale, or someone’s trashed item to make it a treasure for our home for $10 or less. Just click on their name below and I will take you to their blogs.
Terrie – Decorate and More With Tip
Emily – Le Cultivateur
Nicole – To Build a Happy Nest
Elizabeta – Instagram profile
For my challenge I took a wingback chair I got a couple years ago and I deconstructed it! No I’m not kidding….I had picked up this old wingback chair from a local thrift store planning to completely reupholster it. That was about 2 years ago! My excuse is that I kept looking for fabric to reupholster it and never found anything I liked for a price that I could live with. If you’ve read any of my blog posts you know I’m all about making something amazing at very little cost!
When we decided to do this challenge I knew this was the perfect time to get this chair done once and for all. Recently I’ve seen a number of people with deconstructed furniture in their homes and I thought perhaps I would give it a try.


This is what I started with. I’ve taken furniture apart before and reupholstered it again but I was in for a surprise on this one!

What I discovered was that this chair was built to withstand any natural disaster known to man! I’ve never taken apart a piece of furniture that was made to last like this one! The chair makers clearly intended for the fabric to rot off this and never be replaced! However, beneath the fabric and padding was BURLAP! Score!
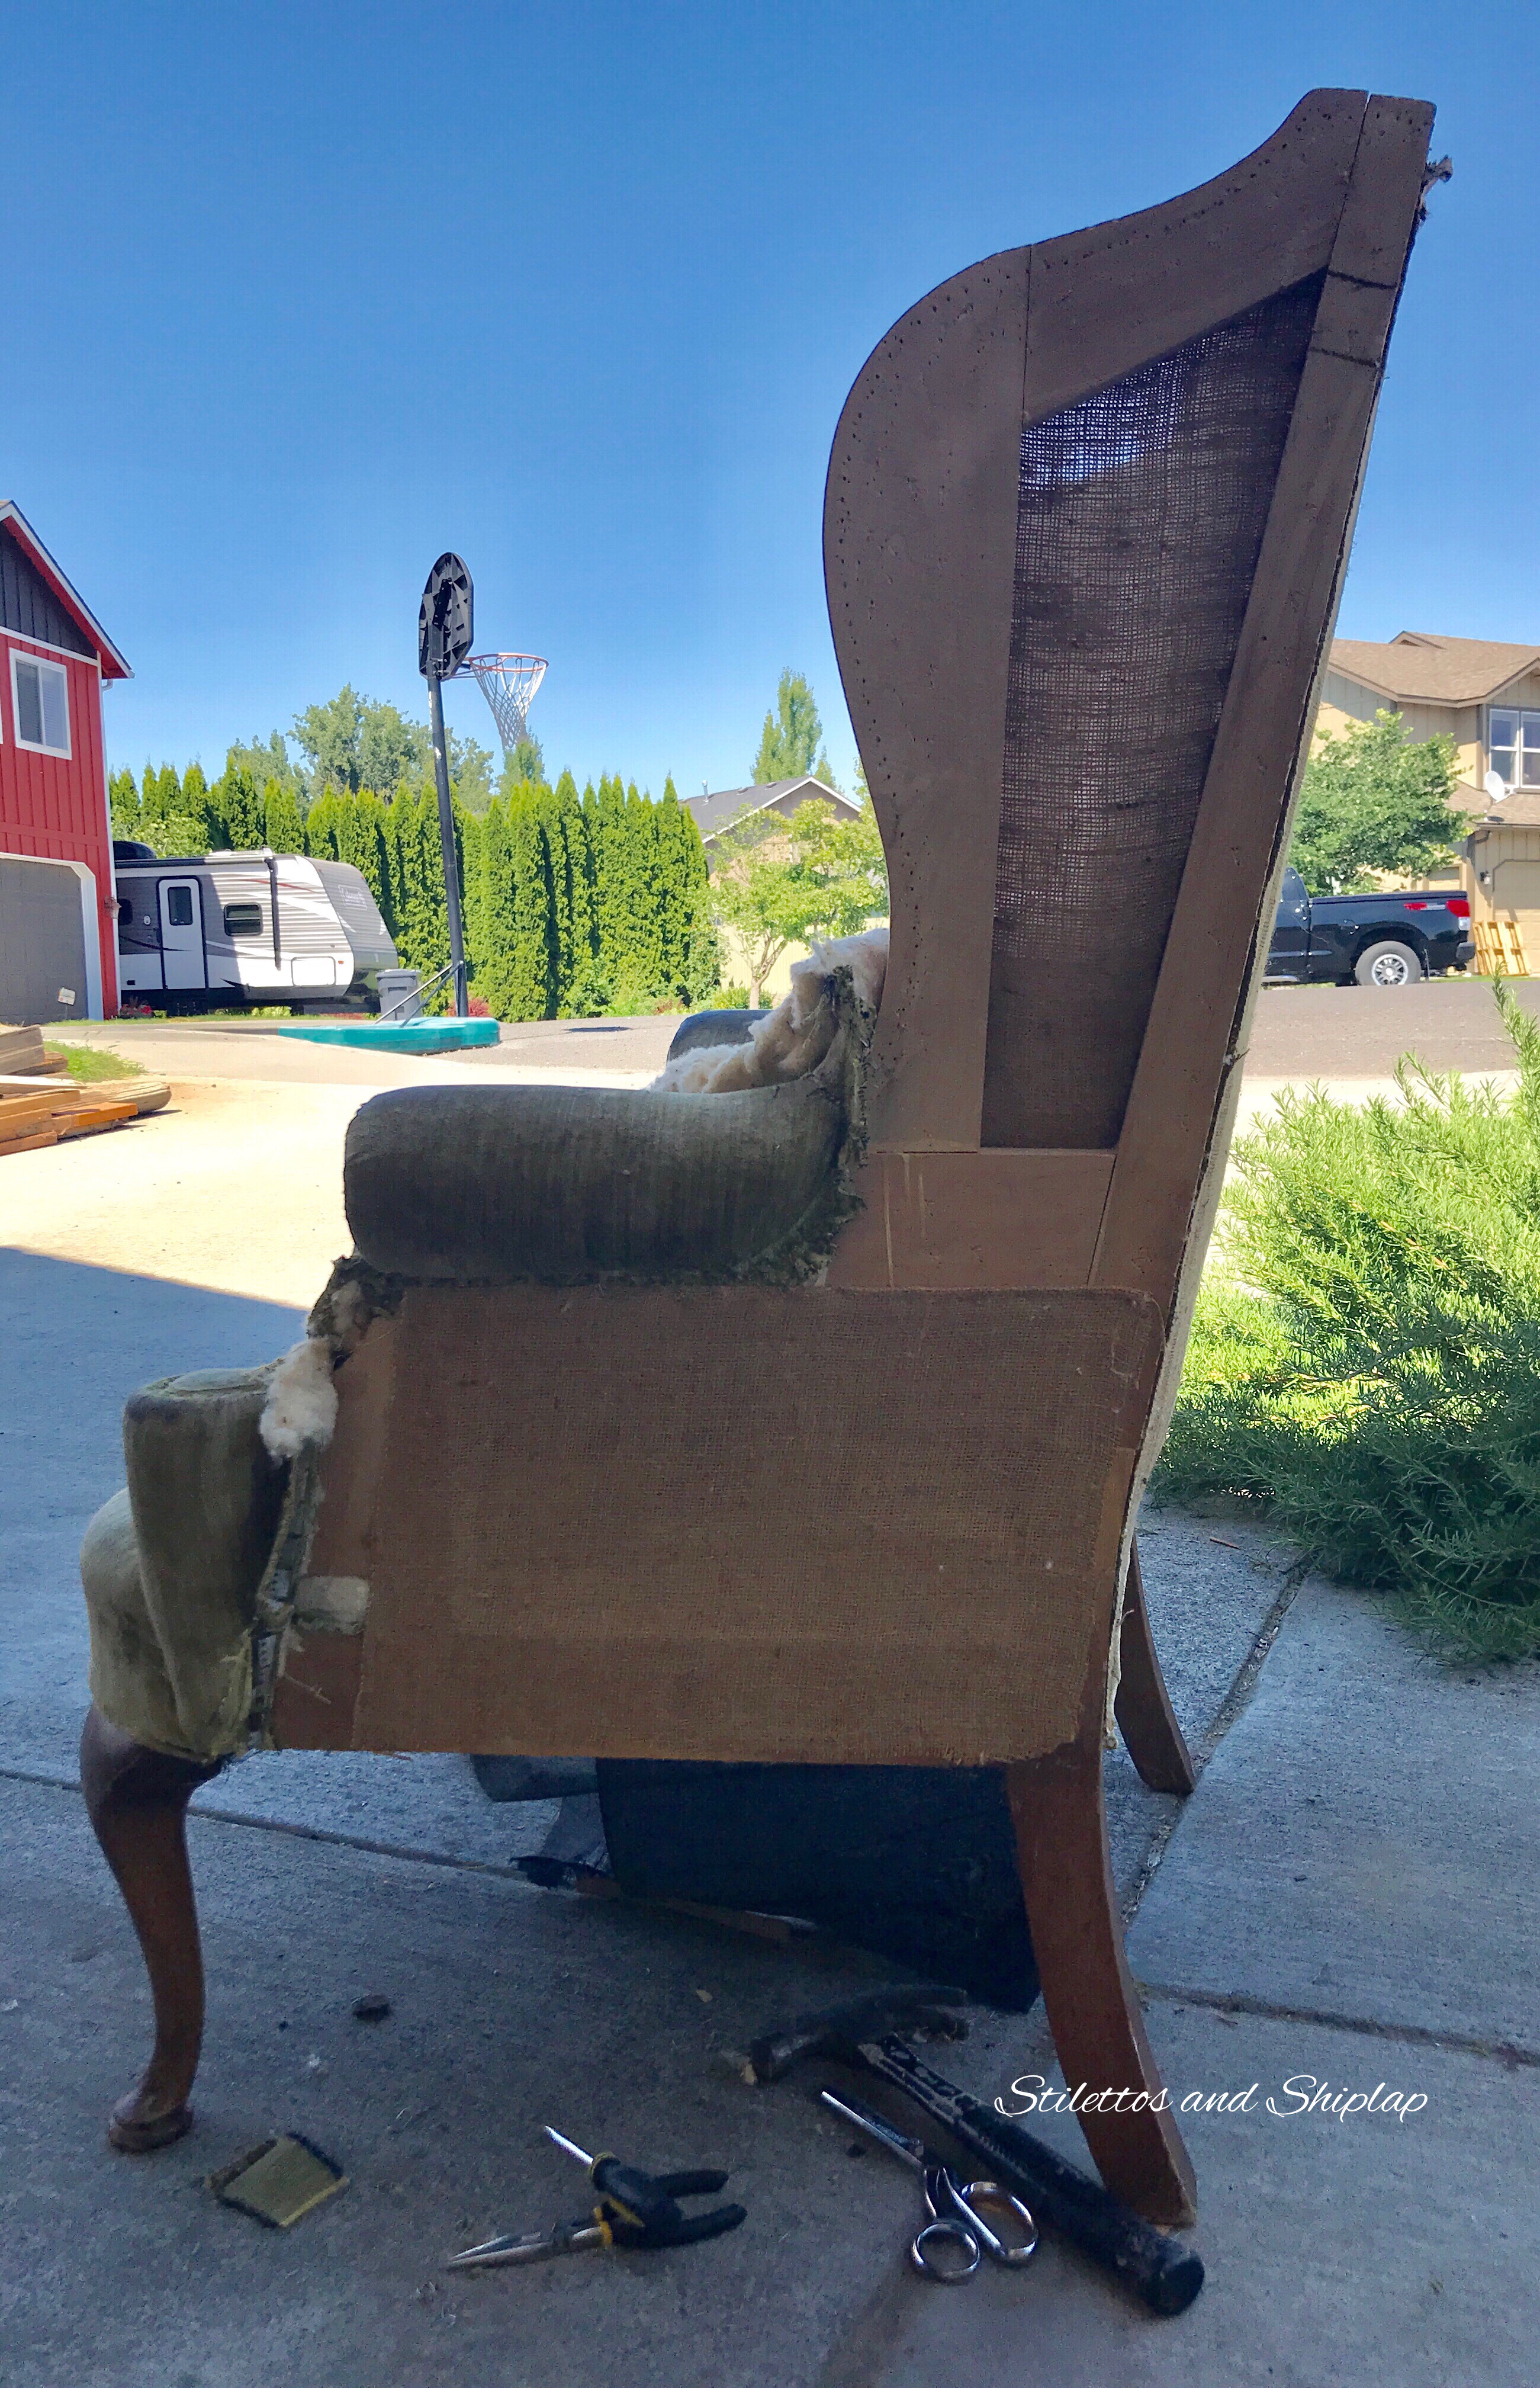
After what seemed like forever and several billion upholstery staples later, I found that the entire chair had burlap reinforcing the upholstered areas! I left most of it on but did remove a few pieces to showcase the wood frame.

I decided to completely take apart the armrest areas in the hopes that I could leave it bare wood but based on how it was built, that wasn’t the best idea. Oh well! You never know until you try.

I used stainable wood filler to fill most of the staple holes but left any distressed bit or other markings in the wood just as it was.

I originally planned to weather the exposed wood by staining it with a vinegar and steel wool mix but discovered I was out of steel wool and I didn’t have the time to go get some. Plan B! I sanded down all the exposed wood, removing any of the previous stain and varnish and smoothing out any filled areas. Then I stained it lightly, applying the stain with a rag. Once the stain was dry I lightly sanded it to distress it a little and make it less “perfect”. I finished with a good coat of wax. I chose wax because I like the finish it leaves for something like this. It’s smooth to touch and protects the piece but it leaves an almost matte finish which looks more natural on something rustic.

Next I rebuilt some armrests with a coordinating fabric I had laying around. I put a little quilt batting in to soften the hard edges and pad it slightly and I secured the fabric with upholstery tacks.
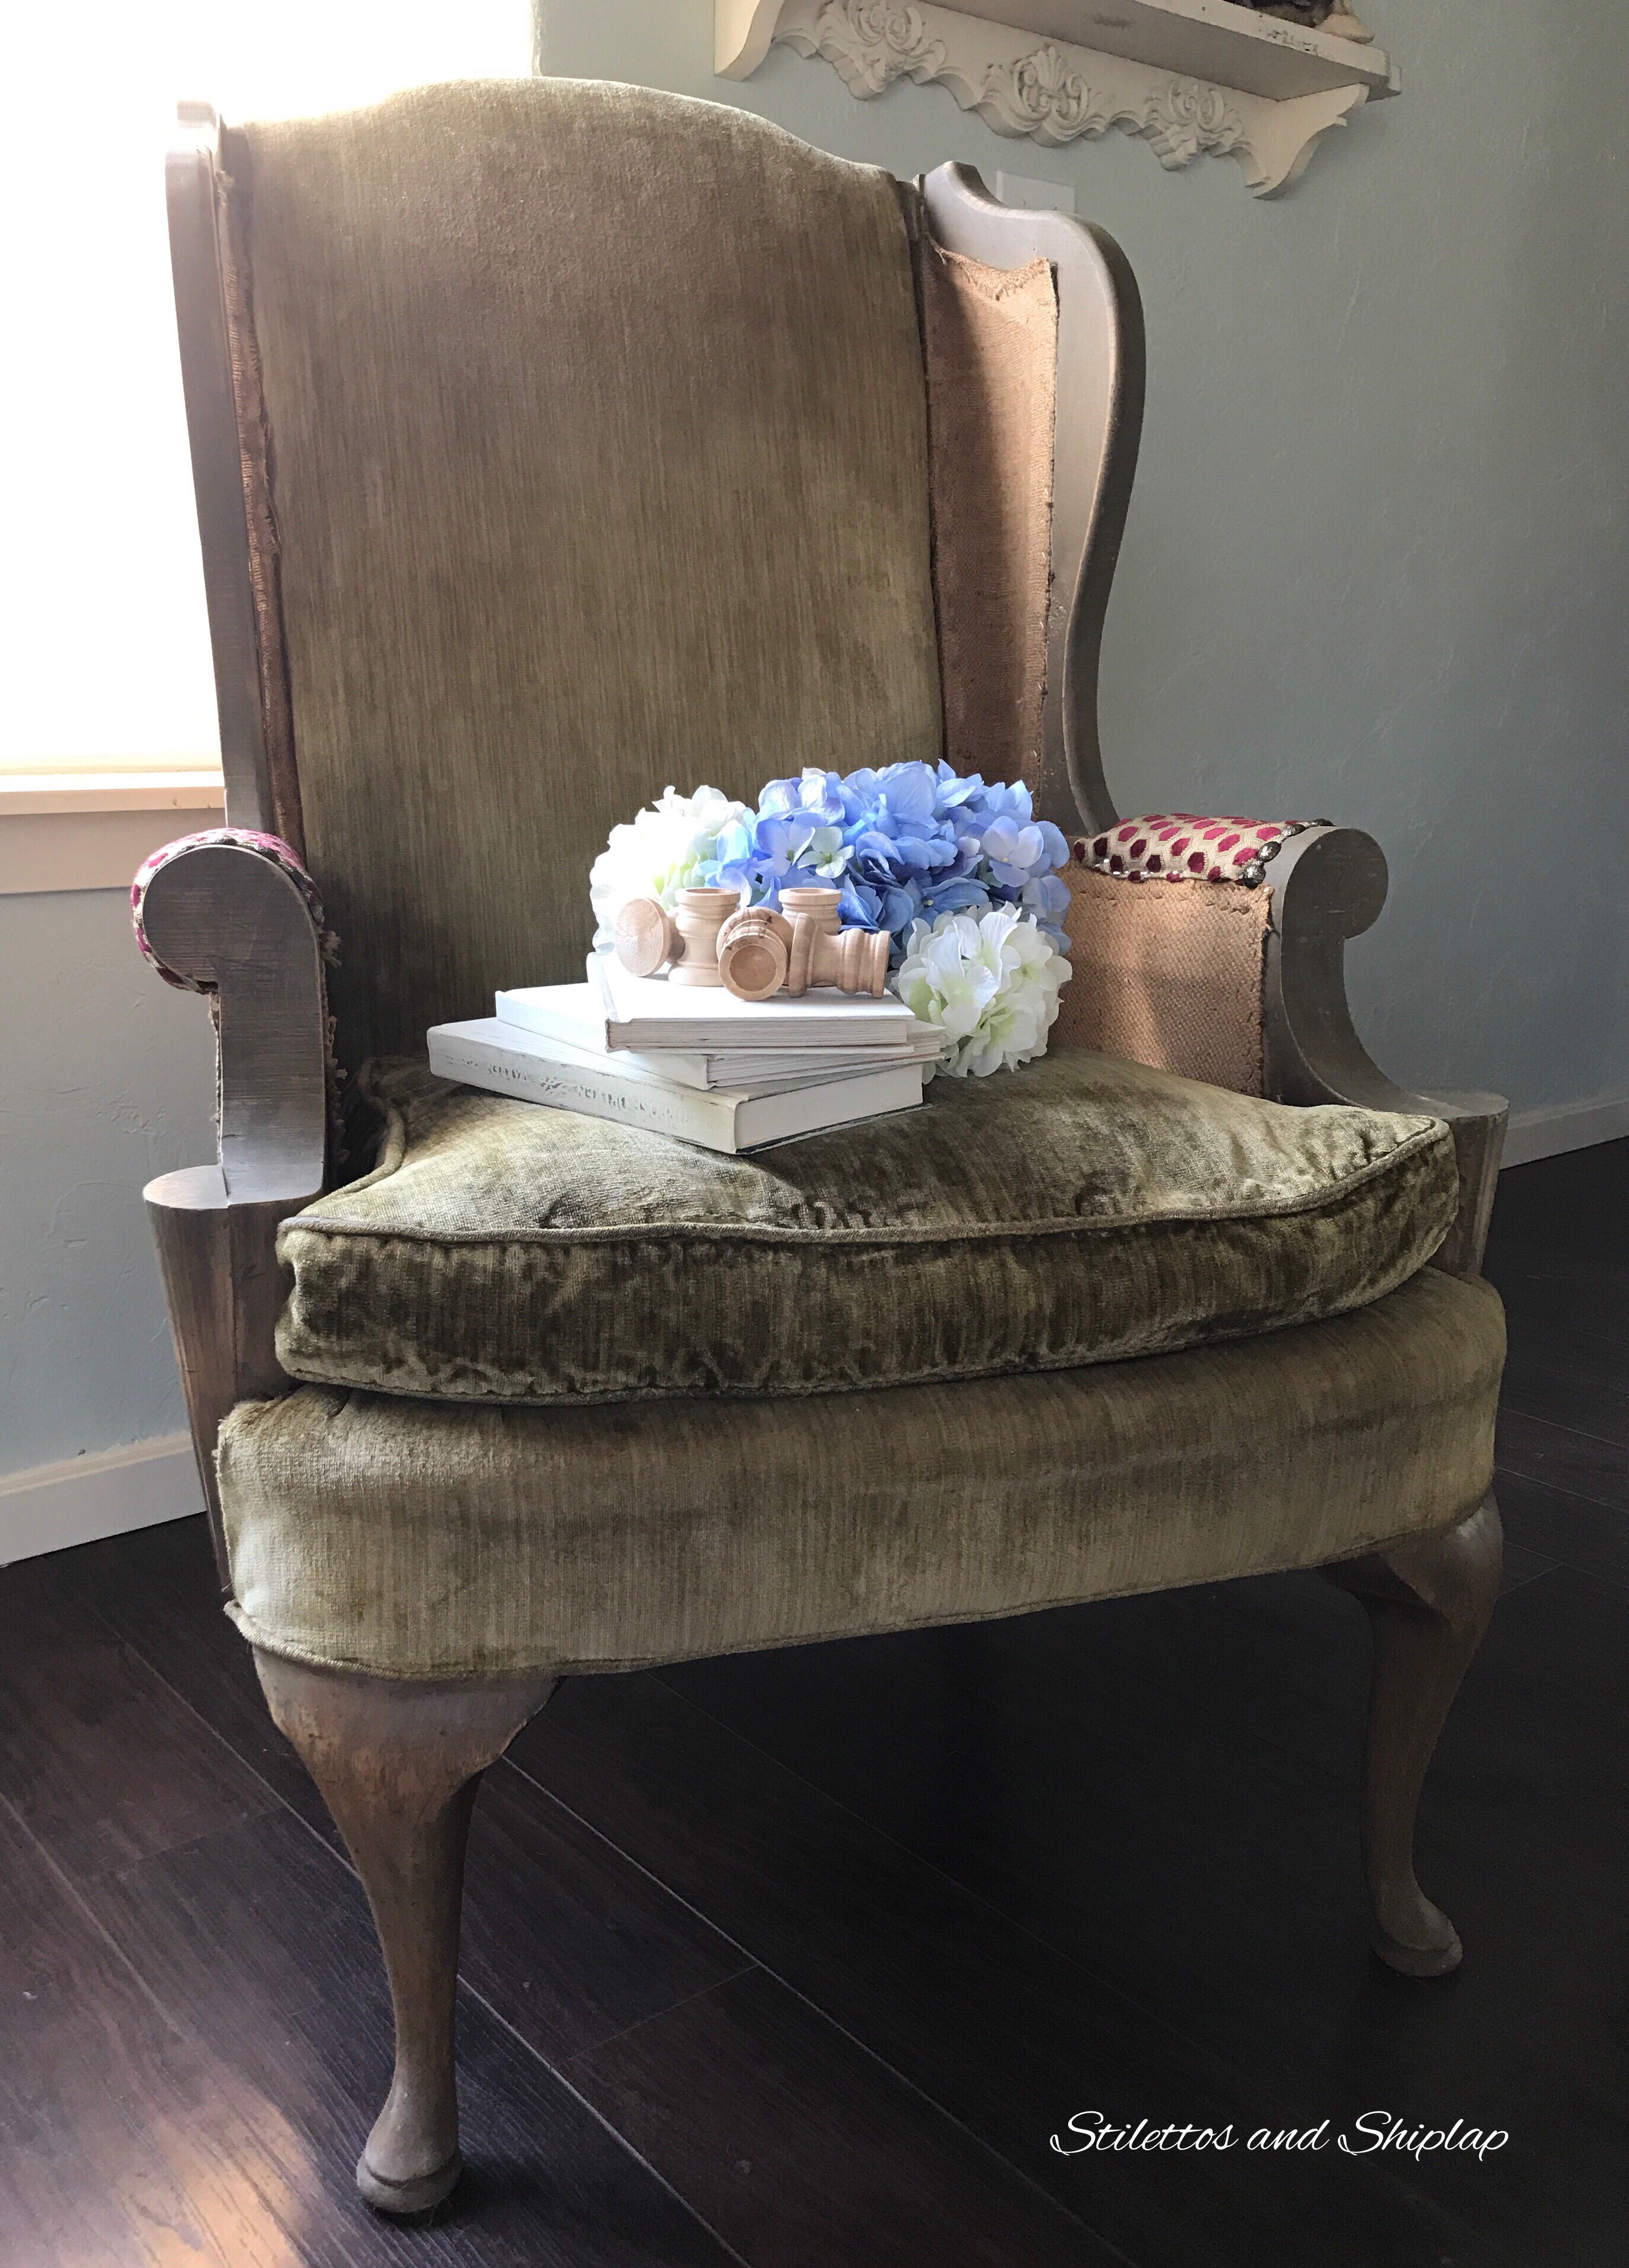
Here is my finished Thrift Challenge piece! I’m happy with how it turned out. Since I had all the supplies on hand that I used, with the exception of the upholstery tacks, I ended up spending only $2 in supplies in addition to my $10 thrifted chair!

Thanks for stopping by! Please click on the links below to check out the amazing transformations of all the other challenge pieces!
Terrie – Decorate and More With Tip
Emily – Le Cultivateur
Nicole – To Build a Happy Nest
Elizabeta – Instagram profile
If you have any questions or have a diy challenge you’d like to see us do, please comment below.
Please feel free to pin my projects to Pinterest. I’d love for you to join me on Pinterest. Instagram or here on my blog.
Enjoy!

That chair is so pretty and you did an amazing job. I think you found a gem for the price. That chair is built sturdy. Love your blog!
Terrie
Thanks, Terrie! I’m so happy to have it done and proudly sitting in my living room ?
Love how your chair turned out!! So cute!
Thank you so much! It was a lot of work but very rewarding
[…] chilly in the mornings and evenings. He is comfy, sitting in style, and toasty as he can be! This deconstructed chair was a recent […]
[…] These pillars have been painted and antiqued, all the trim work has been painted as well as ceilings and walls. Here is my deconstructed chair which you can see the tutorial for here . […]