
I’m sure you’ve heard the expression “the best laid plans of mice and men often go awry”, right? Well that goes double for women.
I often have the greatest ideas but then something happens and the plan doesn’t happen! It’s usually something to do with kids….
That’s what happened with my tablescape that I planned to share with y’all today. I had it all worked out in my head and most of it designed. One major detail is that it involved moss. Sheets of moss and loose moss. Something I didn’t have on hand at present.
No worries – a quick trip to the store would soon solve that.
But that quick trip didn’t happen.
Not even a slow one happened.
My kids enjoyed a wonderful game and movie night with friends instead which was a last minute decision to entertain them while I was in a meeting. I could have pulled them away and gone to the store but one look into those hopeful faces and I was a goner. Who needs moss anyways?
Let me show you what I do when plan A, B, C and D didn’t work out.

Believe it or not this isn’t me hauling out all my faux flowers to make my dining room look like a natural disaster.
No indeed! This, ladies and gentlemen, is inspiration about to strike!
First I sorted through all my faux flowers and natural elements and pulled out everything that made me feel spring-ish. Yes, that’s a word. At least in my vocabulary.

Now for a centerpiece I usually start with some sort of container, riser, tray – anything that can contain the majority of the centerpiece and which can easily be removed should I need to clear the center of the table quickly. Say to serve a large meal or something. My dining room gets used daily….it’s not a special occasions only space.
Next I put the large, focal pieces into place.
Now sometimes I have a specific piece in mind that I want my centerpiece created around. I would put that into place first.
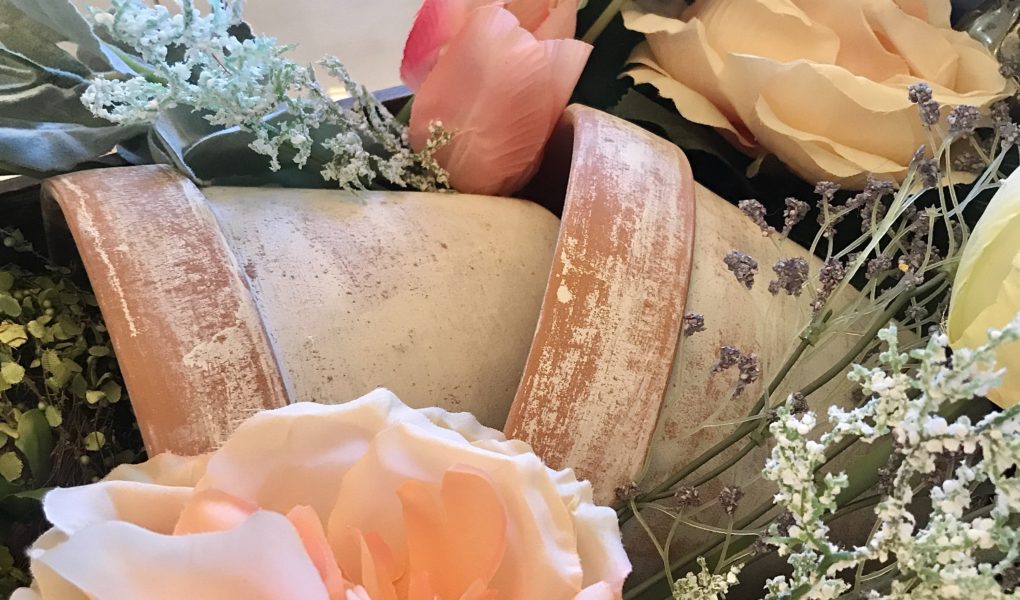
For example, when I created a similar centerpiece last spring, my main focal point was the cute little bird and nest I’d found. My secondary focal point was a pile of weathered clay pots so obviously I put these things into place first.
Or when I created my romantic tablescape a couple weeks ago, my focal point – or at least the piece that inspired the whole vibe I went for – was my stunning french candelabra!

For this centerpiece I chose my vintage silver candlesticks and some clay pots to be my focal points. This was something that wasn’t planned in advance but actually came about as I surveyed the items I’d set out originally that made me feel spring vibes.

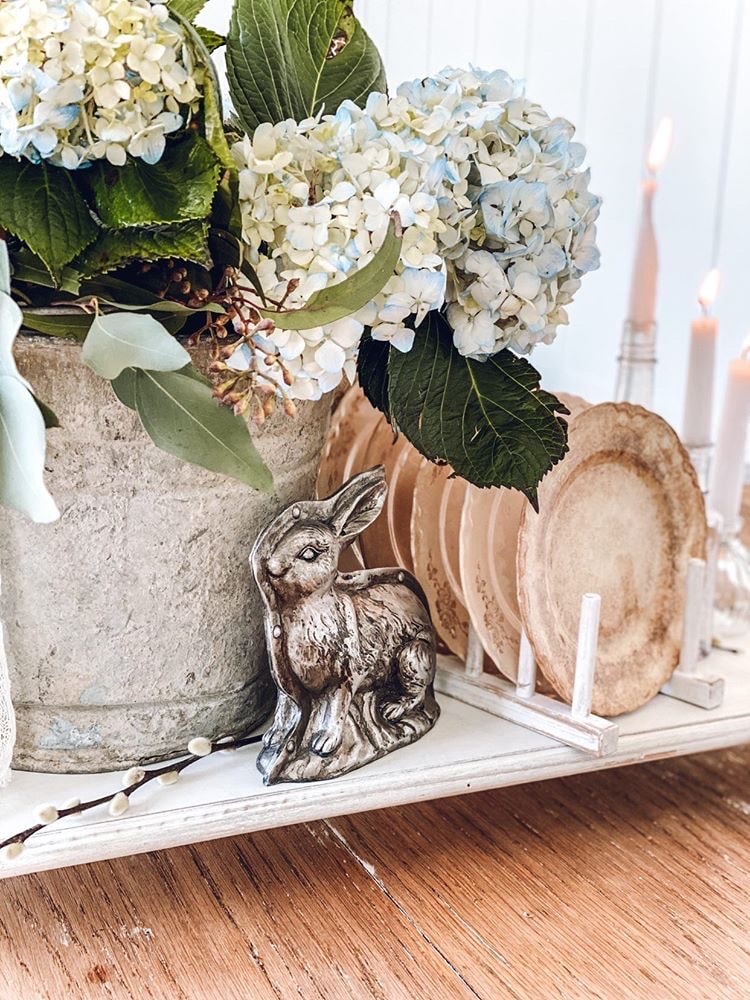
I added some boxwood and moss type decor balls and a nest as some filler piece and again because they make me think of spring.

Next comes the larger florals, things like tulips are always great choices for spring. I could have done nothing but tulips but at the moment I didn’t have enough since I have put tulips in various other places around my home and remember – this centerpiece is sans shopping trip!

The last thing I add in terms of florals are the wispy bits. The heather, the little yellow flowers, the dusty miller. These help to give the centerpiece an airy, light look which to me is more spring-ish (yes, we are going with that again) than the heavier looking blooms.

My very last step was to add some tiny eggs to the nest and stand back and make any final adjustments needed. Like removing the little price sticker that was stuck to some of my flowers.

Once the centerpiece was complete I set it in the middle of my table (you know, CENTER) and cleared away any of the other bits and pieces I hadn’t ended up using.

Time to create the place settings. Again I chose things that felt light and gave me spring feels.
Like the color of these charger plates and the light and airy wreath form.

Voila! The finished product. Not bad for a last minute, “use what I had” tablescape.

Candles are the perfect addition to any tablescape. You don’t have to turn the lights out and make it a candlelight dinner. Even in the middle of a sunny day, like when I took these photos, candles add atmosphere and ambiance. Small, low tealights and candles like I used here, are my favorites for spreading around in abundance since they are nearly impossible to tip over – a good thing to keep in mind.

Adding these yellow rosebuds was an afterthought because they make me think of my late sister. Yellow roses were her favorite flower.


All that’s left now is to stand back and admire the beautiful blooms and then maybe start planning a menu for a lovely dinner that is fit for this table.


I love the splash of spring this brings to my neutral dining room.

Thank you for stopping by and spending some time with me today. I sure hope seeing this process step-by-step has inspired you to create a tablescape too, using what you have on hand. Sometimes plan Z isn’t so bad!
If you would like some more inspiration, a little birdie told me that my sweet friend Emily, from Le Cultivateur, has also created a spring inspired tablescape today. Just click on the photo below to see her amazing work!
Until next time, sweet friends…

Amazing! Looks so pretty and definitely springy! 😊
Thanks Jodi! It definitely brightens up the dining room
Tara your table looks so lovely. Love the items you used on it.
Thank you, Terrie
This is beautiful!! I love every detail!! The centerpiece turned out perfect, with so many lovely details! Seriously love this so much!!!
Thanks sweet Emily! You’re the best
So pretty Tara! I love the place settings! Those floral plates are lovely!
Thank you so much, Dori. Those plates were from Walmart last spring. Now sure if they still have them or not as I haven’t checked.
Oh my word! I am obsessed with how this turned out! So so pretty!
You are just so sweet! I’m flattered.
[…] I’ve often incorporated clay pots into my tablescapes around this time of year. Last year I made one featuring pots and a bird and nest, this year I combined pots and flowers. […]
[…] Easy spring tablescape […]