
I have this problem. I’ve shared my covered front patio before but I might not have told you all the details. Like the fact that after all these years I basically don’t use it nearly to it’s full potential and don’t really style it because every morning I have to move most of what is on it when the sprinklers come on.
Like how I can’t even leave the rugs at my front door while the sprinklers are on because they will get wet. Like how I have to lift them every night and if I don’t I have to hang my rugs to dry for a couple days.
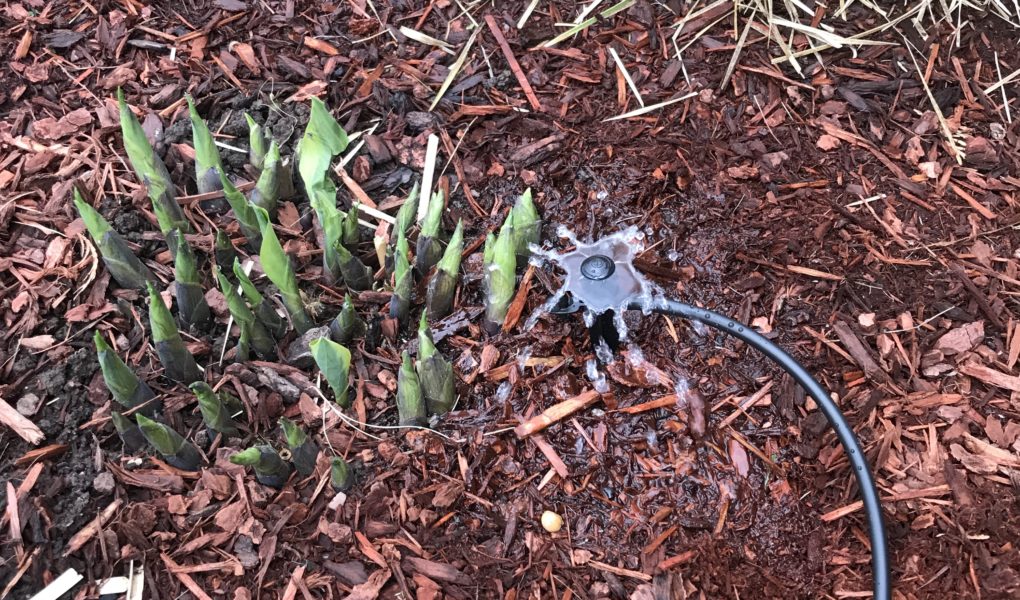
Like how I have standing water on my concrete patio every day after the sprinklers and I have to sweep it off and even then it takes the whole day to dry off because it’s always shaded.
Like how this issue is a result of the patio not having been poured properly and how it has these low spots and it slants towards my house rather than away from my house like it is supposed to. Also how in order to permanently solve this issue I would have to have the existing concrete completely removed and a new floor poured because there isn’t enough space to put a thick enough top coat to fix it.
Now that you know all this, my current project will make so much more sense.
Since I can’t afford to remove and pour a new concrete patio, I had to come up with something much more cost effective and something I could do myself. Okay let’s not kid anyone….I will try nearly anything as a DIY!
So my solution was – removing all the sprinklers that were in the flowerbed right along the edge of this concrete patio. I have to run that zone every day because there are sprinklers that water my lawn on the same zone as the ones in my front flowerbed (don’t get me started on how poorly my underground sprinkler system was installed). Even though the sprinklers were set properly to water only the flowerbed, there is always overspray and that is what was creating the water hazard where my front patio should be.
So I dug up each sprinkler down to where it connected to the sprinkler line and I capped each one off so none of the ones along the patio would come on anymore.
And then the fun began.

First I laid out my main water line. I purchased this 1/2″ tubing and all the other materials I used from Home Depot. This is not a sponsored post.

I wound the tubing in and out, back and forth through my flowerbed and used the plastic stakes (shown) to hold it where I wanted it. They clip over the tubing and then you push them down into the soil. I placed these approximately every 2-3′ and in a couple spots I placed 2 close together but from opposite sides to really hold it securely. These plastic stakes come 10 to a bag or you can purchase individual ones.
I used a special pipe cutter (for pvc lines and tubing) that works on a ratcheting system to cut my 1/2″ line and it went through like a hot knife in butter.
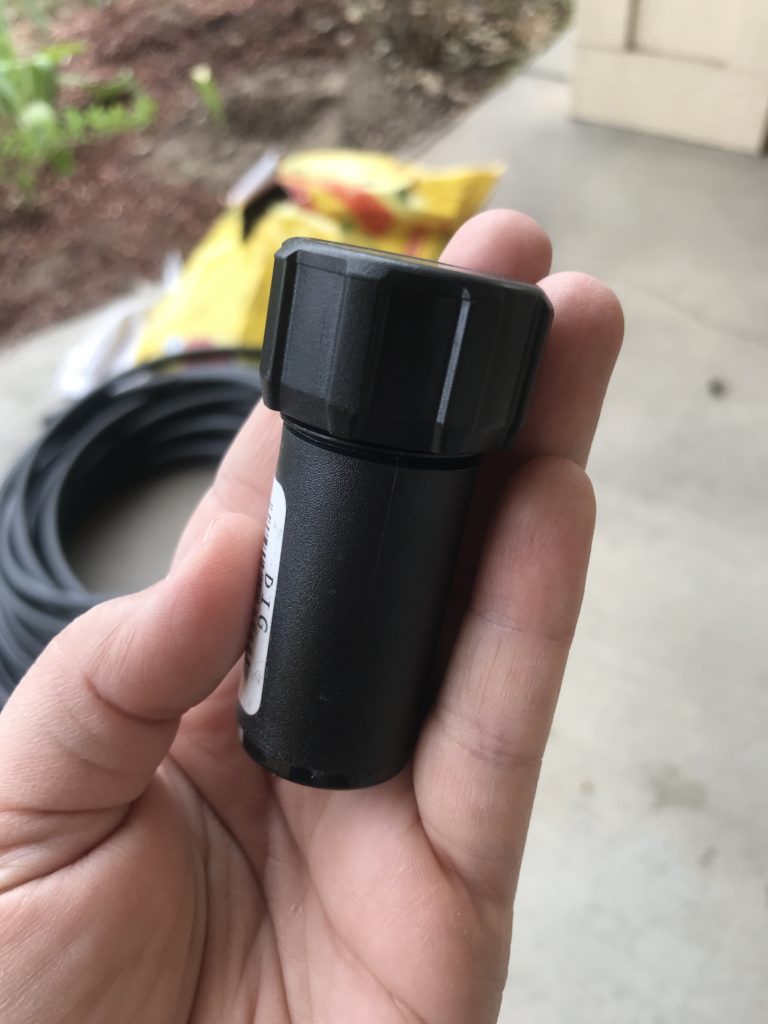
Now there are several options for the ends of your line. One option (the one I chose) is to cap off the line with one of the above fittings. The end can be unscrewed to open the line or attach a hose etc.
You can tie your drip system into your existing underground sprinkler system if you wish by using one of the available fittings to connect it to your sprinkler line. I chose NOT to do this because, as I mentioned before, I have a couple other sprinklers on this same zone which I can’t have running as frequently or as long as I need this flowerbed to be run. If my sprinkler system had ONLY the flowerbed on a separate zone I would definitely have tied into it so that it would run automatically.

Another option would be one of these fittings which allows you to connect a garden hose to one end.
I also chose NOT to use this method because my outside faucet is right in the MIDDLE of my flowerbeds, somewhere about dead center of the front of my house. (I know! Don’t get me started!)
I decided I didn’t want a garden hose running from the front faucet, all the way along my front patio including past my front door, to the end of the flowerbed where it could connect to my drip line. If you have a faucet in a normal location, near the end of your house or near the end of your drip line, this would be a great option.

I capped off both ends using one of these fittings. You simply push them onto the 1/2″ tubing. It takes quite a lot of muscle to push them on all the way but I was able to do it myself without any help so it IS possible.

In the middle of my line, directly across from where my faucet is located on my house, I installed one of these T fittings. You simply cut the 1/2 tubing where you want to put the fitting, and push it onto the tubing just like the end cap. Again, it takes a LOT of muscle to get this fully onto the tubing. It ever so slightly compresses the tubing to stay tight and not allow any leaks. Then I connected my garden hose to this fitting.

Next comes the drip lines themselves. Those are the individual lines that run to each and every section or plant. Now there are SO many options for this and you really need to decide what works best for you BEFORE you run the 1/4″ tubing to each plant because it determines the length of the tubing.
For instance, there are tiny sprinklers that you can attach which water in a small circle around them.
There are little stakes with tiny holes all the way down the length of them that you insert into the ground and it waters below ground. This is a great option for a plant that likes to have it’s roots kept wet but not the leaves.
There are little buttons that simply drip.
The list goes on and on. For myself I chose tiny little sprinklers, called adjustable bubblers.

These came in a pack of 5, they push into the ground right near the plant and you can adjust the water flow by turning the little domed cap on the top either clockwise or counter-clockwise. You can’t ever make these particular ones spray a very large radius but that is just what I wanted since I don’t want to chance getting water on my patio!

You install these sprinklers to the 1/4″ tubing by once again pushing it on. I found the best way was to hold the tubing securely in one hand using pliers, and then using my other hand I twisted the sprinkler back and forth pushing it all the way onto the tubing. It worked quite easily.
Once you have the sprinkler on the tubing you can push it into the ground where you want it to be and cut the tubing to the length that you need to reach the 1/2″ main line. I used wire cutters to cut my 1/4″ tubing and it worked very well.

Now I’m someone who likes to find creative ways to accomplish tasks without spending a bunch of money on tools that only have 1 function. There are times that you need to spend the money though and this is one of those times.
I originally tried to do this next step WITHOUT the above tool and I ended up going back to Home Depot and buying it after all. Trust me – this tool is life-changing for the next step. You need it. It cost me just shy of $17 and was worth every penny.
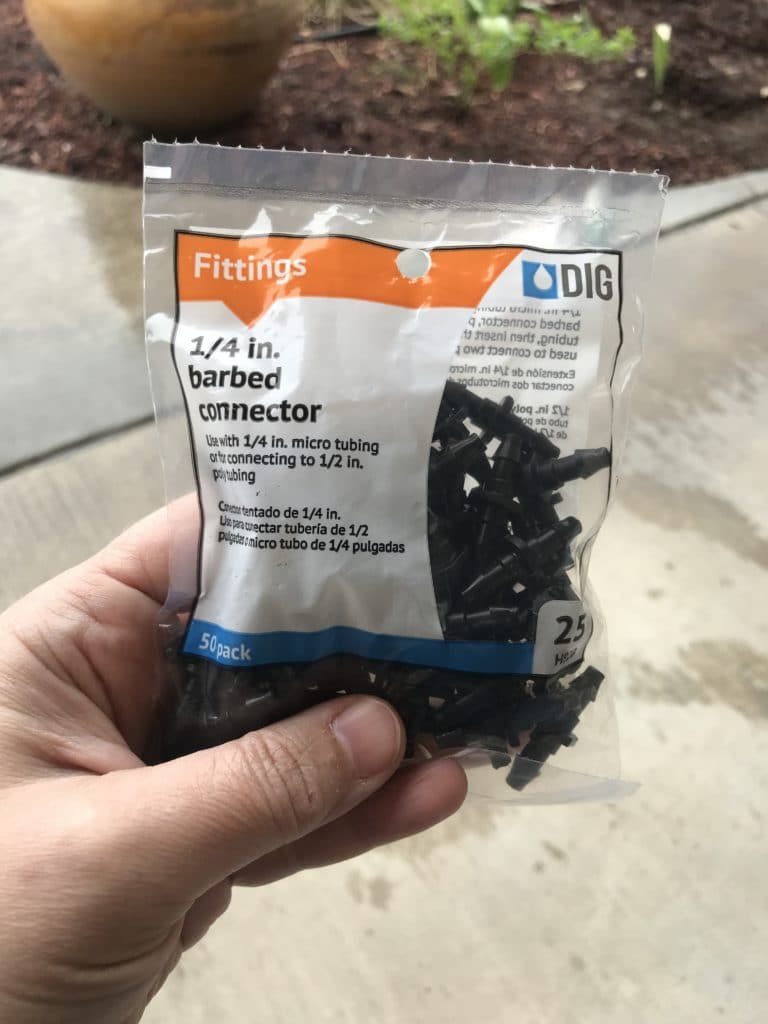
These barbed connectors have to be installed in the end of every line of 1/4″ tubing that goes to each plant. That’s a lot. That’s why you need the tool. Because the connectors are so tiny it’s nearly impossible to get a decent hold on it to insert it into the tubing with the force that you need to use. The tool does it in about 5 seconds.
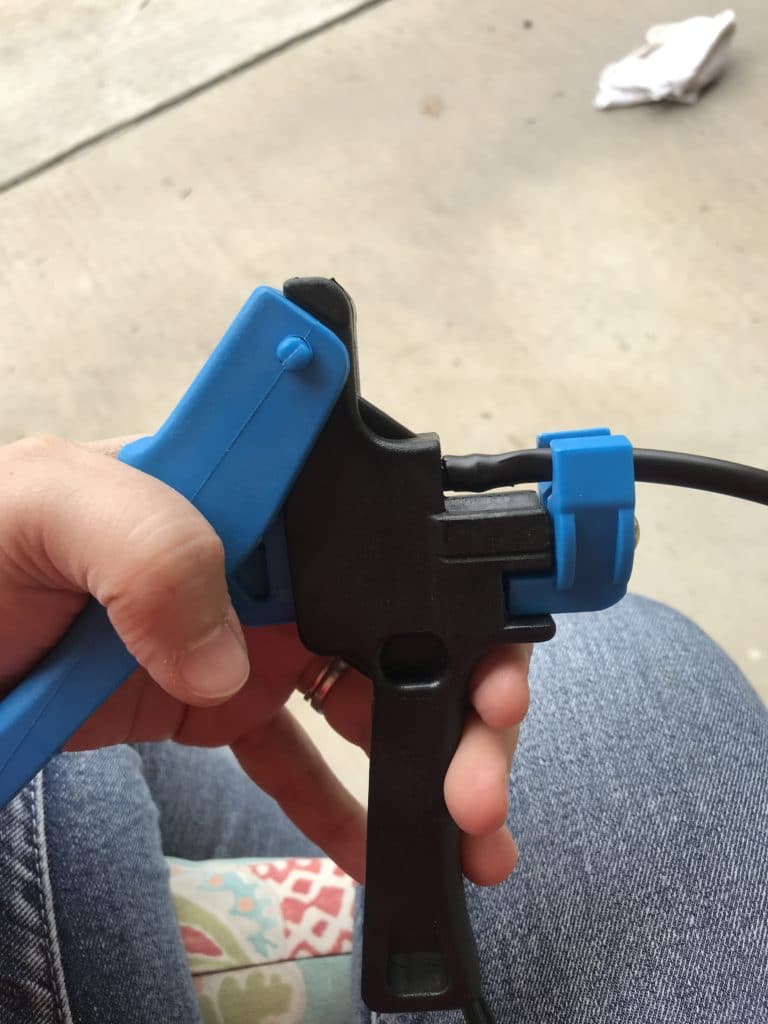
The barbed connector goes into a little hole on the left, the tubing slides through the slot on the right and you line it up with the connector. You squeeze the handle and voila! Done.
Next you will need one of these little tools to make the holes in the 1/2″ line to insert the other end of the barbed connectors that hook your sprinkler lines to your main water line.
There are a variety of different tools for this that are more expensive and fancier but this is the most basic and cheapest one and it worked perfectly. It only cost a couple dollars, if I remember correctly.
You simply decide where you need the 1/4″ tube connected and grip the tool firmly in your hand, place it against the 1/2″ tubing and push, twisting as you push. With little effort it pokes a perfectly sized hole in the 1/2″ tubing.
Take your pre-measured 1/4″ tubing with the barbed connector in the end of it, place the connector against the hole and push. It will make a little snap when it pops through the hole.
Then push your sprinkler down into the ground where it needs to be for your plant.

Once you have all your lines installed so that each plant or each section of your flower garden is covered (depending on the watering connector you chose) you can turn the water on and test the system making adjustments as needed.

For example, when I turned the water on, most of the sprinklers were completely closed meaning no water came out at all. I had to adjust each little sprinkler cap to the spray coverage I wanted. These particular ones don’t spray very far from the head itself so you have to place them quite close to the plant. This was what I wanted for this area however, to prevent any water from reaching the concrete.

Now there are drip irrigation kits that you can purchase, typically around $50, that contain all the basics for a drip system install. I chose NOT to go that route because I knew based on what was included in the kit that I would not have nearly what I needed and would need to still add pieces here and there. When I priced out some of the individual components I felt I could do better on the price point.
In the end I spent roughly $50 for this entire system which covers every bit of my front flowerbed running the full length of the front of my house. Every single perennial in that bed has it’s own sprinkler and some of the really large ones have 2 – one on either side.
When I add some annuals to the flowerbed, as I do each year, I will add a few more lines and a different style of watering head to cover those sections. I still have enough of the 1/2″ tubing left to do several other small flowerbeds or another really large one, if I want to. I also have enough 1/4″ tubing so that I don’t think I will need to buy any more no matter how many more lines I might add to this front system or any other drip systems I put in this particular yard.
I recommend buying the components individually rather than the kit since it contains parts you likely won’t end up using and it won’t contain nearly enough of things you will need a lot of, such as the barbed connectors.
If you have any questions that weren’t answered in this post, please feel free to send me an email or drop the questions in the comments section and I will try to answer everything.
Next I plan to cover the line with mulch since I add new mulch to this flowerbed every spring anyways.
Have a wonderful day and thanks so much for stopping by and checking out my new drip irrigation system!
Until next time….

[…] years. I solved this issue by removing the flowerbed sprinklers along the porch and installing a drip irrigation system instead. This solved the issue of the water except in major rainstorms which can’t be […]
[…] sprinklers in the front flowerbed that were watering my patio floor more than anything and I put in drip irrigation […]