
Remember when I showed you what my fireplace “feature” wall looked like before? Well today I’m sharing part 1 of the makeover that it is currently in the midst of. This will take several blog posts to get it all in because it’s a pretty major project.
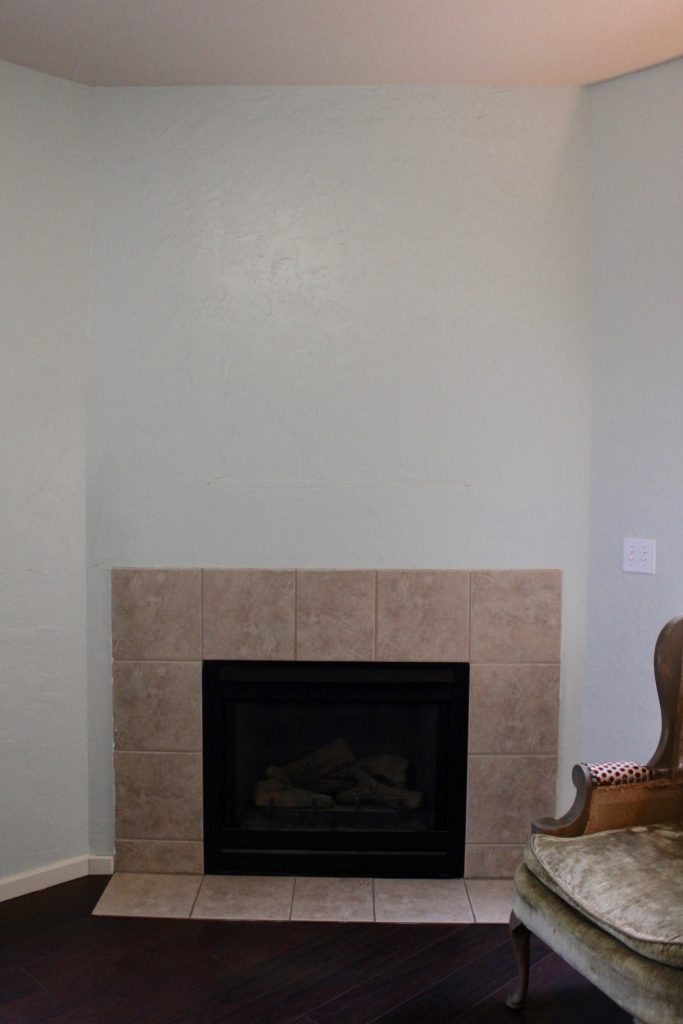
This is what you call a feature! Do you love it? Do you want it for your very own? I thought so! When I moved in here, this was as you see it but the wall above the fireplace had a huge gaping hole for one of those enormous televisions that we used to have. Remember those? It was such a big and deep hole that you really couldn’t do anything cute with it. It didn’t take me long to box it in and drywall right over that sucker! I did put a sheet of plywood behind the drywall so that I never had to worry about where the studs are when I want to hang something heavy. It sat here just like this ever since. Okay I did have a shelf above the fireplace that I styled like a mantle. But otherwise, this is all she wrote.
Until now!
My plans were originally to put stacked stone all the way up this entire wall and a floating beam style mantle. Gorgeous, right? Uh huh. And pricey enough that it hasn’t happen yet. Years later.
While contemplating my Christmas decor this year I decided there was no way I could take it any longer! I had to do something about it and if the budget didn’t allow for what I really truly wanted, then my wants would have to change. At least for now.
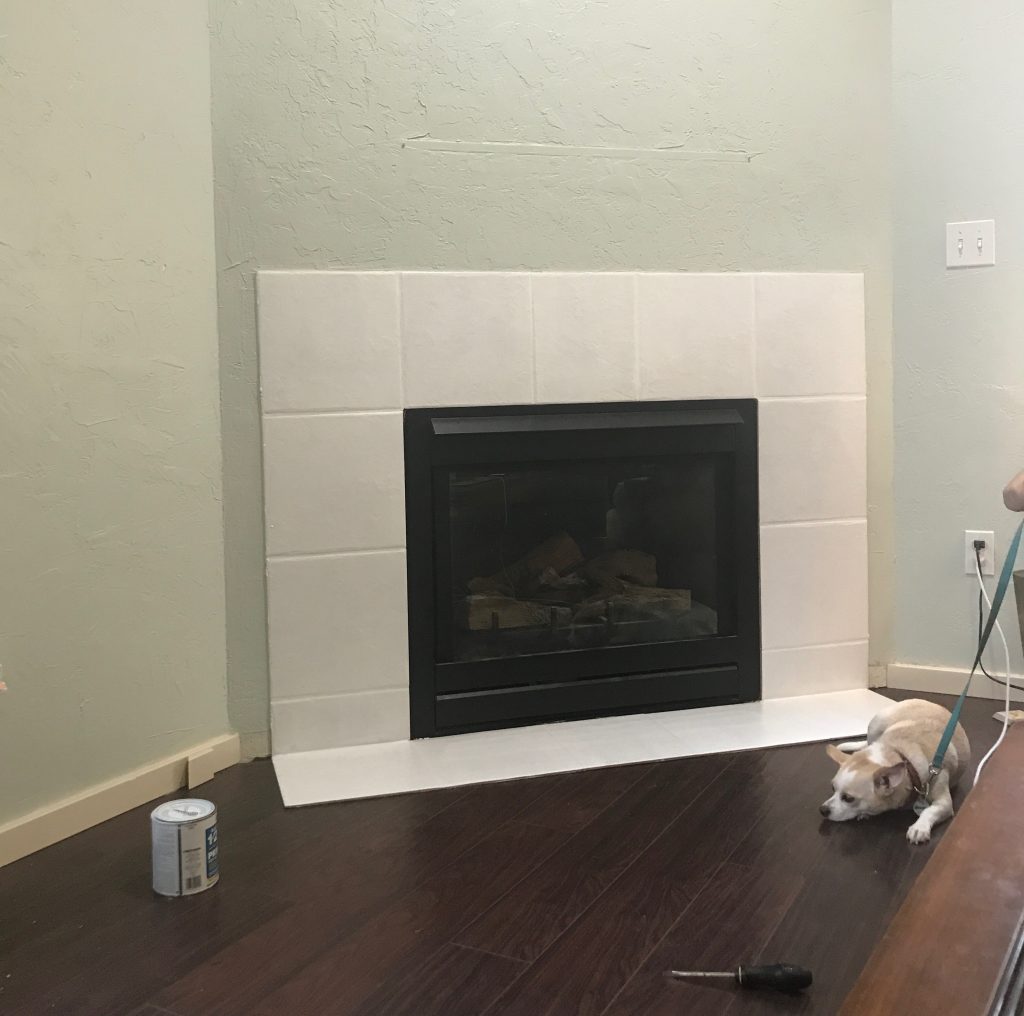
Clearly the cheapest thing to do with the ugly, boring tile, would be to paint it. I used my favorite Zinsser Bullseye 123 Primer to prime over the tiles. I have used this before on many different surfaces that would normally not hold paint well and this stuff is miraculous. If you let it cure really well (like ideally a week) before much use, it will stick to anything. Remember this bookcase? A laminate bookcase that I primed with this amazing stuff, painted and then antiqued…
I’m serious.
I painted 3 coats of Primer just so it would have a good solid base and I turned the fireplace on to heat them up and dry them really well in between. I only did about 2 coats per day even though dry time is stated to be 1 hour for recoat. I applied the primer with a small roller like this.
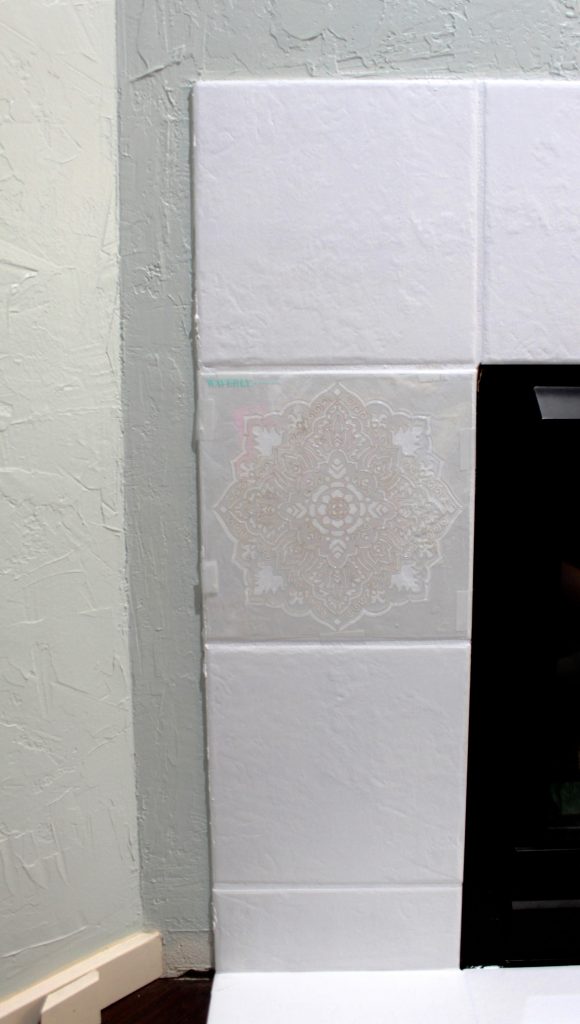
Once the primer was really dry, I got ready to stencil. This is the same stencil I used for the drawer fronts on my nightstands! I don’t like waiting for orders to arrive if I have something on hand that could possibly work….
My original plan was for the stencil to be in a cream color that would end up being very subtle and almost like antique lace. I thought that would work perfectly with this stencil design. I got my paint and tested the first one and it just didn’t show up properly and looked too yellow on the tile. I didn’t want it to be tan or brown so I started messing with my own color. I settled on this sort of brown/gray color. I was mixing it up using Waverly Chalk Paint from Walmart.
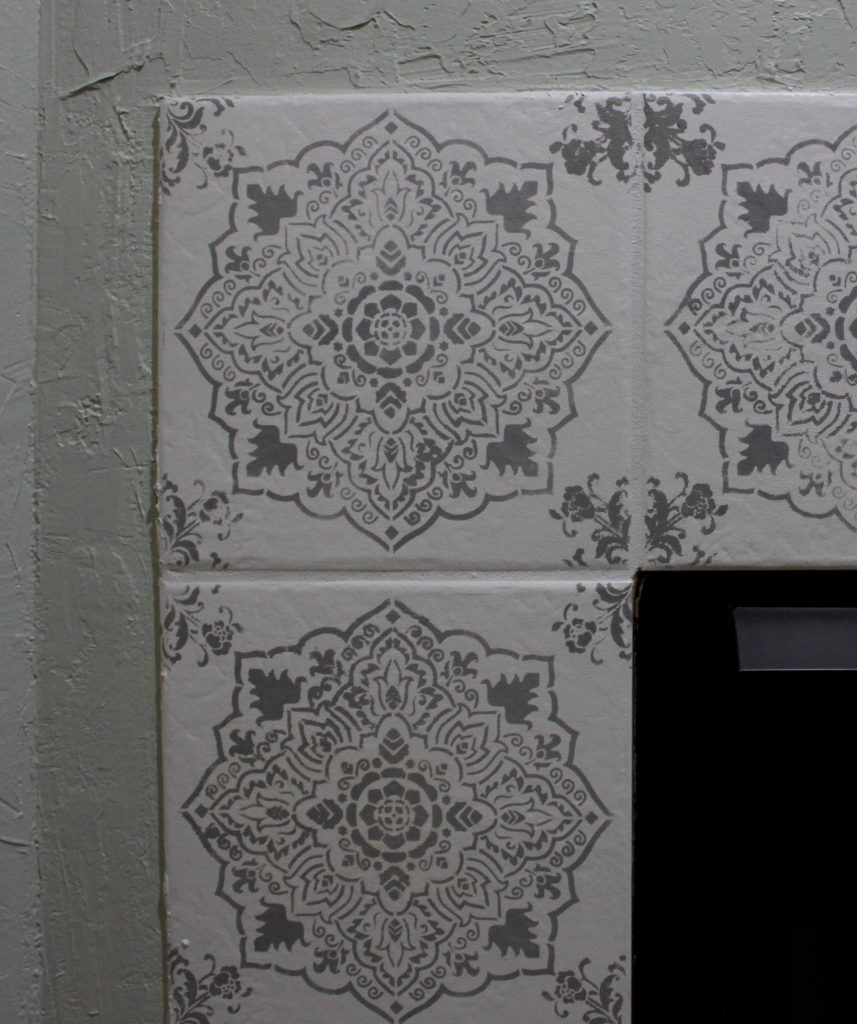
I used a second smaller Waverly stencil I also got from Walmart for the corners of the tiles because there was still too much white surrounding the big stencils and it made the pattern too obvious and not soft enough for what I wanted.
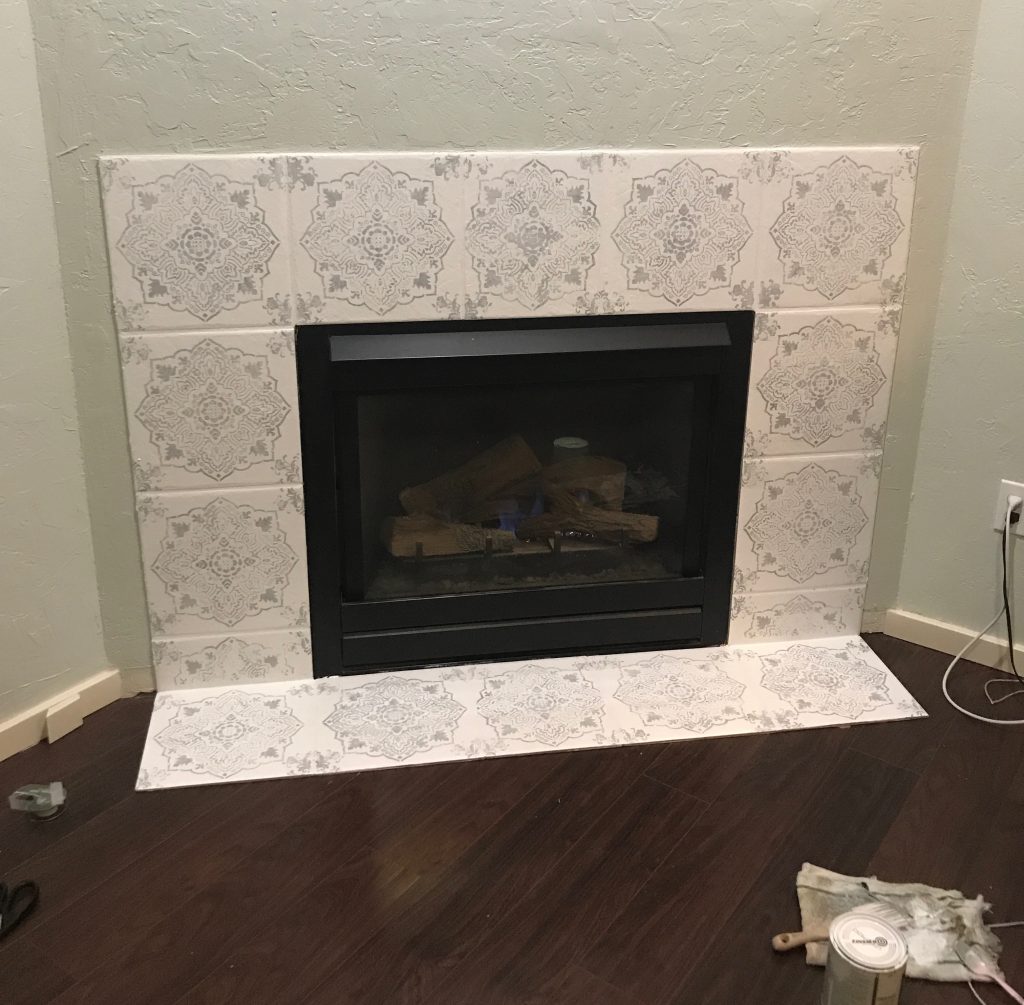
After standing back and looking at it, I decided I wanted it still a little more subtle and old looking. I took white paint and dry brushed it over each of the tiles, especially over the darker bits of the stencil to make it look more hand painted and soften it.
I plan to finish it with a coat of some sort of floor sealer and I will show you what I used when I get it. I have to go to the store for that though so no instant gratification this time!
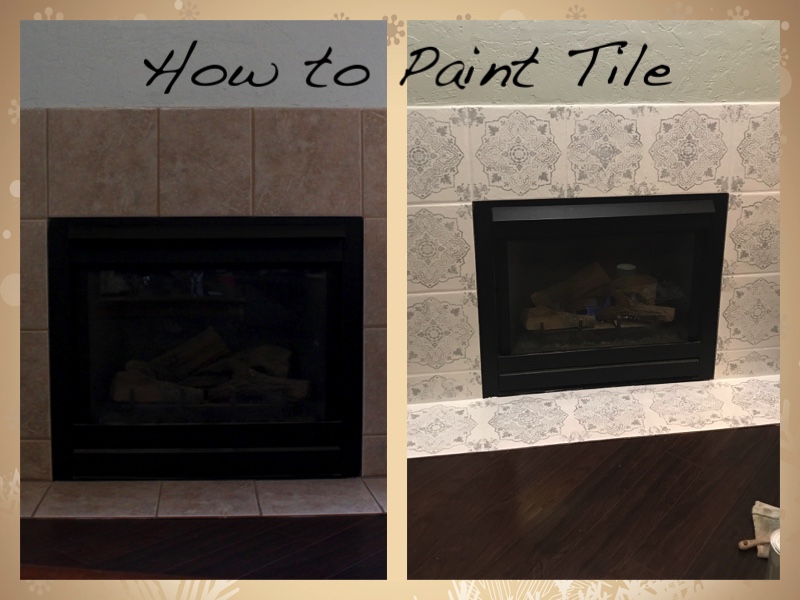
The MR said it made such a difference already and made the entire room so much brighter. He wanted to know why I hadn’t done this years ago! Duh! I was waiting for him to buy me the really expensive stone for the whole wall! 🙂
I will be back soon with the next part of this makeover! Don’t go far!
This site contains affiliate links to products. I may receive compensation for purchases made through these links.

This looks so different already! Awesome job. Clever thinking to do the dry brushing and mix your own color… The sign of a creative mind.
Thanks! I am always improvising, it seems. Glad you like how it is turning out.
Simply painting the tiles made a huge difference. I love the tile and can’t wait until you share step 2 with us. Hurry up I am so excited to see! Great job Tara!
I know! I’m on it! Haha Thanks Terrie.
Tar, this is Sony beautiful! You’re amazing and I bet it’s going to look so pretty with all of your Christmas decor now!
XO Sweet Friend, Good Job!
I’m hoping to start the next step sometime in the next week, perhaps? I can’t wait to show you!
That looks amazing! What a difference! I can’t believe the difference between the before and after!
Happy day friend!
karianne
Thanks so much, KariAnne! I am currently working on the next part of this project and hope to show that reveal very soon! Have a great day, friend.