

I’m excited to share this challenge with you today! Show of hands – who likes a good challenge? I’m raising my hands, if you didn’t see….challenges make everything a lot more fun for me. Don’t get me wrong, I like to style and design things regardless of whether there is a challenge involved or not but add in a twist and make it a bit tricky and I’m all over it!
Recently some friends and I got together and decided we would all see if we could put together an entire Christmas tablescape using nothing but items from the Dollar Tree and the odd piece here and there that we already owned. I will share their links at the end of this post so you can check out what they did as well!
Here we go!
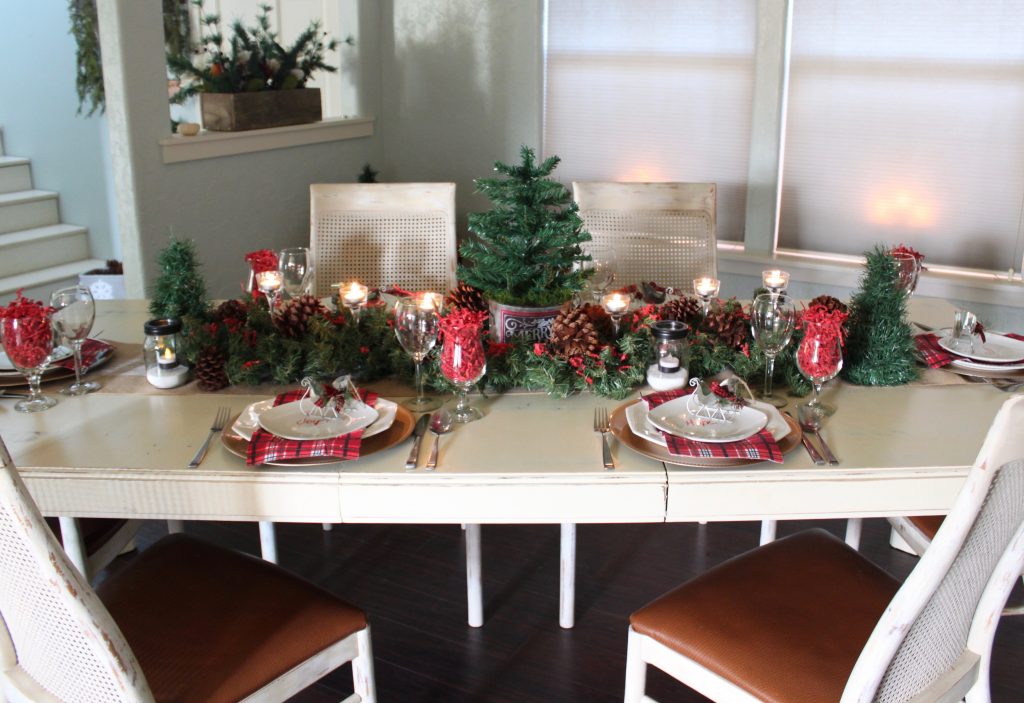
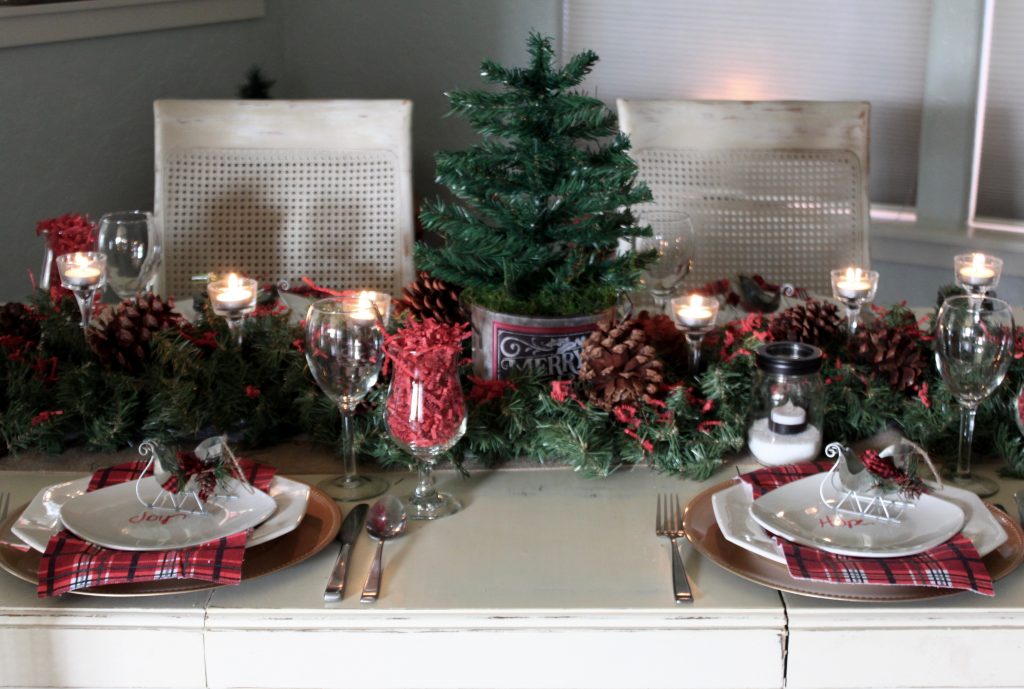
I started with my burlap and lace table runner which I already had and was purchased from Walmart for less than $5. Then I added an evergreen garland which I folded into quarters to make nice and wide and I placed this down the center of the table. Then I fluffed it up.
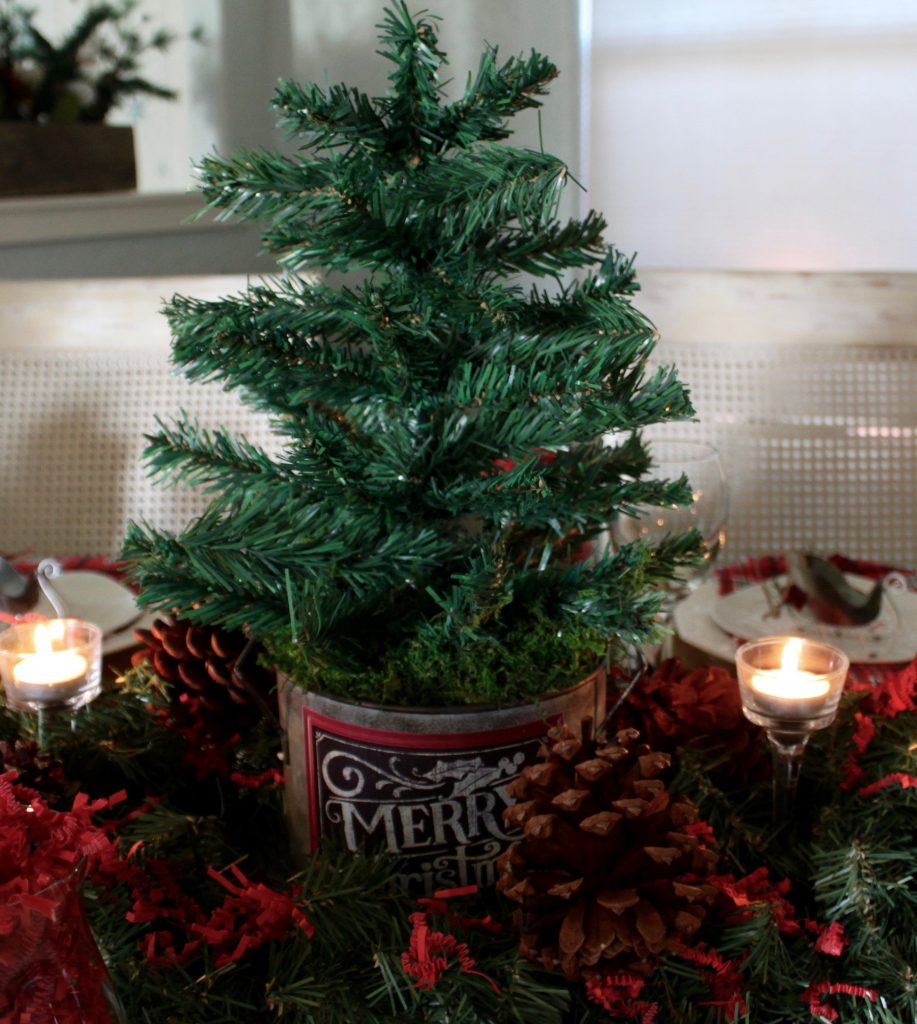
For the center of the tablescape I made a potted tree. The metal bucket was a thrift store find that I already had but the tree and the moss was all from Dollar Tree.
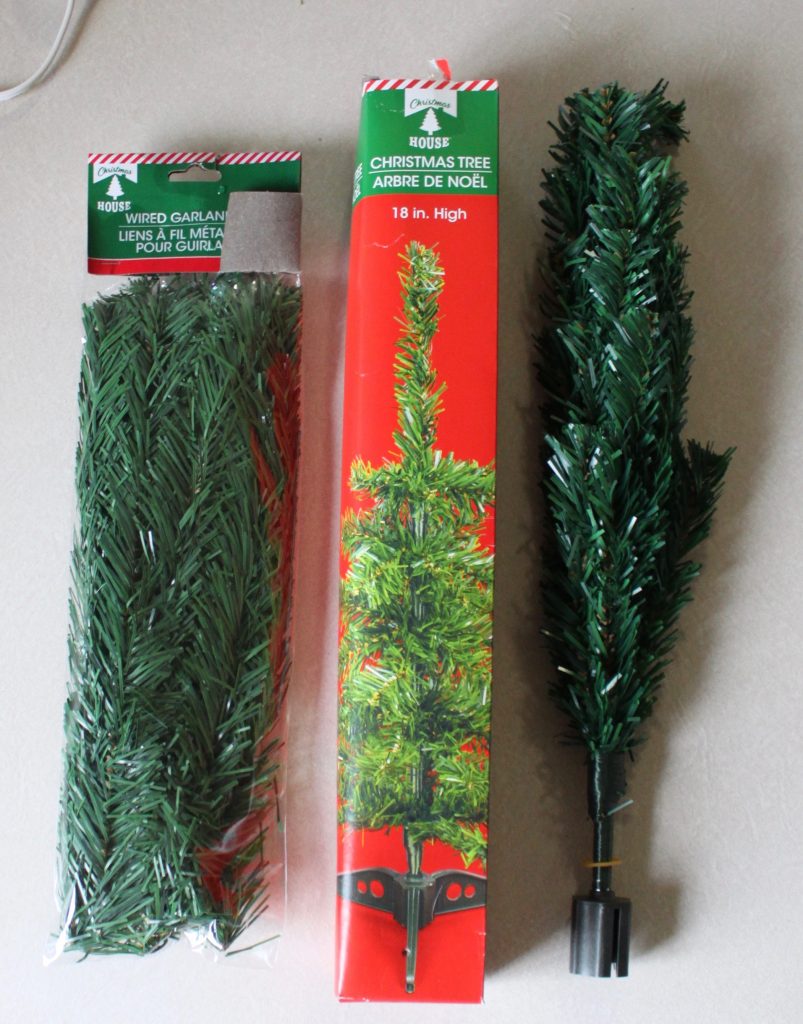
Here is the tree I purchased, along with some wired evergreen garland ties. I threw away the plastic tree stand leaving the tree as shown above. I cut some styrofoam packaging that I had laying around from a recent purchase and placed it in the bottom of the metal bucket. Then I placed the tree into the bucket and cute cubes of styrofoam and wedged them in all around it to hold it securely. I finished by hiding the styrofoam with floral moss. Then I shaped the tree. I took the evergreen ties and placed the middle of one on the “trunk” of the tree in a bare spot and crossed each end around to the opposite side. I didn’t twist them around each other but just around the “trunk” once to secure them and kept adding them in this manner all the way up the tree until it was as full as I liked it. For shorter branches closer to the top simply wrap the ends around an additional time or two.
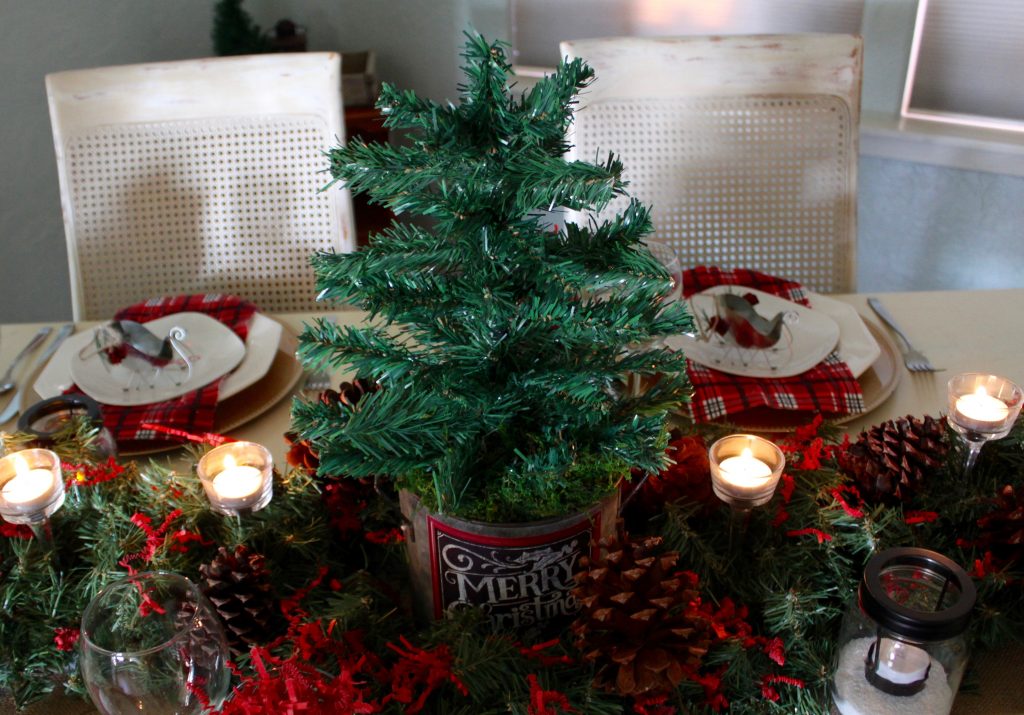
I parted the evergreen garland in the middle of the table and placed the tree so that the evergreen garland goes around each side of it.
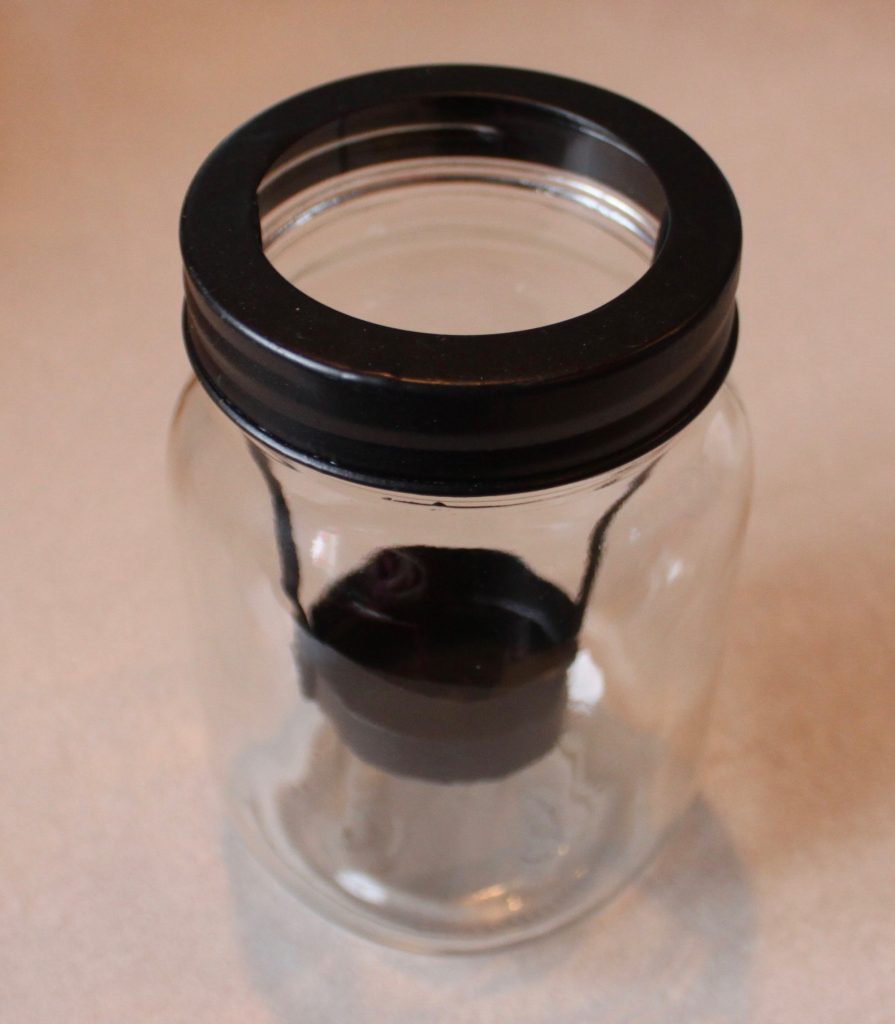
I had noticed these mason jar tealite holders while at Dollar Tree the other day. I thought they were pretty cute and neutral so I bought several of them.
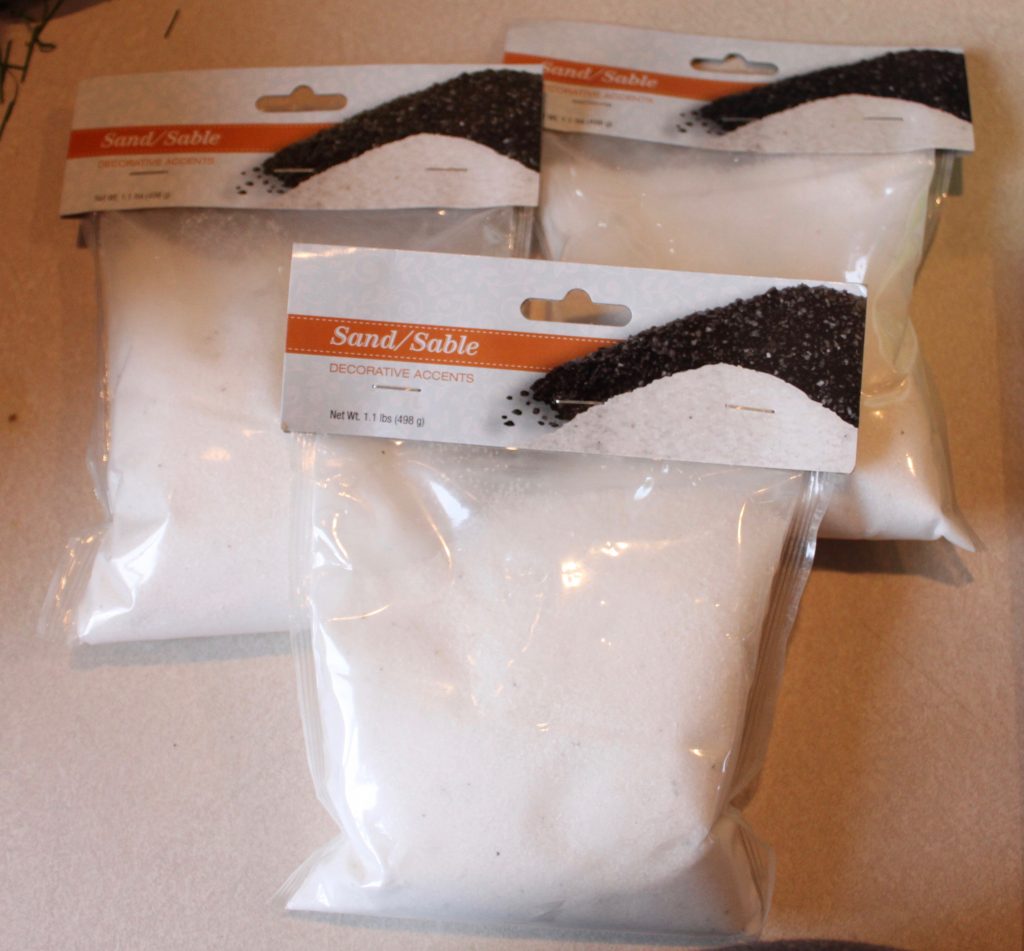
I also purchased this white sand and poured some in the bottom of each jar, up to the level of the bottom of the tealite holder to look like snow. This would also work well for those little winter scenes you can make in salt shakers or glass jars.
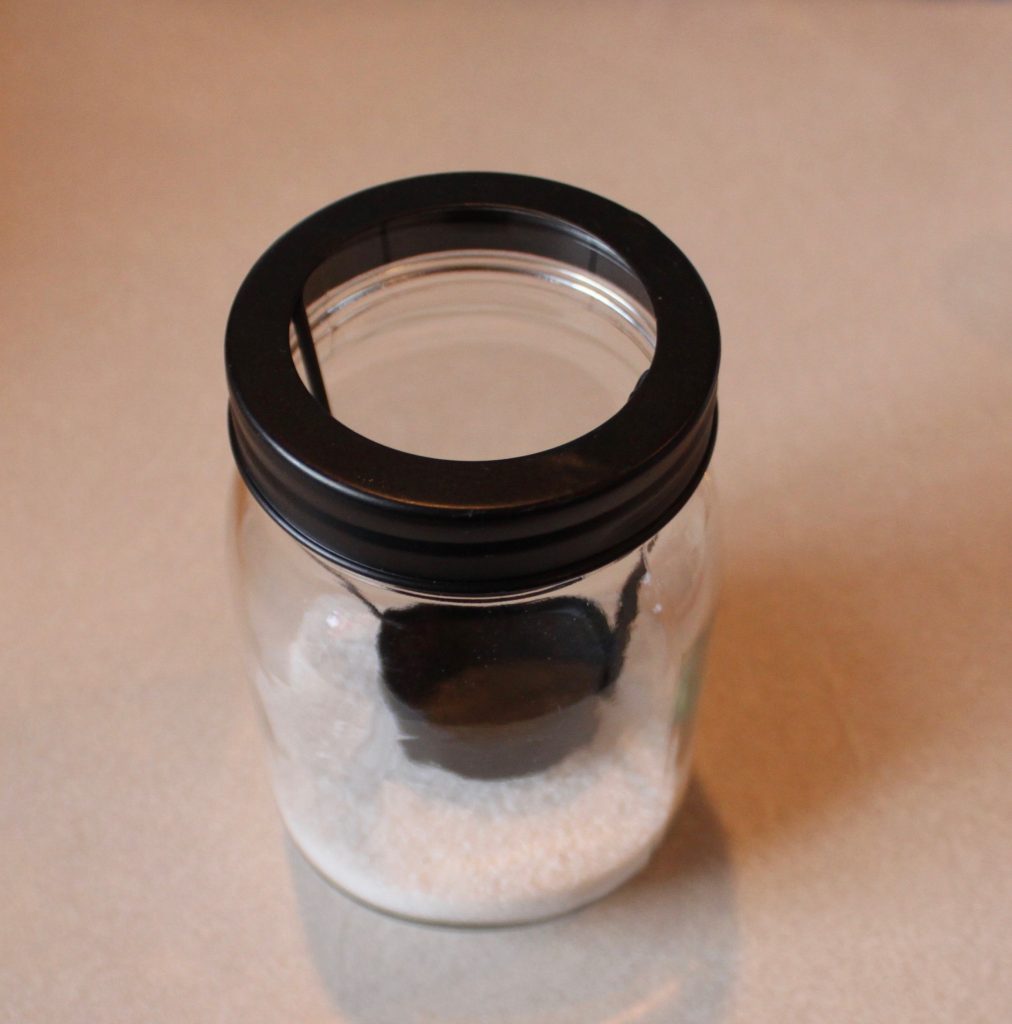
You could use real tealite candles in these are there is no fire hazard with the sand in the bottoms, or you can get the battery operated tealites from Dollar Tree as I did. You could also use colored tealites if you wanted.
![]()
This is how they look when you turn on the battery operated tealites.
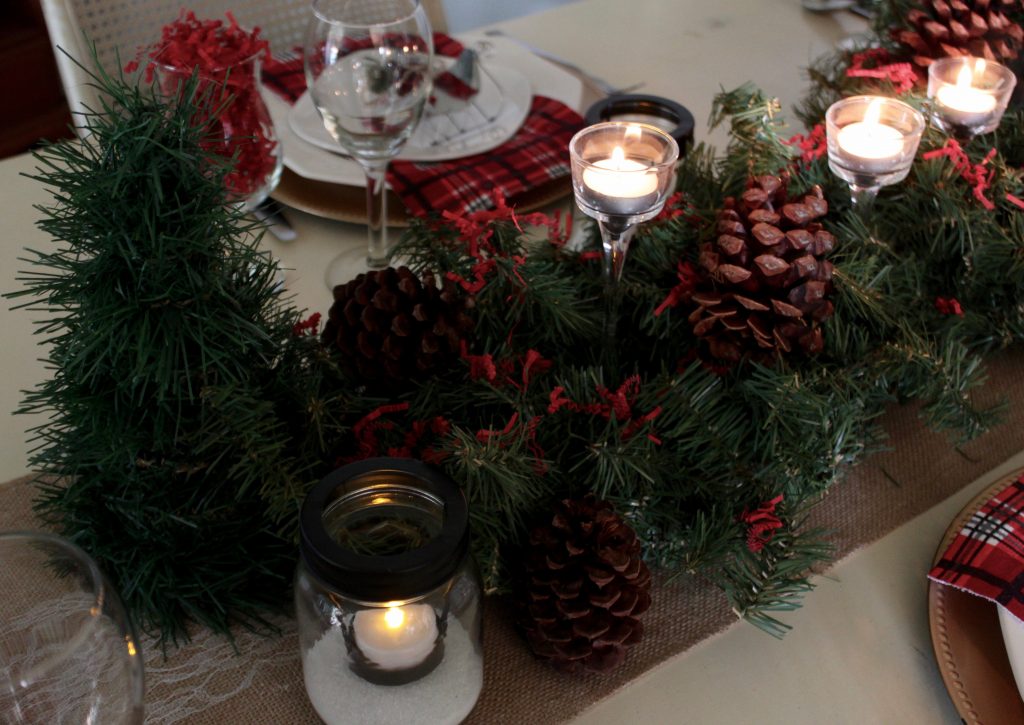
I placed these randomly on either side of the evergreen garland.
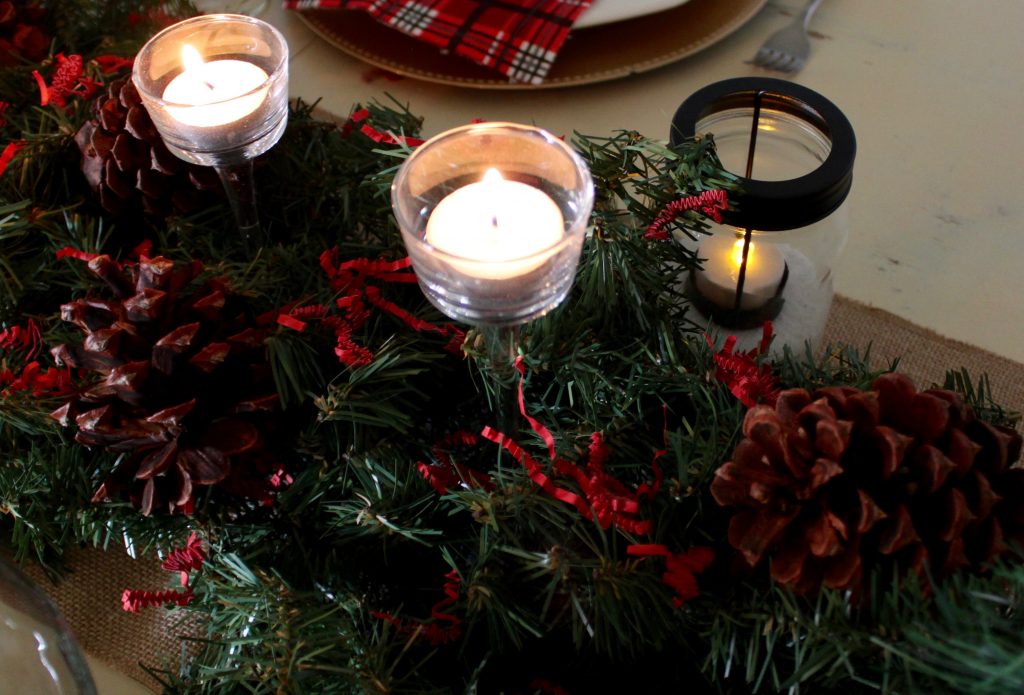
Next I placed 3 of these long stemmed, glass tealite holders on either side of the middle tree. They come in 3 different heights and I purchased 2 of each height. I used real tealites in these but again you could use the battery operated ones, scented ones or colored ones.
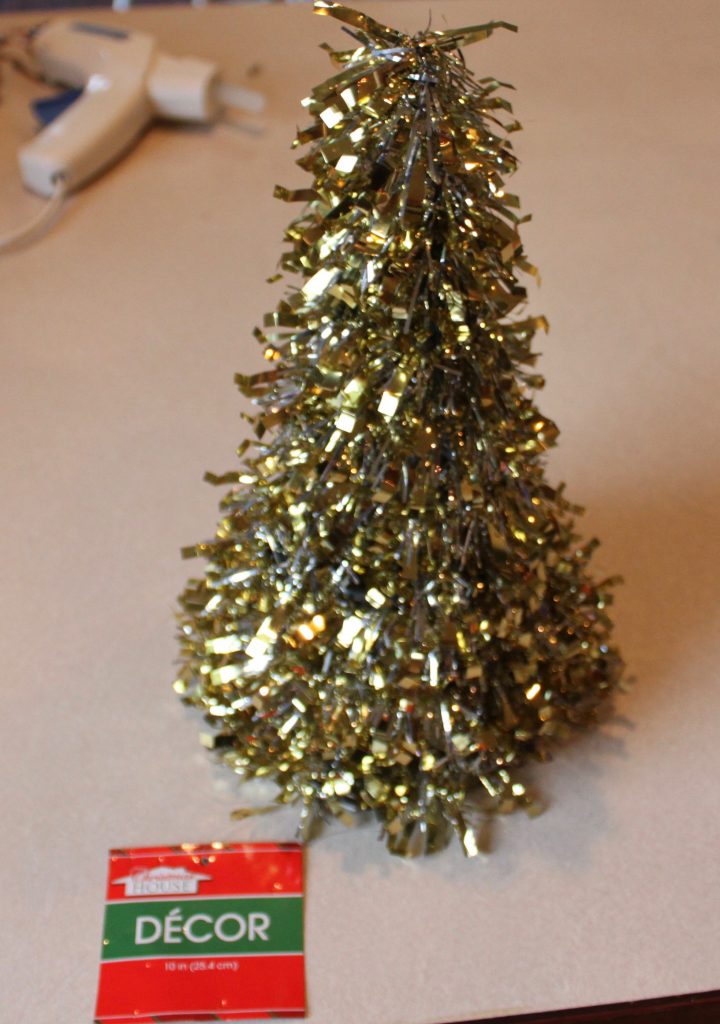
Next I took 2 of these gold tinsel trees (they come in many different colors if you are looking for them in the store) and removed the tinsel garland covering them, leaving only the plastic cone shaped frame.
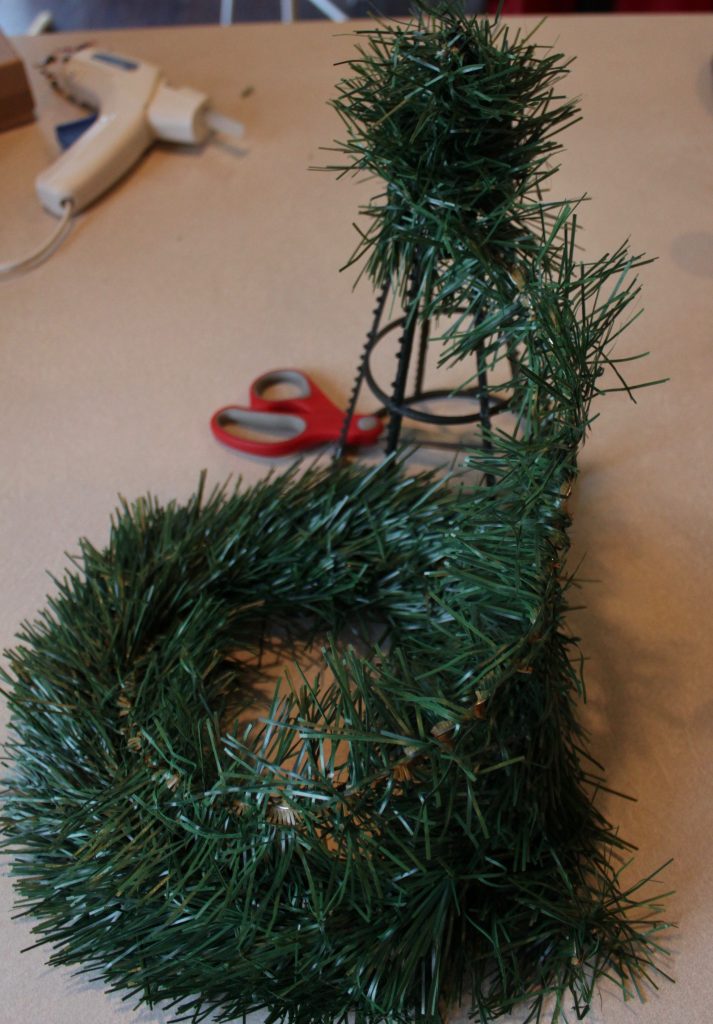
I took a wired evergreen garland and put one end into the notch at the top of the tree frame and then began wrapping it around the frame. When I covered the entire frame I cut the garland a few inches longer than I needed, tucked it between strands and wrapped it around a couple times to hold it secure.
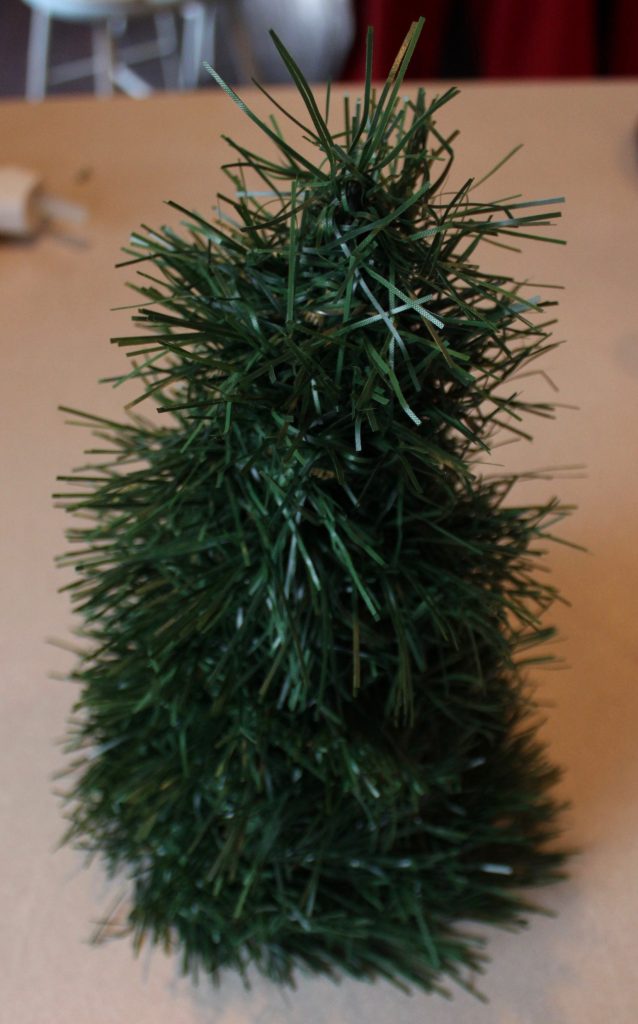
Then I fluffed up the tree and placed one at either end of my evergreen garland running down the middle of my table. You could easily add some tiny ornaments or bells to these with floral wire and even something to the top of them. You could also wrap them with some battery operated twinkle lights. I chose to leave mine plain.
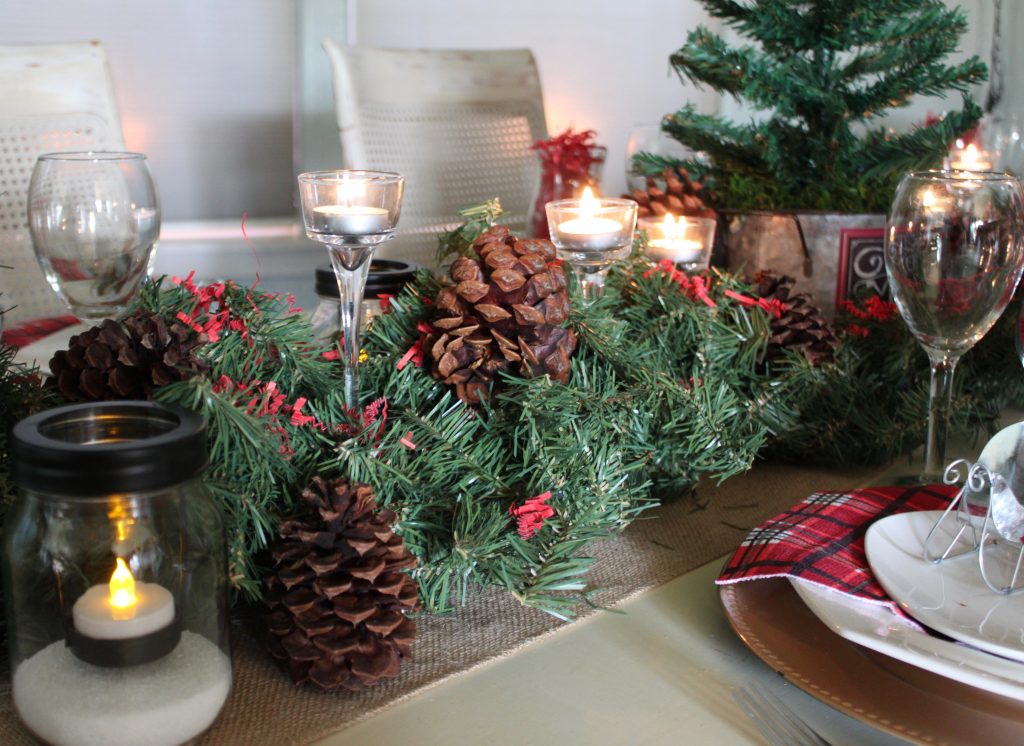
In case you haven’t heard, I sorta have an obsession with cinnamon scented pinecones! These particular ones I already had on hand but you CAN purchase cinnamon pinecones at Dollar Tree. I believe the mesh bags have 3 pinecones in each for $1. I placed the pinecones randomly throughout the centerpiece. They add the perfect finishing touch and make the dining room smell amazing!
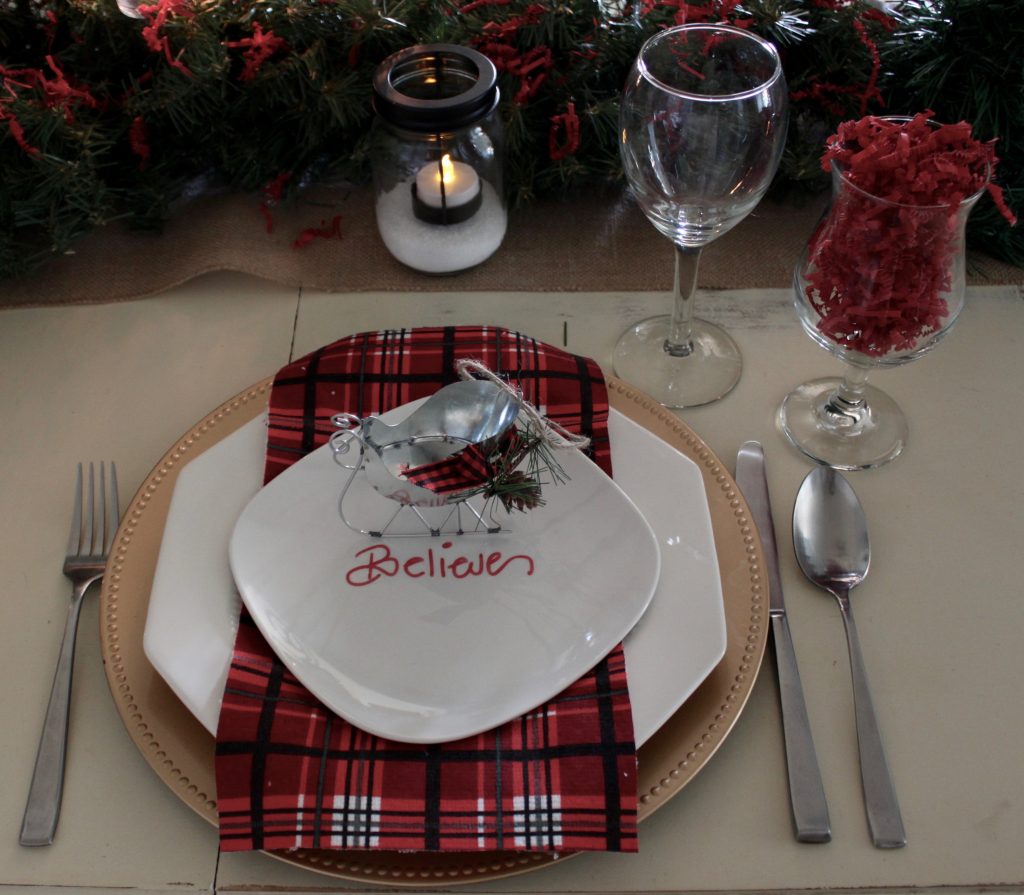
For each place setting I started with a gold charger plate. I’ve only ever seen one style of these in the stores but online Dollar Tree has a number of other styles and colors available.
I layered in my own Ironstone dinner plates and used my own flatware as well.
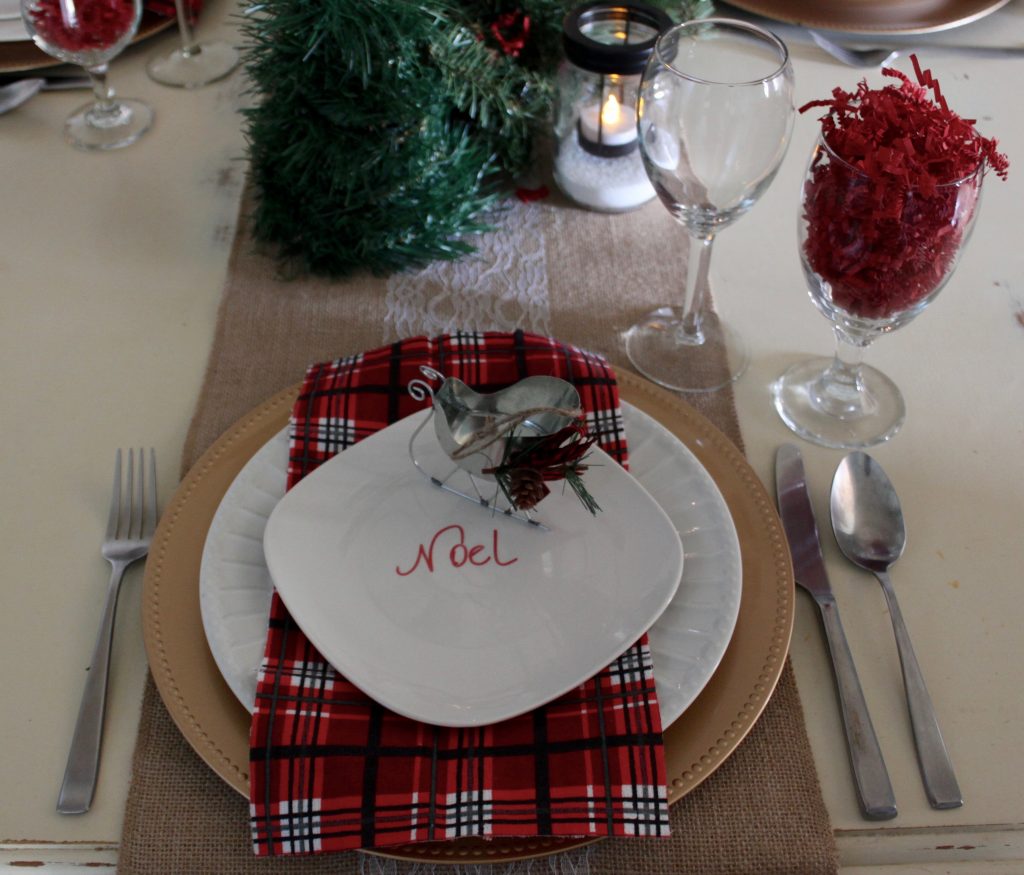
Next I took a red plaid tea towel (here are some similar ones) which I purchased from Dollar Tree last week, cut the white border off the towel all the way around and then cut it into 3 equal sized strips. In these photos I have not done anything to the edges but at some point I would want to either use some sort of fabric adhesive (glue or iron-on) to hem them all around or sew/serge a hem around them to keep them from fraying.
I topped these with square bread and butter plates (collection shown but can be purchased individually in the store) which I had written on with a red permanent marker. I did not bake these in the oven to set the marker because I want to be able to wash it off when I’m done with this tablescape. I will not be serving food off these plates as a result.

On each plate I placed a tiny Christmas tree ornament sleigh which I purchased last week from Dollar Tree. I cannot find these same ones online but they have a lot of really cute tree ornaments that would work just as well.
I placed a wine glass at each setting as well as a Daiquiri glass. In each Daiquiri glass I put some red decorative shredded paper. You could also use the foil shreds and they would look great in champagne flutes but I wanted the more natural look of the paper.
I also lightly sprinkled the evergreen garland in the center of the table with the shredded paper to add some color.
And there you have my Dollar Tree Christmas Tablescape! Everything shown was purchased from Dollar Tree with the exception of the few items which I indicated. I hope you’ve enjoyed this challenge and that this has given you some very budget friendly ideas for a festive tablescape!
Looking for more ideas? Head on over to my friend’s blogs and check out what they did for their tablescapes!

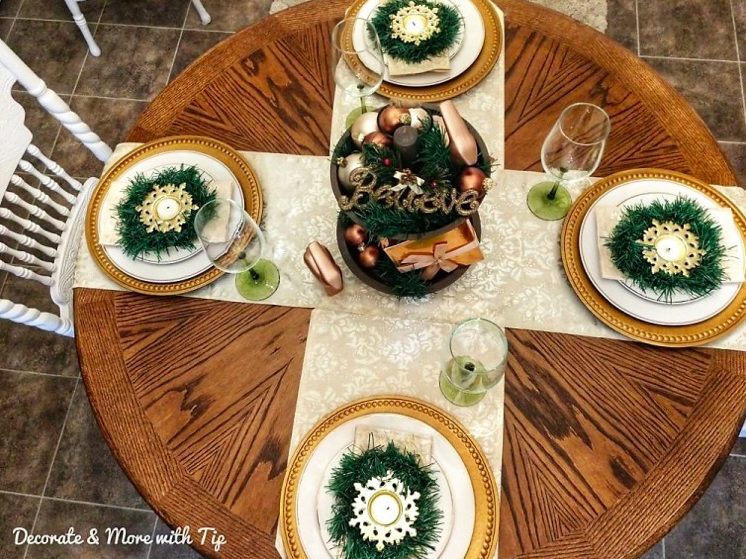
Terrie from Decorate And More With Tip
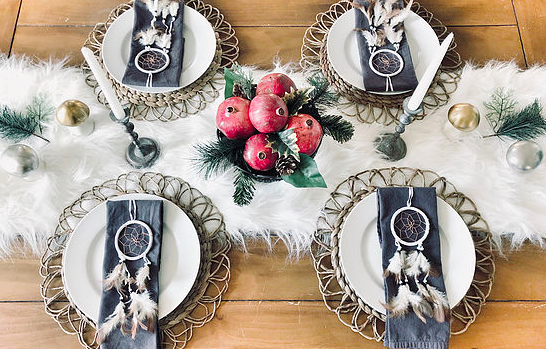
NJ from The Colorful Wings Journal
See you soon!
You can follow me on Pinterest and Instagram for even more ideas and great product deals.

Super cute Tara! I loved those little mason jar tea lights!
Aren’t they cute? A person could so easily paint them a different color as well if you didn’t want black.
Tara, you’ve knocked this out of the park! I love it all! Great minds think a like…greenery, little Christmas trees, pine cones, and candles, makes such a lovely tablescape! Loving it all!!
~Emily
I know! We totally did go a similar direction and as I said on your post, so glad I didn’t end up doing the little christmas houses like I originally thought of doing! Haha how funny would that have been?
Oh Tara! This is so beautiful!!! I love the diy trees made with those cones and I love those tea light mason jars!!! Great job!!! ❤️
Thanks so much, NJ! I am so glad you like it. I was thinking those mason jars would look good in various other colors too! You know I can’t resist painting most things 🙂
What a great way to dress the table. I am so happy that we worked on a Dollar Tree tablescape together. A lot of us has a budget to live by and around Christmas it is ever so needed. Now with your inspiration they can have a beautiful table for their guest and not go over the budget. Thanks for sharing!
My pleasure! It was a lot of fun. Thanks for the idea in the first place.
Of gosh Tara this is just so cute! How creative you are my dear. You always amaze me!
You are the sweetest, Jerri! I have wonderful bloggers such as yourself to help inspire me!