
For the 5th and final blog post in this week long series showcasing furniture makeovers I’ve done, I’m going to show you the little nightstand I did for my oldest daughter. I was looking for a small one for her room because she doesn’t have a lot of space and needed several other pieces of furniture including a large bed since this is the room we have to use for guests when they come. I found just what I was looking for at a little thrift shop but when I got it home I realized it smelled terribly of cigarette smoke. I hoped I could get rid of that smell or I knew I’d be getting rid of this piece pretty quickly and would have just wasted my money! Not something I take too kindly to!
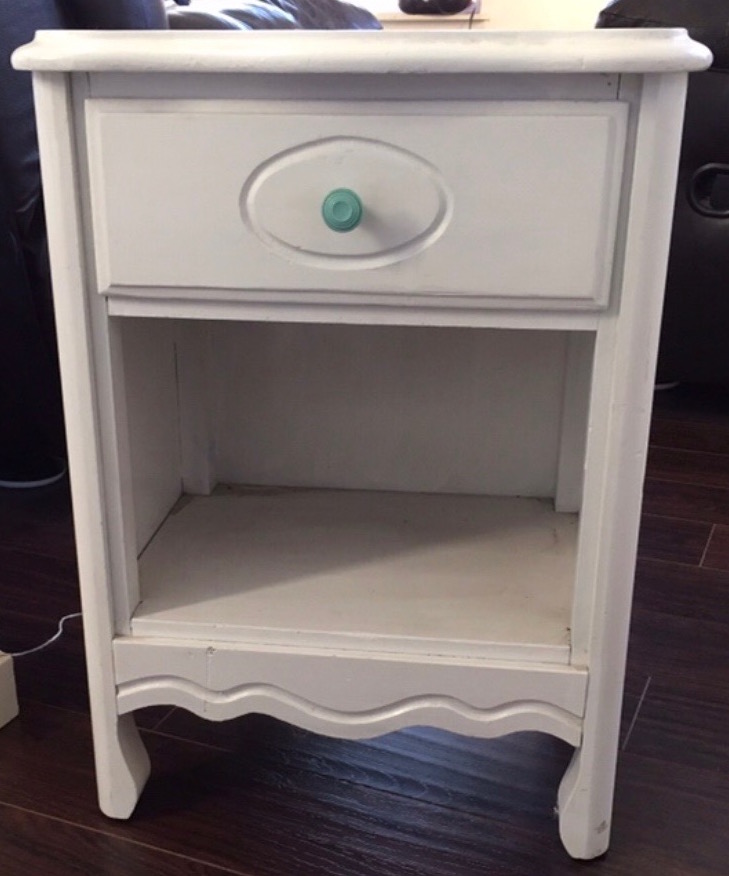
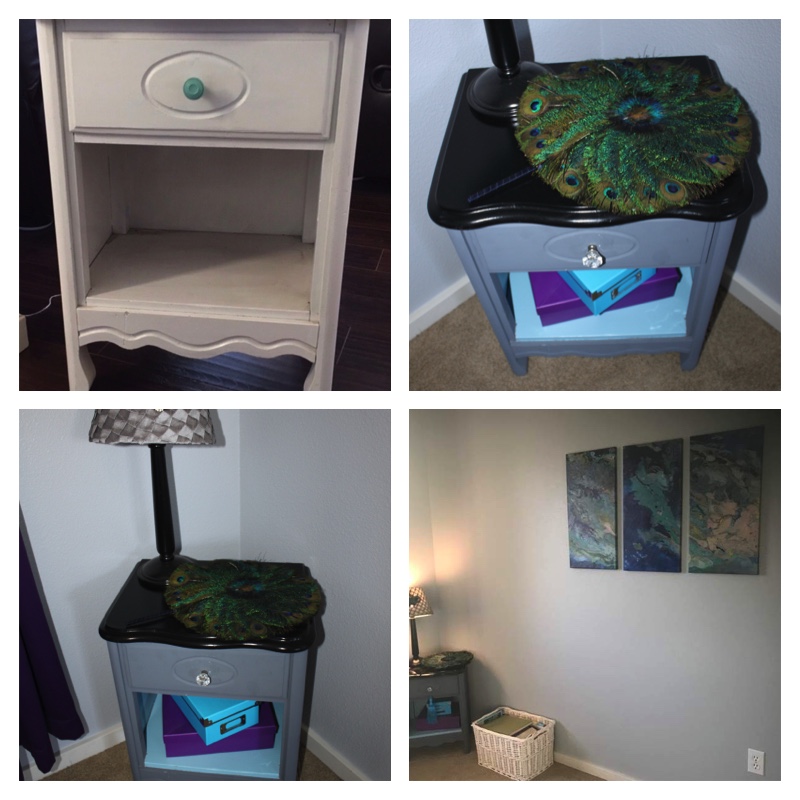
So this is what it looked like before. Plain, dainty, cute lines but a bit worse for wear. And did I mention smelly??? I gave it a really good couple of washes to make sure all the dirt and cigarette smoke was off it at least, inside and out. Then I coated the entire thing, inside and out, with 2 coats of Kilz Max Stain and Odor Blocking Primer/Sealer. I let it air out really well and dry in the sun too.
Next I taped off the body of the nightstand covering it with newspaper and just leaving the entire top exposed.
![]()
I spray painted the top with Rustoleum semi-gloss black. I did several light coats and let it dry really well before I took off all the newspaper covering the rest of the nightstand. For the rest of the outside of the nightstand I painted it with 2 coats of a medium to dark gray chalk paint. The inside of the drawer I painted in a cream semi-gloss I had left over from painting some trim in my home. The inside of the open bottom of the nightstand I painted with Waverly chalk paint in “Pool”.
My favorite wax to finish off pieces like this is Varathane Paste Finishing Wax. It goes on beautifully with a soft cloth and provides a wonderful finish. As always I used my favorite Zibra paintbrushes!
I finished this piece with a clear glass knob. 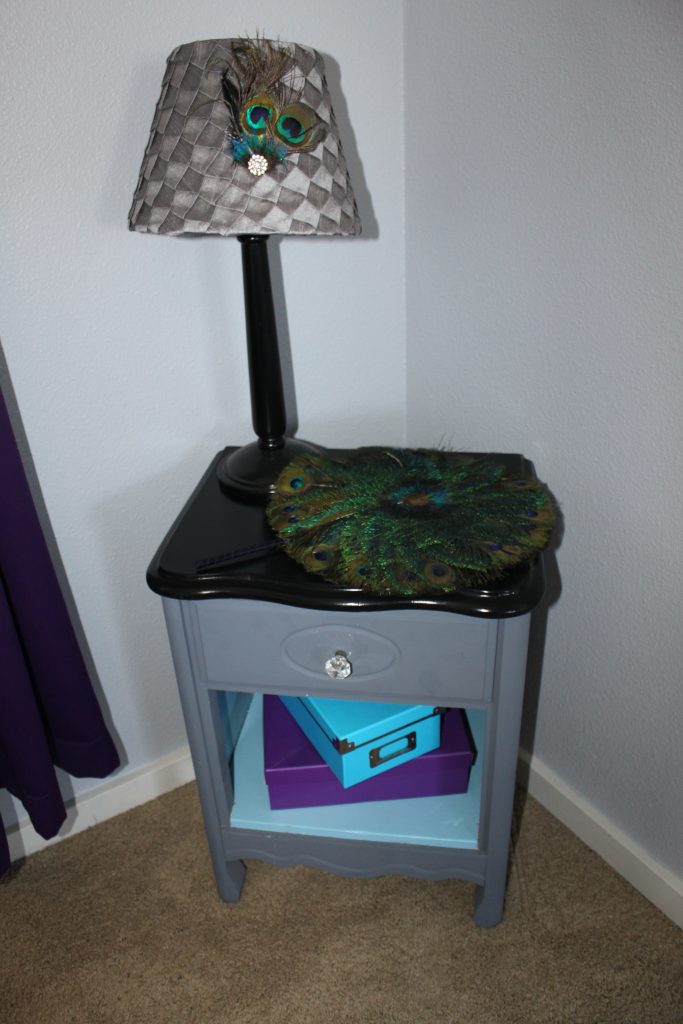
You may have guessed by now the overall theme of this room! I will show you the entire room one day soon when I finish it. I’m still working on a couple pieces of furniture for in here. This was a very simple little project that took very little time to complete and if you know how to use a paintbrush, you can do something like this. No fancy finishes or techniques on this one. I resisted the urge! 🙂
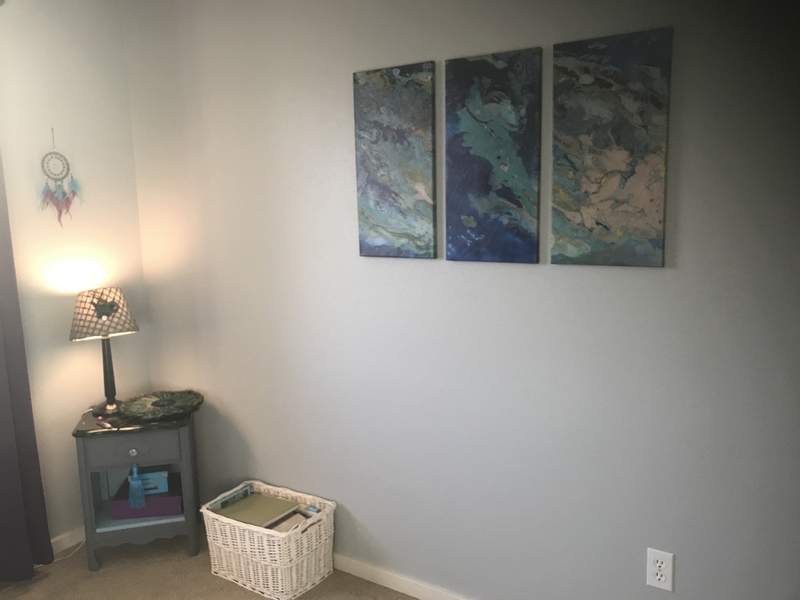
Here is a peek at part of the room. There is a desk currently being worked on for under those canvases.
Enjoy!
I’d love to have you follow me on Pinterest and Instagram!
This site contains affiliate links to products. I may receive compensation for purchases made through these links.


I Love the way you’re always re-purposing some piece of furniture to make a lovely accent in a room for your lovely home. You have such a talent for it because they always turn out so beautiful!
Jerri that’s one of the sweetest things anyone has ever said to me! I really appreciate that!
Peacocks! They have the most glorious colors! Love what you did Tara! You have a great eye to see things as they CAN be!
Yes, I’ve always been able to do that and this sort of thing is like play to me. It brings me to life!
You’re so ambitious with the transformations! Nicely done and I like how the room is shaping up!
Thanks! It’s pretty much done but for the bed needing to be replaced with a full sized bed and a desk that I’m refinishing for in there. Then I’ll show it all