

This site contains affiliate links to products. I may receive compensation for purchases made through these links.
So I had a thought this morning. Actually it could have been last night while I was going back and forth between my kids bedrooms listening to them cough and NOT sleep! It’s all starting to run together this morning. Maybe I should grab another coffee before I continue writing this?
Okay here was my thought….everyone likes a good before and after, right? Well I sure do and I know they always seem popular so here is my plan! Every day this week I am going to blog a before and after in my home. They will be a bit different than your normal before and after though because they won’t be fully after. They will before and now, with me telling you what I’m planning for eventually so that I will someday have an after. Haha got that? We’re both confused now. Lets just jump in!
Monday. Show of hands who loves a good Monday? Nobody? Well maybe this will help. Wanna start with my dining room?
So this was my dining room when I moved in. I know you’re thinking – didn’t she say dining room? This is a family room, lady! You would be right. That’s what it was used for by the former owners. There was no dining room in this house. While that clearly worked for the former owners, that does NOT work for a family of 7 with a massive dining room table! Because it was a family room, there was no ceiling light and no lights at all. Just a few wall outlets that were operated by a switch on the wall behind that piano so you could turn on lamps by the switch.
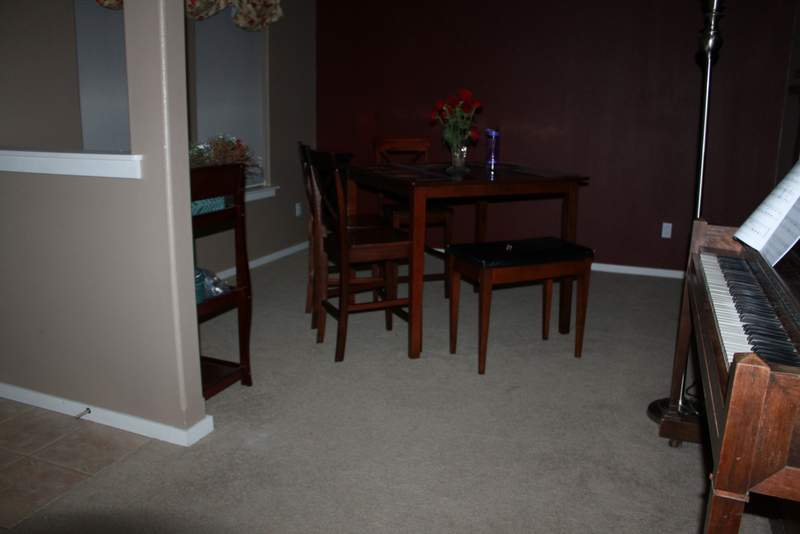
So this immediately became step number 1! Yes, the piano was left with the house. This is what this cave….I mean room….was like with no lamps on and just the nearby ceiling lights. The up side is that we got to have candlelight dinners EVERY NIGHT! Clearly this table is not ideal for a family of 7 but believe it or not we did all sit around it for meals. For a while. Until we got our huge dining room set from my in-laws. The carpet actually looks decent here but trust me when I tell you that it was NOT. It was wretched!
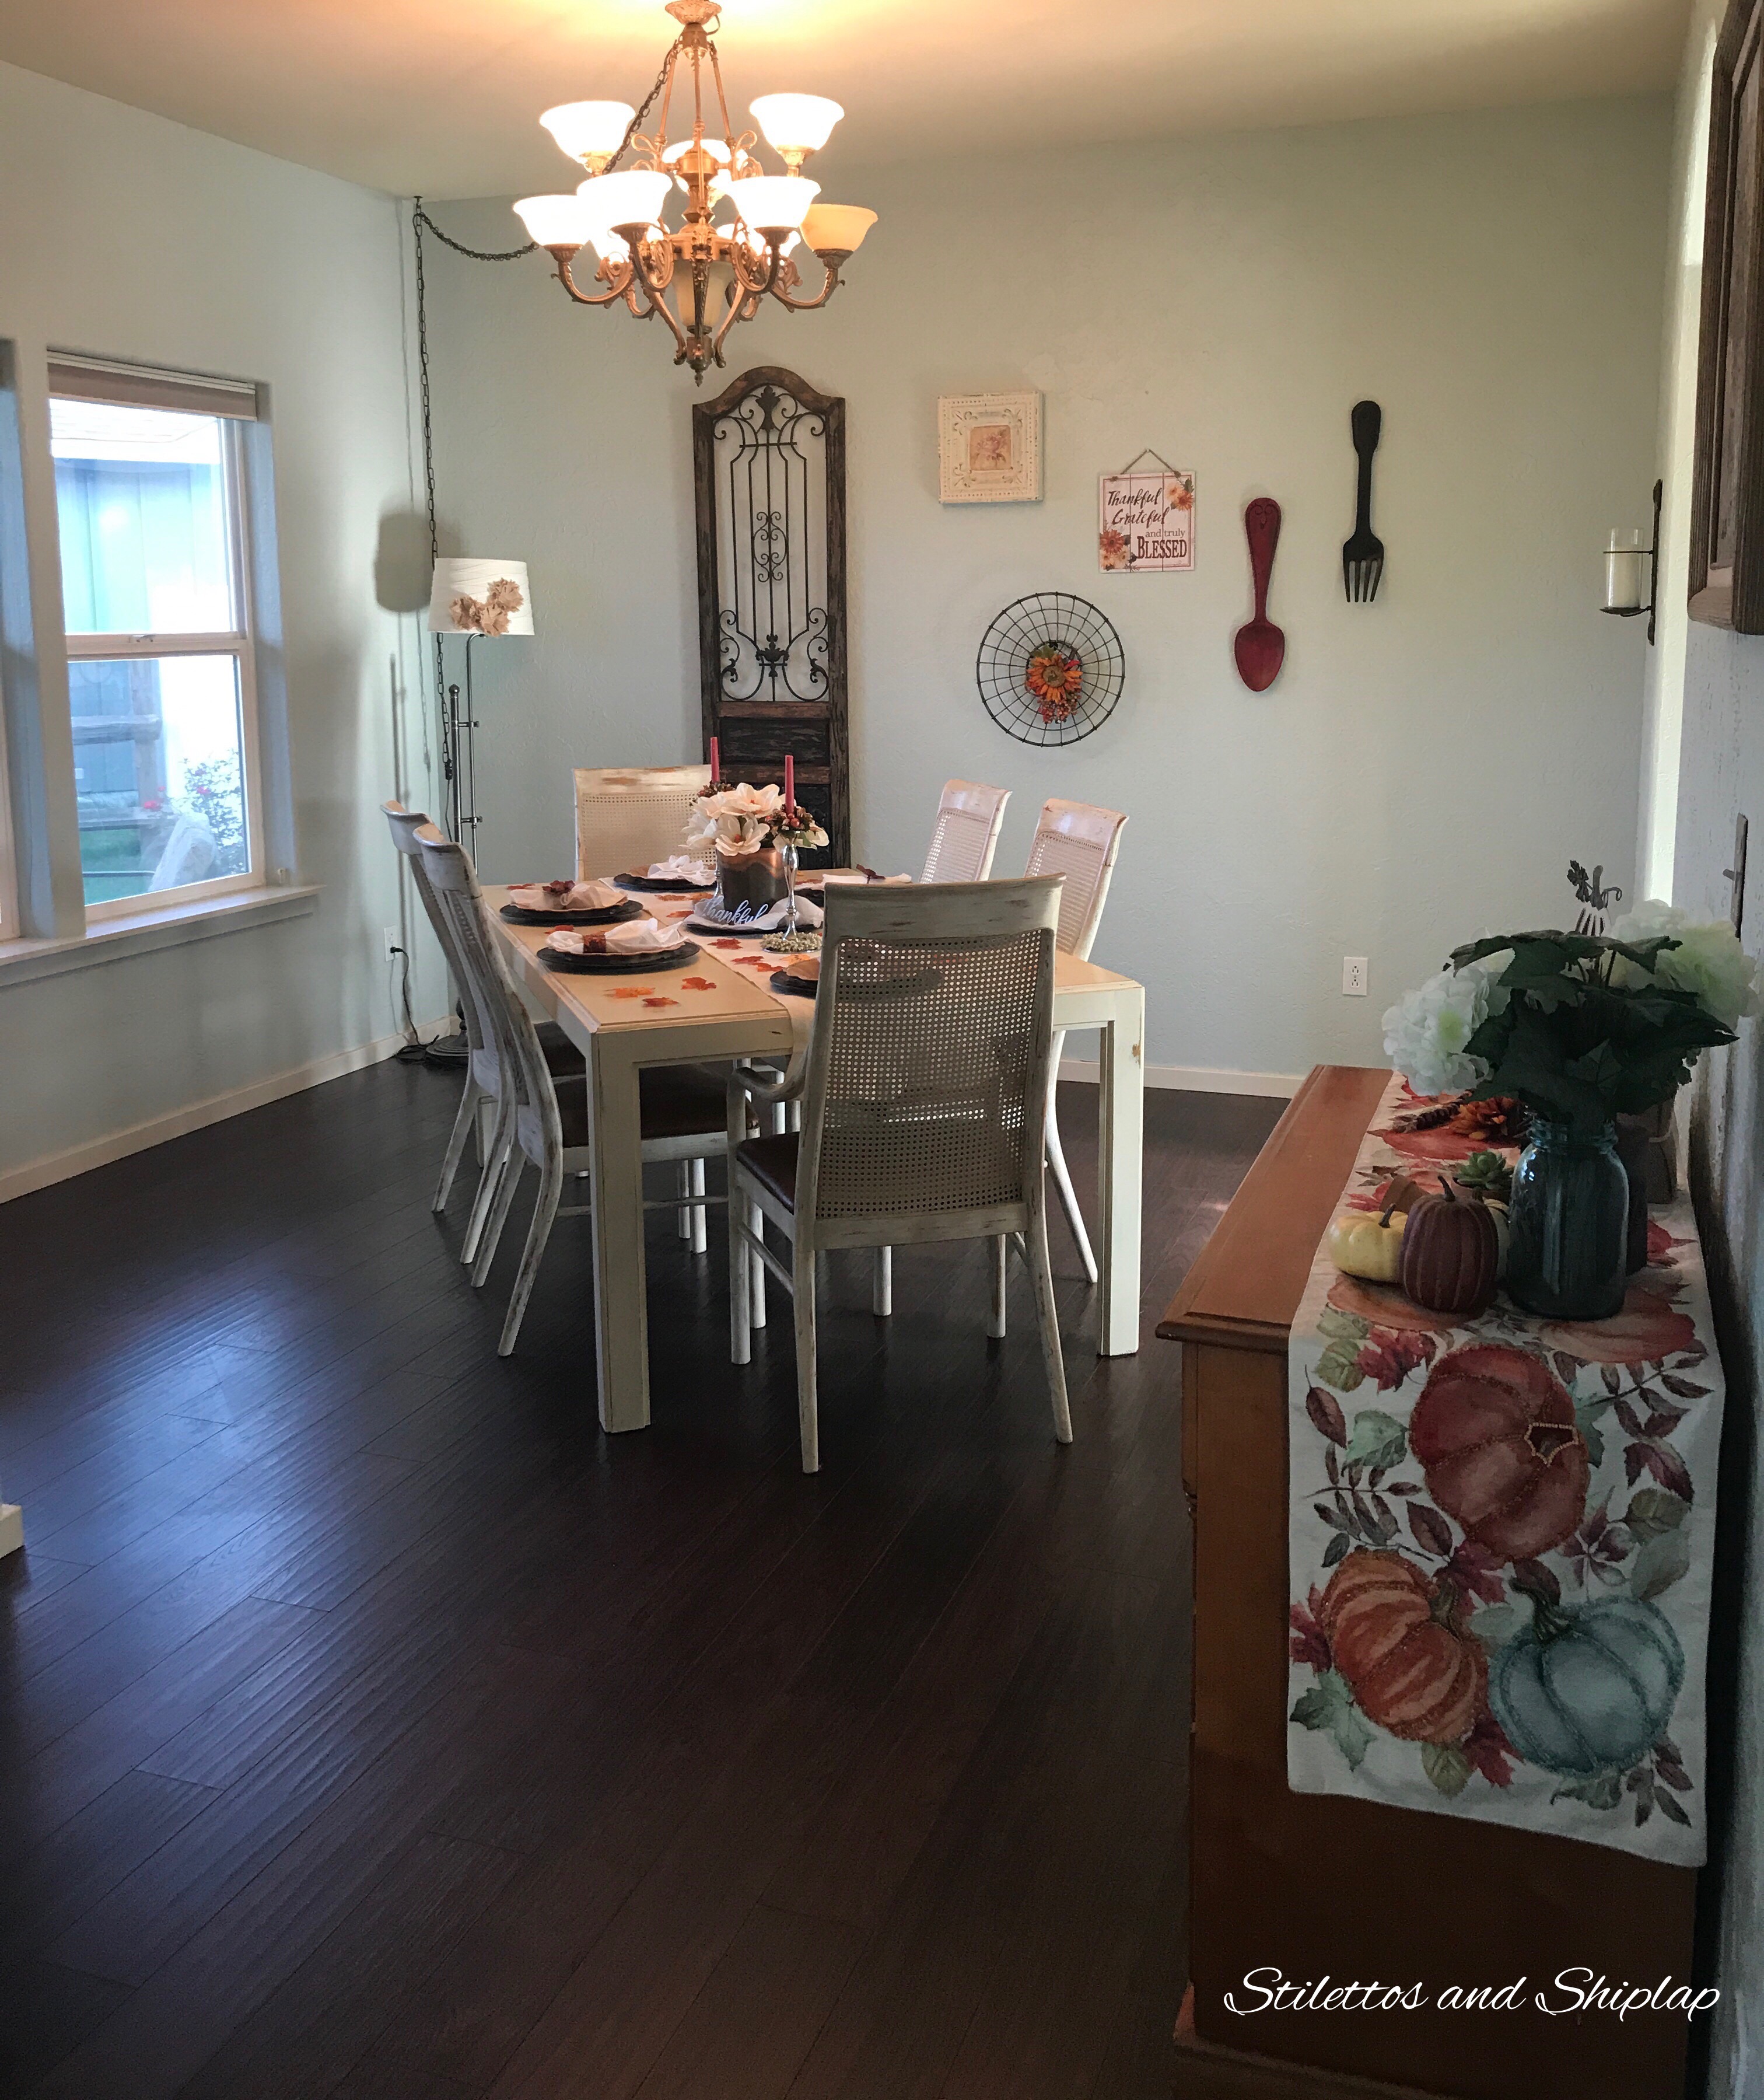
And welcome to now.
- So far I have plastered over the orange peel texture on the walls throughout the entire main floor. I did a rough plaster finish so that it’s easy to patch when – not if – the kids damage something! The walls, ceiling and trim have all been newly painted and majorly lightened up the room!
- We ripped out all the carpet in the entire main level and stairs and we put in this wood floor ourselves. It is a hand scraped flooring and so far it has held up so well that I couldn’t be happier. My only complaint is that since we got the dogs it never looks as clean as I would like because the dust from their feet when they come inside and their hair shows up very clearly! I vacuum every day and steam mop every other day AT LEAST!
- I looked into having an electrician come in and wire a ceiling light for this room since it was now a dining room. Since there was already a light switch wired to a very nearby outlet I felt it should be pretty simple and inexpensive yet they wanted a minimum of $1,000 and said it could be more just depending. They would also be ripping out half my ceiling and part of a wall. I wasn’t worried about the wall but the ceiling is still the orange peel texture which is nearly impossible to blend repairs into. Since this is an open concept home, that would necessitate the entire main floor potentially having to have its ceilings done if we couldn’t get a good blending job. I wasn’t up for that nor did I have the $1,000+ to spend on this. My solution? I bought a used chandelier for $40 and re-wired it to a lamp cord so that it is actually plugged into the wall outlet near the corner. Since that outlet was operated by the light switch across the room, I can turn on and off the ceiling fixture by the light switch. Yes, I have a chain across my ceiling and down the corner but it cost me about $60 as opposed to $1,000 and for me that’s well worth it!
- Clearly we now have a large dining table in this room, which is passed down from my in-laws and has 2 additional leaves (not shown in this picture, this is the smallest it goes which still fits our family of 7 just fine!). I refinished it and will show that whole makeover in an upcoming blog post. I’ve added in a few pieces of furniture, some of which will be also getting a makeover in the near future.
My someday for this room still includes:
- An area rug for underneath the dining table.
- Draperies at the windows.
- A few more small pieces of furniture or decor items for corners.
- Some more and some different items for walls.
- A ceiling medallion for the chandelier.
Thanks for coming along! I hope you enjoyed seeing this “Before and….maybe someday” installment. Check back each day this week for a new one!


Hi Tara! I love the idea that you made your living room, a well needed dining space for your family. I have actually seen this done as a makeover on HGTV. I love the transformation! It’s so bright and cheery, and I love those dining chairs! I can’t wait to see more of your accomplishments in this room! 🙂
Well what I found odd was, there is a living room (still used as my living room) and a family room (now my dining room) within a stone’s throw of each other, yet no dining room in a 4 bedroom house! Huh? The only spot for a table was in front of the patio doors which is a pass thru between the living room and kitchen so you can’t put a very large table or many chairs in there! Yes, the entire main floor is very bright now, grounded with the dark wood floors. Lots more to do but it’s come a long way!
Tara, I really like your dining room makeover. I especially like how you show what you still have planned. Great job!
Awwww that’s so sweet of you to say! Y’all can come along with me while I do those things too!
Amazing transformation!!! Love the wall color! And that chandelier is perfect!! Such a beautiful space!!
~Emily
Thanks! The wall color is Sherwin Williams Seasalt. Love how it looks a little different depending on lighting and whats next to it. Makes it so that it goes with basically everything and looks different all the time depending on time of day etc so I don’t get bored of it. I needed that since one color throughout an entire floor (open concept) normally would bore me silly!